
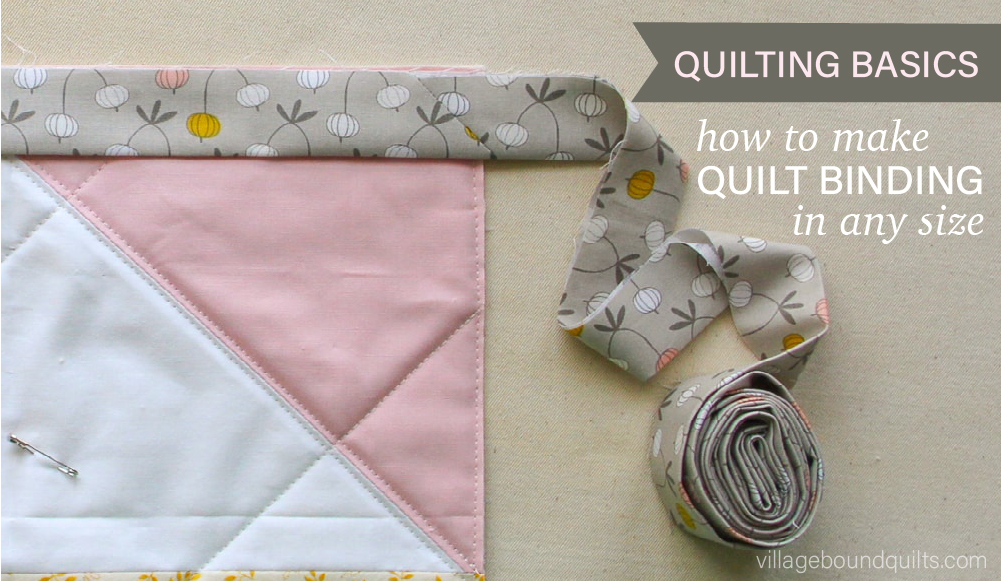
Quilt Binding: Making the Binding
You've pieced your quilt top, carefully basted and quilted it, trimmed the excess edges and now you need to finish those edges so you can start snuggling your work of art! Whether it's your favorite part or least, quilt binding is an important final step in your quilt making process. But what exactly is it and how do you make it?
As a self-taught quilter, I found it frustrating to view a tutorial on one site, only to have it missing information I wanted to know, or to have it use 'quilt language' that I didn't (at the time) understand, and then have to fill in the missing pieces by jumping around. I'm hoping that you won't have to do that here! I start with a few key terms and a short math instruction, but if you want to skip those parts and get straight to detailed instructions on how to sew your binding strips together, feel free. Brevity is not my strong suit, but lucky you, I've done my best to include everything I can possibly think of. Okay - here's the low down:
What is quilt binding?
Quilt binding has two recognizable definitions: it is both an object and a process. As a process, quilt binding is the act of sewing the binding tape to the quilt (which will be covered in a future post). As an object, quilt binding is the fabric that wraps around the outer edges of your quilt sandwich - the top, batting & backing together - and is attached after quilting to finish your quilt. And this, my friends, is what we are talking about today!You may also see it called binding tape, bias tape, bias binding (though not to be confused with twill tape or seam tape, which are ribbon-like and mainly used when sewing garments or buttonholes and not for quilts).
First, and not to further confuse you right away, BUT... there's more than one way to make quilt binding. WHAT?!! I know, you're totally freaking out right now, but don't. If we have a short vocab lesson first, I just know you're going to be a confident binding maker! There are two ways to cut your fabric when you make you binding - straight grain or on the bias - and each have their pros and cons.
Lengthwise grain runs parallel with the selvedge and will stretch the least, due to the warp threads being pulled tighter than the weft during weaving. Binding can be cut from fabric this way, but it won't have much flexibility and it's also the least efficient way to cut from a length of fabric. Ask me how I know. hashtag, beginner mistakes.
Cross grain, aka crosswise grain, is perpendicular to the selvage but still along the grain of the fabric. It has less stretch than bias cut, but when you're binding straight edges - as most quilts have - you don't need the fabric to stretch much. Most often when quilting patterns call for a number of strips to be cut to make the binding, they are cutting in this manner because of it's ease of use and limited fabric waste.

Straight grain, or straight-of-grain is a term used for either the lengthwise grain or the crosswise grain, as it refers to the direction of the threads in the fabric (straight). Usually with binding fabric, straight grain is referring to the crosswise grain.
Bias cut is cut on the bias of the fabric (45-degree angle). Because it's not cut along the grain it has a lot more stretch, making it ideal for binding projects that have curved edges (like rounded quilt corners). It can be slightly more difficult to cut and can produce more fabric waste when cutting is poorly planned, but that shouldn't deter you from using this method. Cutting this way can also produce some great results when using striped fabric as binding!
Selvage, or selvedge, is the edge of the fabric that is tightly wound to prevent the fabric weave from unraveling. In solid fabrics, this edge is often fringe-like. Most high-quality cotton prints have the manufacturer, designer & fabric line information printed in the selvage. The selvage of any fabric is usually removed from the fabric when cutting, before sewing and piecing.
Double-fold, also sometimes called French fold, is the sturdiest way to fold your binding for quilts, especially when they are anticipated to get a lot of use (aka - frequent washing). the binding strip fabric is folded in half, bringing the edges together on one side, resulting in 2 layers of fabric hugging the raw edge of your quilt sandwich.
Single-fold uses a bias tape maker to fold the edges of binding strip fabric inwards, leaving only 1 layer of fabric along the outermost fold. While the amount of fabric is the same and can be used on either straight cut or bias cut strips, it's single fold makes it more prone to wear as compared to double-fold.
Tape is just the term used for the continuous length of strips that you sew together to make binding with - basically just a really long piece of fabric.
So you can have cross-grain single-fold binding, or double-fold bias binding, or really any combination of the fabric cut and the fabric fold. Technically we are making double-fold straight-of-grain binding tape when we most commonly make binding . But that's a mouthful - so we'll just call it binding. Good? Good! Moving on!
How much binding do I need?
We can figure this out with some simple math - all you need to know is the size of your quilt and the size of binding you'd like to make. You can make quilt binding in any size you'd like, but 2 1/4 (2.25 inches) or 2 1/2" strips are most common - this will give you a binding width of about 1/4" on the front and back of your quilt. Using 2 1/2" strips might be recommended for early beginners, especially if you're going to be attaching your binding entirely by machine (so that attaching leaves room for 3/8" instead of strictly 1/4" seam allowance). But you can make binding in any width you'd like! Here's how to figure out how much fabric you'll need for the size binding you choose:
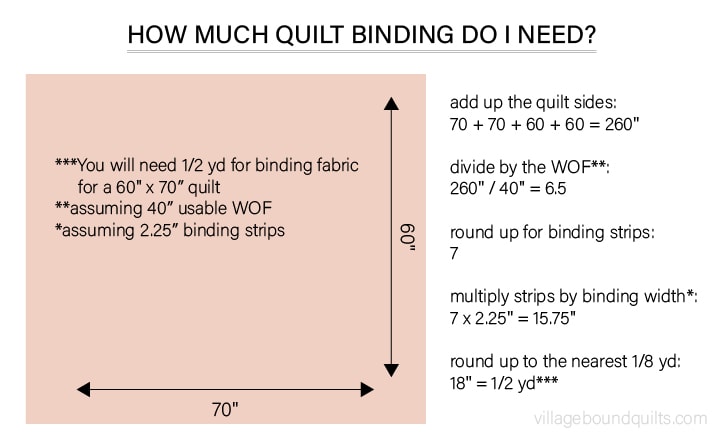
Let's assume you have a 60in x 70in quilt. First, add up the sides of your quilt then divide by the usable WOF of your yardage. Because the common WOF (width of fabric) for quilting cotton is 42in, you can safely assume that a usable WOF for most quilting cotton is 40in.
60 + 60 + 70 + 70 = 260in binding needed to fit your quilt
The perimeter divided by usable WOF is 260 / 40 = 6.5 (round up to 7) strips needed
Since you'll want to ensure enough yardage (and cutting a partial strip is impractical), round up to the nearest whole number - 7 is the total strips you'll need to cut for binding a 60 x 70in quilt. If your number of strips needed comes really close to a whole number, like 6.95, you may consider adding another strip (or at least another 10 inches of binding fabric), just to be sure you'll have enough to join the ends together.
Next, multiply the number of strips needed by the binding strip width you chose, and round that up to the nearest 1/8 yard size.
7 x 2.25 = 15.75in of fabric needed, round up to 18in
18in = 1/2yd fabric
So to bind a 60 x 70in quilt, you'll need 1/2 yard of fabric, which you'll cut 7 strips from at 2.25in each. Easy!
Alright, now here's the thing: if you really don't like doing math and you really don't like the idea of making binding yourself, you can buy it but you'll be limited on the colors and length you need/want if you shop big box store. There are specialty shops that make and sell bias tape using modern fabrics and current trends (those can be found online through social media, Etsy, etc), but beware of "double fold bias tape" - if it was made with a bias tape maker, it still has only 1 layer of fabric at the center fold. Or you could forget about wondering how it was made and just make your own perfectly coordinating binding! And it's super easy to make, especially now that we've already calculated how much fabric we need. Let's do this!!
How do I make my own binding?
Real quick: if your already making quilt binding, chances are you have some basic quilting supplies. In case you want to know what I use, you can check that out here.
Square up your fabric
Most often, the fabric that you receive straight off the bolt from the fabric store is misaligned, so first you need to 'square up' your fabric. Open your fabric (undo the fold that it had off the bolt), and press your fabric flat - all of it - including the fold it came home with (Image 1). You'll need to refold your fabric creating a new center fold, making sure that the selvage edges are aligned. To do this, hold your selvages together in the air (you should be standing), with the fold of the fabric hanging towards the floor. You'll slide one selvage edge along the other (like a sliding door) until the waves are gone and the fabric hangs flat (Image 2). How much you'll need to move your fabric this way will vary, depending on how it was folded on the bolt and how well it was cut at the store.

Image 1: Fabric from the bolt may have a cut side aligned (left side here), but the selvage is often misaligned.
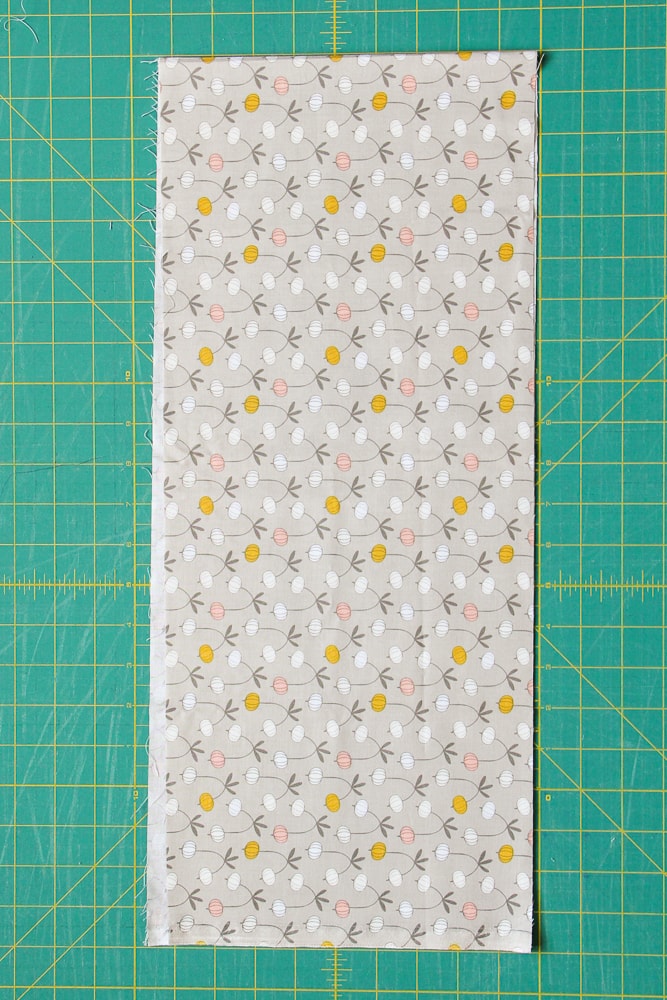
Image 2: Refold to align selvage edges. Note the left side is no longer aligned but the selvage is.

Image 3: Trim one side of your fabric to create a straight edge, thereby 'squaring up' your fabric before cutting your binding strips.
Cutting binding strips
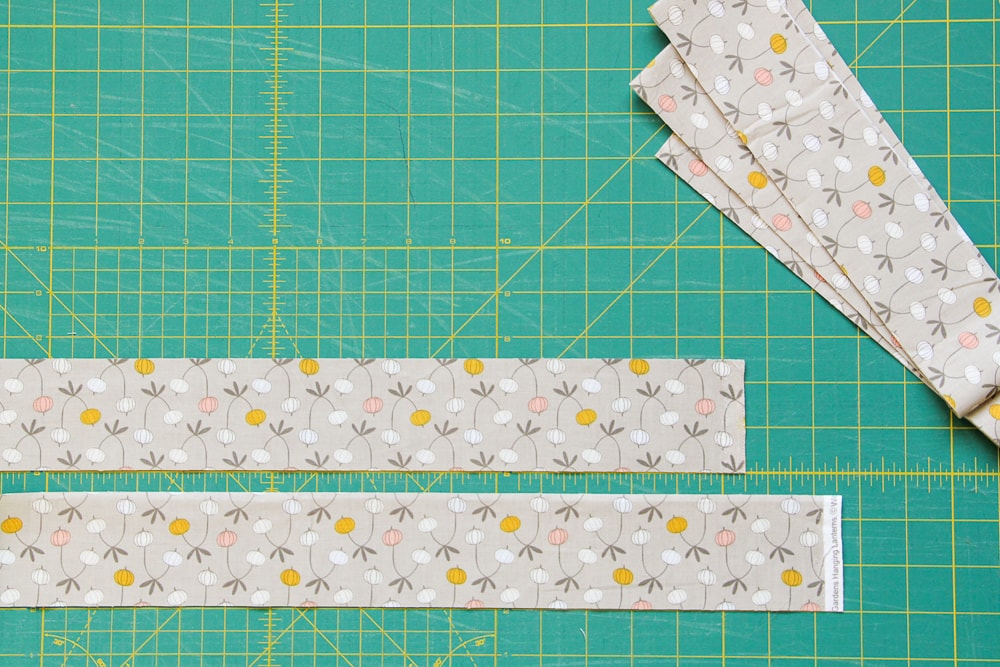
Now that your fabric has found it's alignment, take it to your iron and give it a quick press along the new fold to gently crease it. Next, carefully move that newly folded fabric and align the fold edge with a straight line on your cutting mat. Then with your ruler aligned at the folded edge and along a line on your cutting mat, trim one side of your fabric to create a straight edge, thereby 'squaring up' your fabric (Image 3). Cut your first strip and open it to test for alignment before cutting the remaining strips. You want to be sure that your strip is a straight line and not a slight 'v' shape at the fold when the strip is opened flat (this will make a difference in the binding process).
Making one big tape (joining strips)
You can trim all of your selvage edges first, but it's unnecessary, since we are joining on the diagonal. Joining on the diagonal helps distribute any seam bulk in your binding; When you fold your binding over the quilt edge the seam will wrap around on the diagonal (like a spiral), rather than a horizontal line (like a book). It's a bit easier on your machine too, if it has trouble working through thick layers of fabric. If you'd prefer to join your strips end-to-end, you'll want to square the ends of your strips to remove the selvages. Joining end-to-end is acceptable, but it can create bulk during the attaching process, because now you've added 2 additional layers of fabric into your binding in the same 1/2in of space. Only use this method if you think you might be cutting it close on binding fabric and are hoping to score a win in the game of 'binding chicken'.
Let's get started!
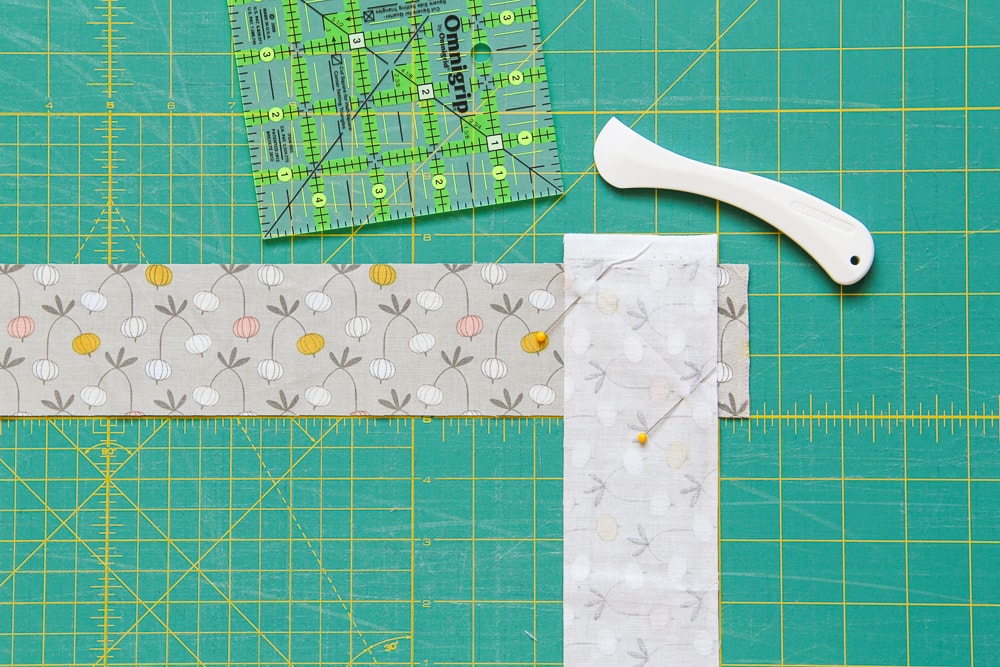
Step 1: See how the strips are oriented in opposite directions? The three leaves of the design are pointing up in the top strip and are pointing down in the bottom strip (head-to-toe).

Step 2: The bottom strip is now vertical, right-side down, with the three leaves of the strip now pointing towards the left.
Step 3: The two strips prepped for sewing.
1. Lay out your first two strips in parallel lines, making sure they are right-side-up and your print are facing opposite directions (head to toe).
2. Lift the bottom right corner of the bottom strip and lift it up and across the top strip to the upper left corner, so that the right-sides are together, the two strips intersecting and 90-degrees. You can use the lines on your cutting mat to be sure that your strips are perfectly perpendicular. join at a 45-degree angle.
3. Align a ruler across the center of the intersection, separating the two tails from the two strips. Use your marking tool of choice (I like a Hera Marker), and mark the line. Use a few pins to hold the fabrics in place and keep them from shifting.

Step 4: Sew a 45-degree angle to join the strips.
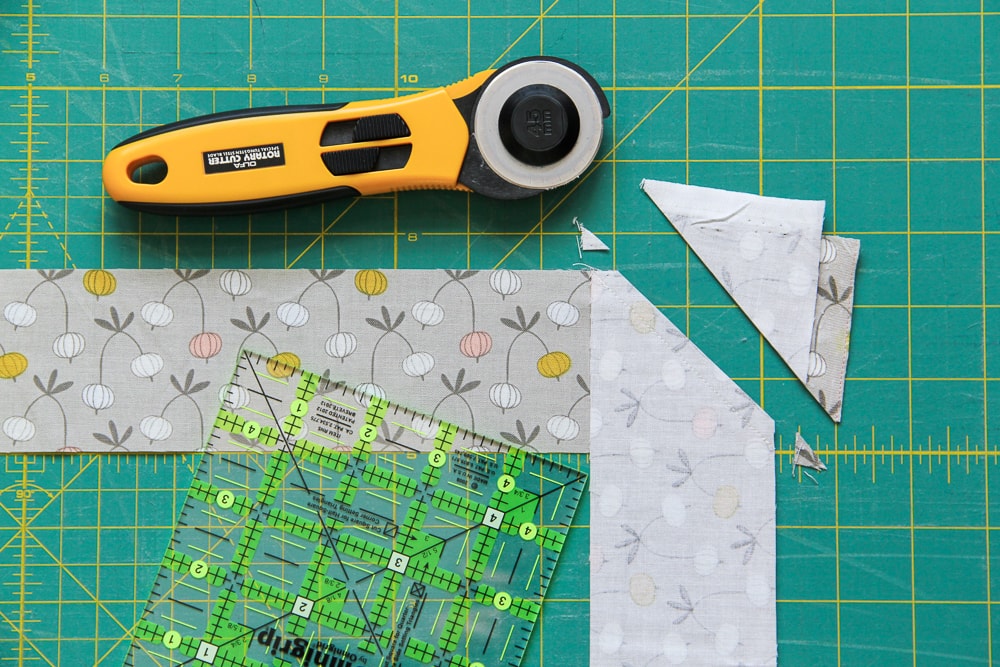
Step 5: Trim the excess, leaving 1/4" seam allowance.

Step 6: You can join all of your strips together at the same time!
4. Sew a straight line along the mark you just drew. I recently discovered I like to use a slightly shorter stitch length of 2.0 to join my binding pieces, as they seem to stretch apart less this way, but a standard 2.5 is great too!
5. Using your ruler and rotary cutter, measure a 1/4" seam allowance and trim away the excess.
6. You can use these same steps 1-5 to join all of your strips together at the same time, marking, pinning and then chain piecing them before trimming the tails.

Step 7: Press seams open.

Step 8: Verify strips are straight at the seam intersections.

Step 9: Fold the continuous length of binding in half, wrong-sides together and press.
7. Press seams open to distribute bulk (this is one of the rare times I'll recommend pressing this way when making a quilt).
8. Check your seam to make sure your strips are correctly oriented and that your strip is still a perfect width. You want to be sure that the left side of your seam is not higher or lower than the right.
9. Fold your fabric in half, wrong-sides together, making sure that when you get to a seam, the seam allowance stays open as you fold your strip in half. Press the full length of binding to set the fold.

You're done! You can roll your binding up on itself, or just leave it in a gentle pile until you're ready to use it!
Next up: attaching the binding to the quilt