
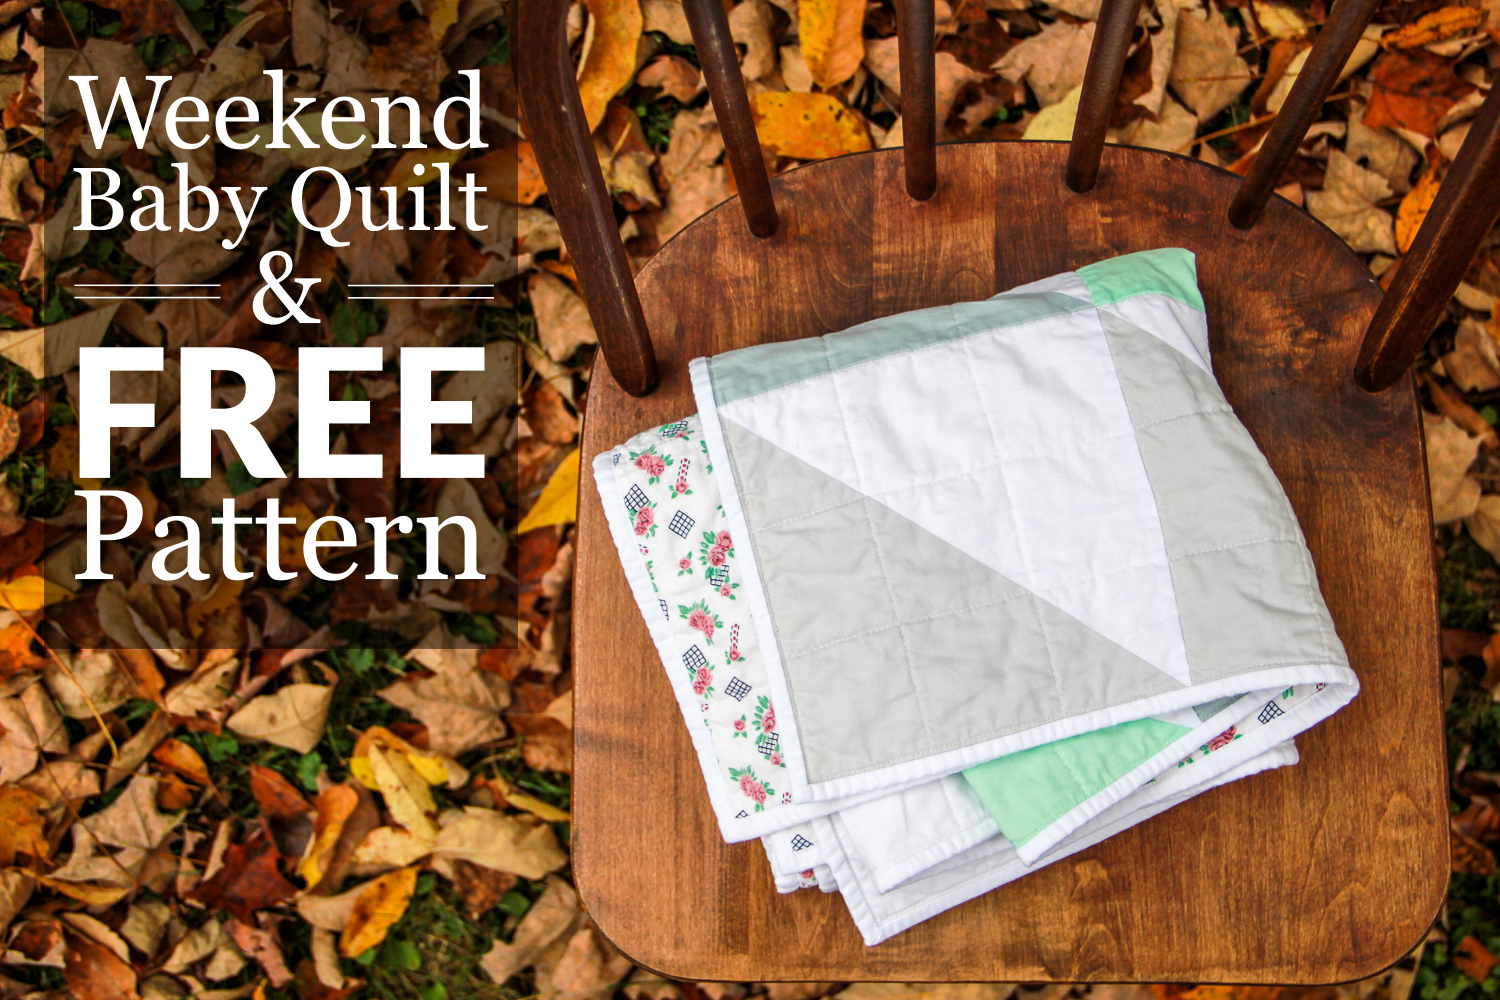
Weekend Baby Quilt: a Free Pattern!
Baby quilts are so great, aren't they? They're typically pretty small, so they require less fabric, thread and time to make. You can choose from a variety of adorable prints or soft pastel solids. Quilting them is a breeze. And best of all, you can make one in a weekend!
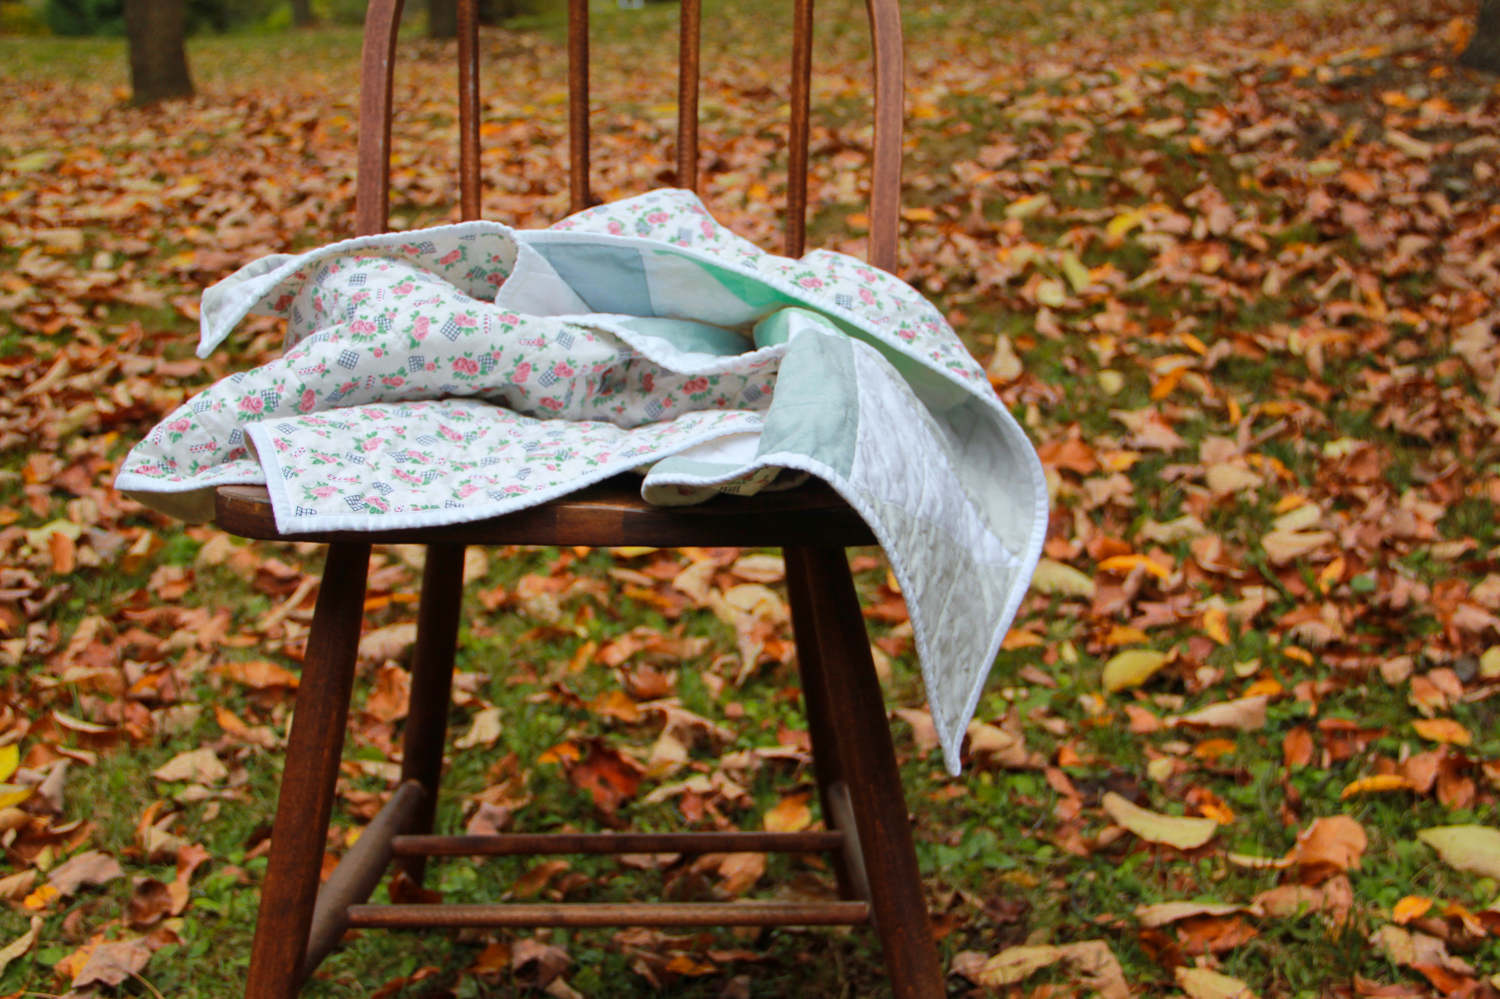
Not that you need a reason to make another quilt, but a baby is a pretty great reason. And while diapers, baby wipes and onesies are all fantastic gifts for new babies (I don't even want to consider how many of those we went through! $$$) a quilt is a gift that can be loved, used and washed over and over again. From tummy time to emergency burp cloth, there can never be enough soft blankets around with a new baby. And when baby grows into toddler and child, there are picnics to be eaten, fabric forts to be built, bedtime cuddles to be had, winter car rides that need a lap cover, and more. There are so many uses for a small handmade quilt - it's a gift that gives for years.

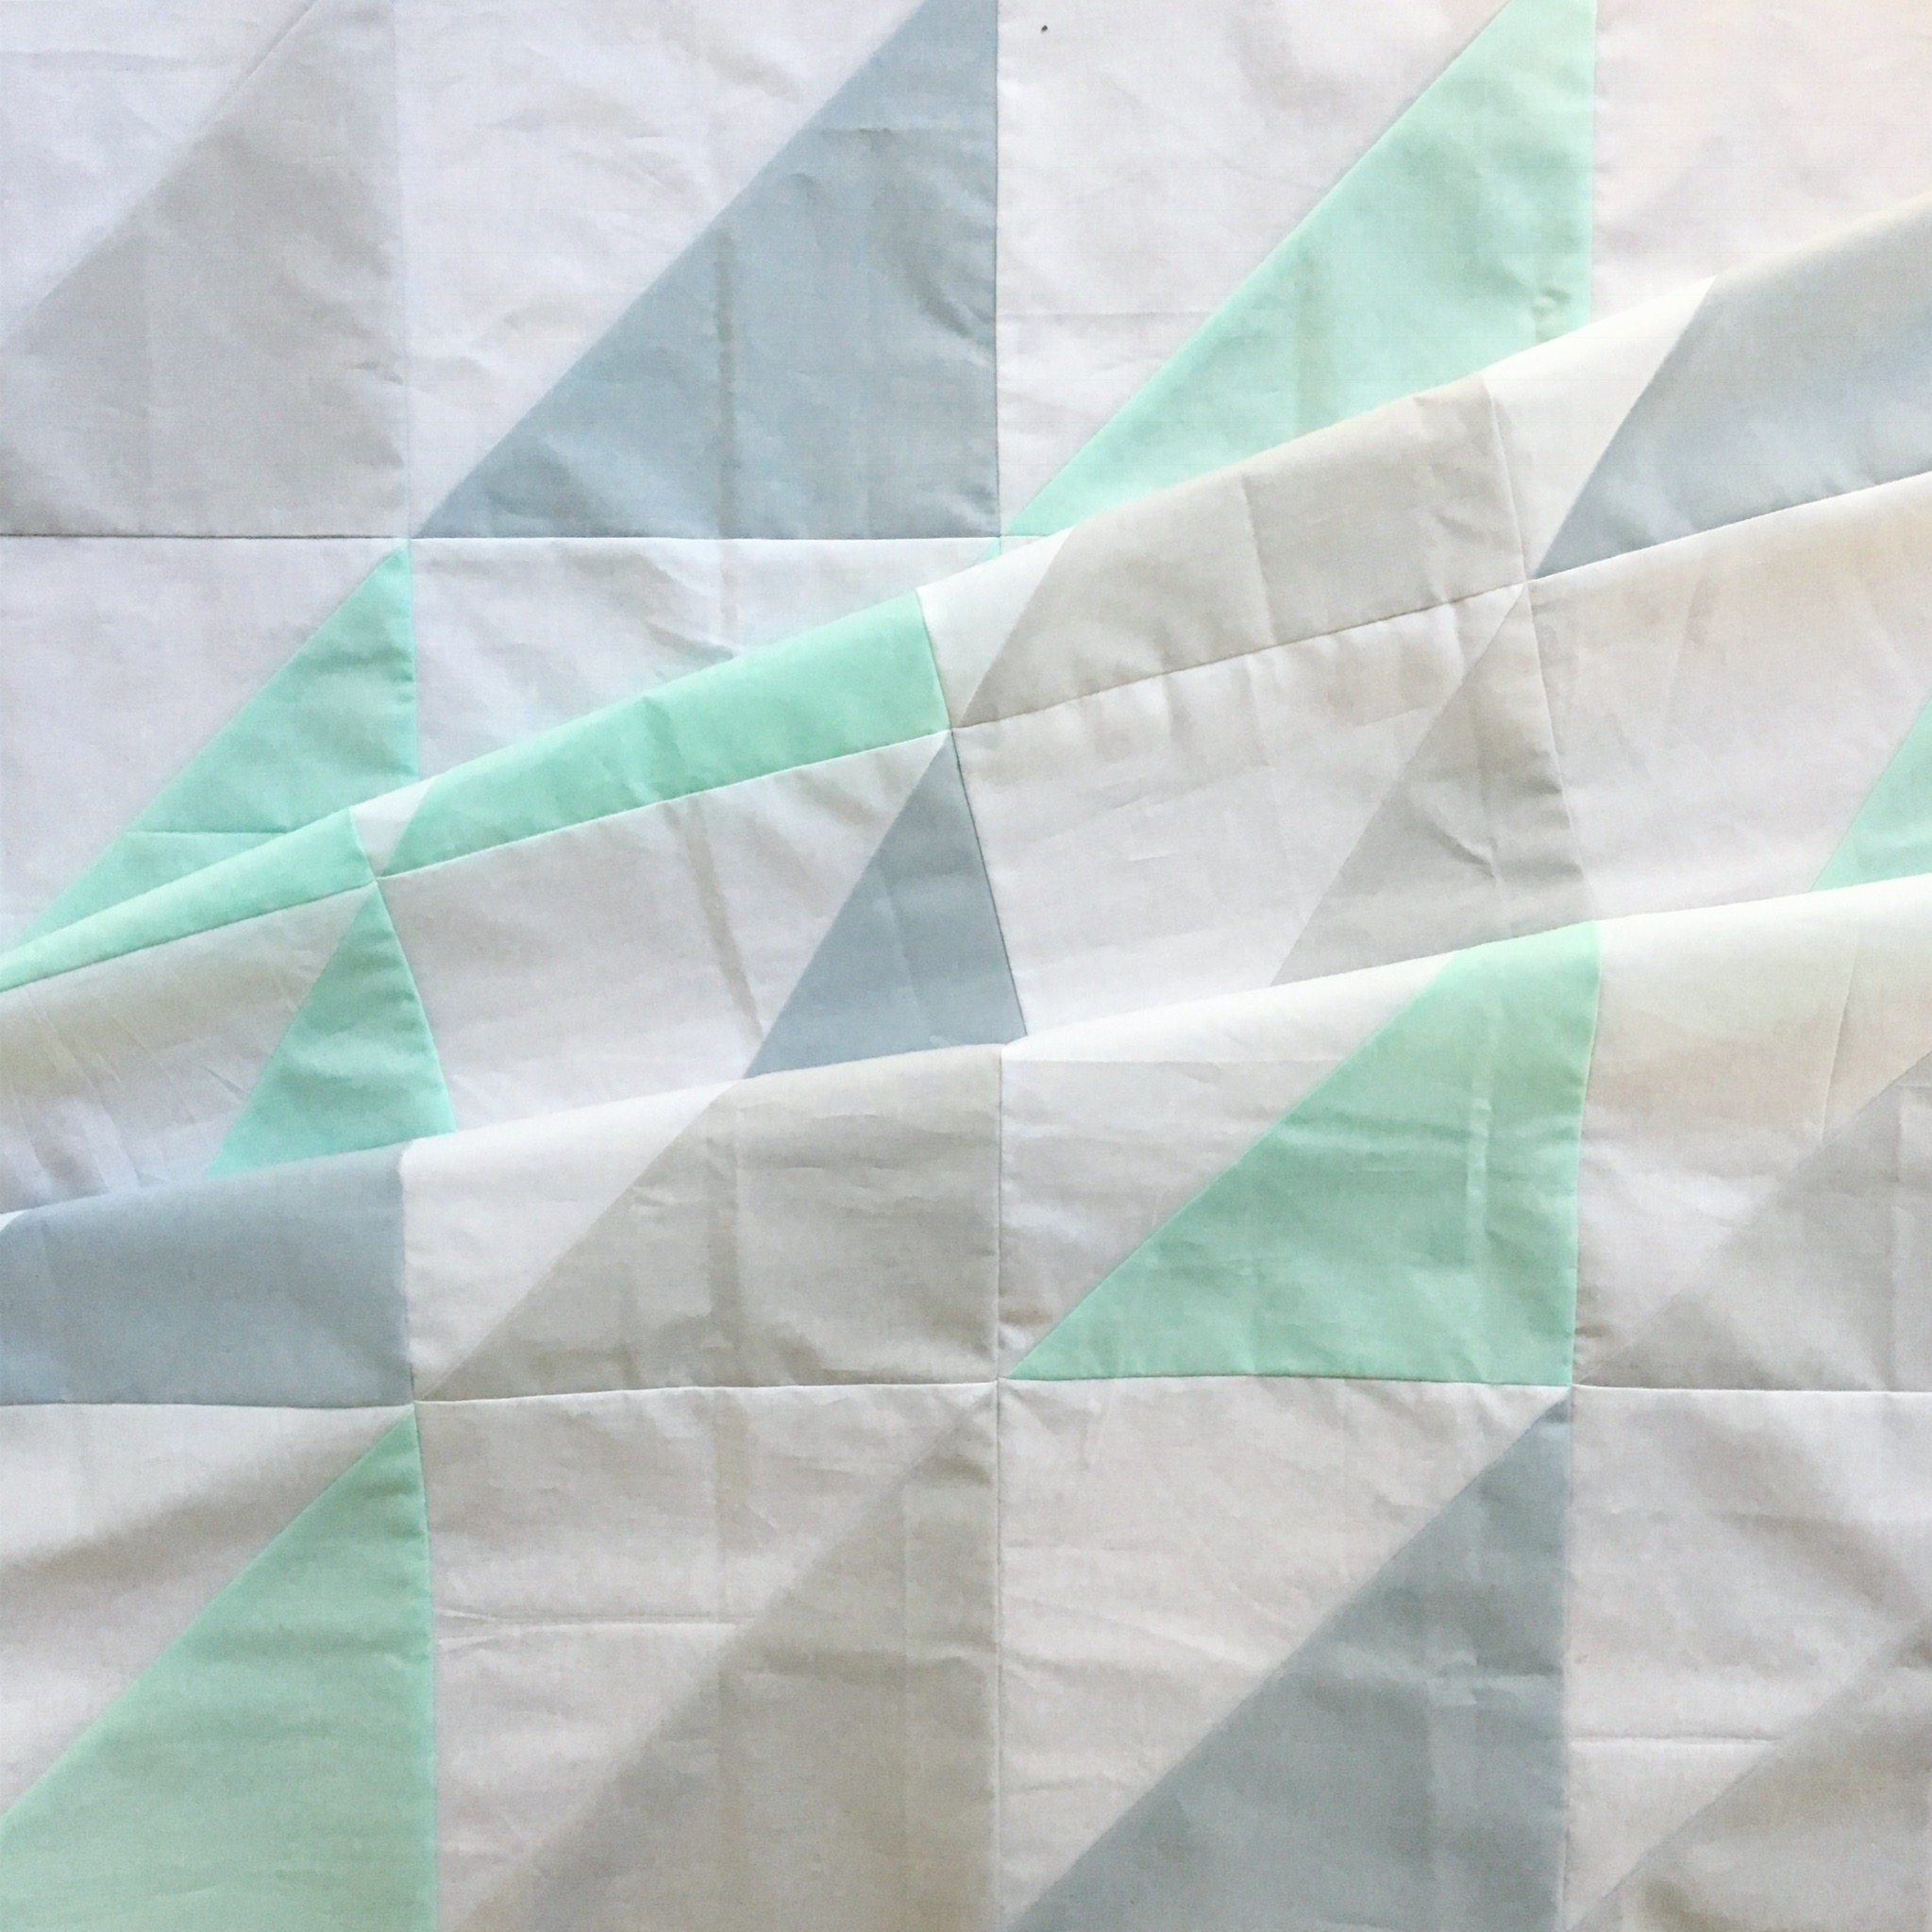
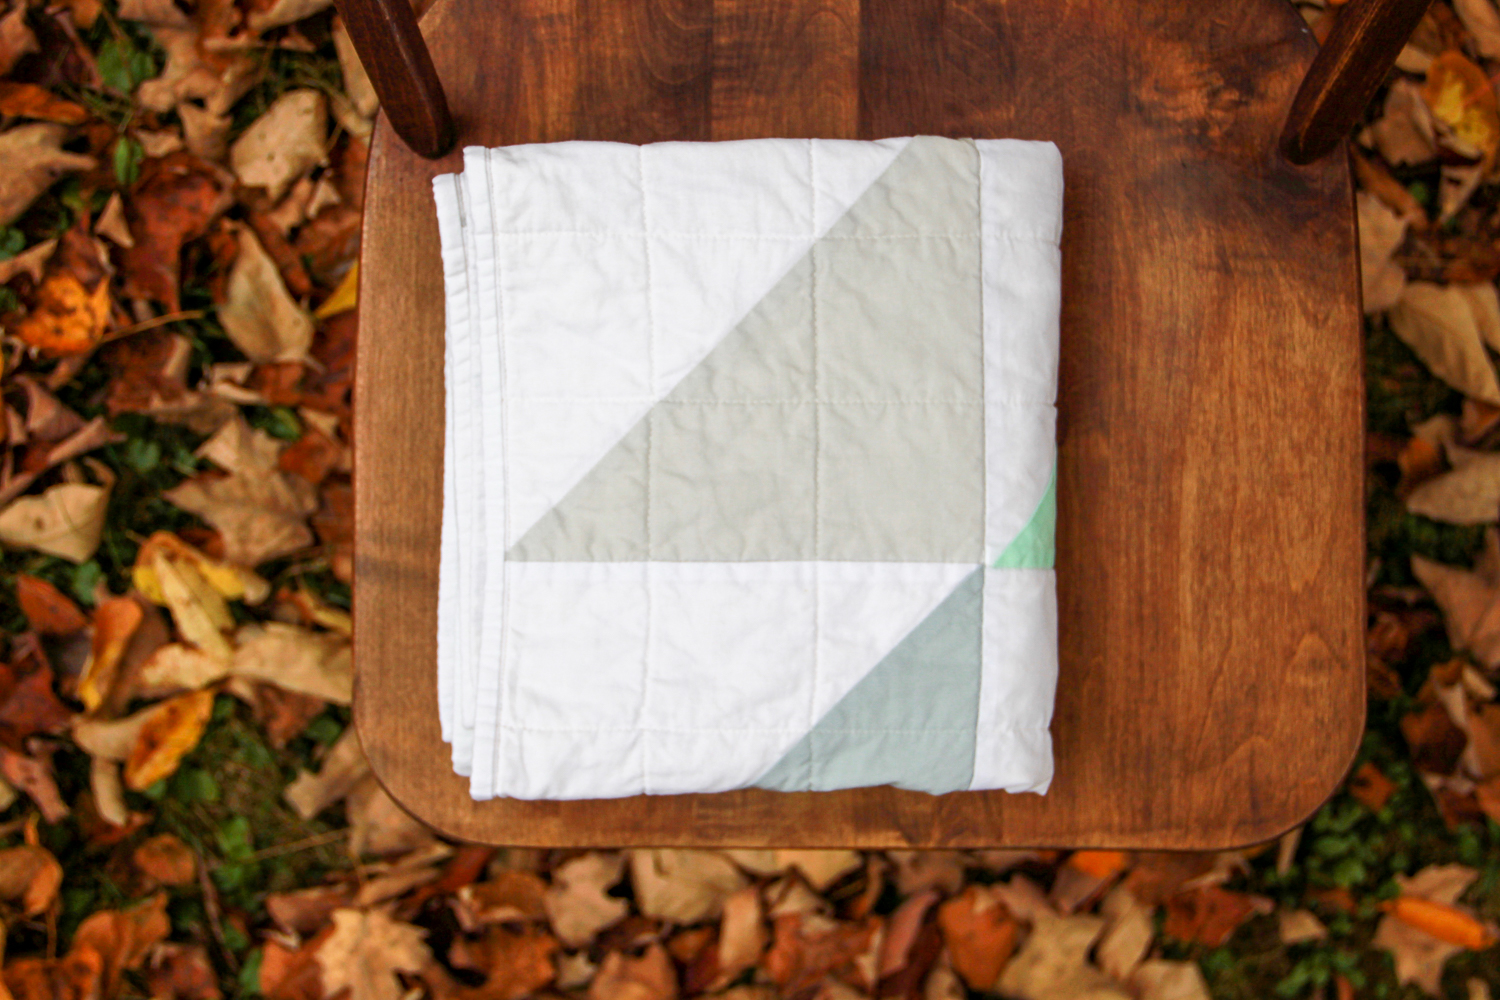
I recently had the pleasure of making a quilt for a new little bean, and I was excited to create a gender neutral quilt top for a first-time mom-to-be. I wanted to create a quilt that would grow with baby and would also blend into the parents' home decor style with a simple geometric design. I immediately decided that half square triangles (HSTs) would be the perfect way to incorporate a few colors into a calming palette.
A baby quilt can really be any size you like, though typically speaking a baby quilt will be anywhere between 32-40 inches on any side, while a standard crib size is usually 36 x 52 inches. I like a larger baby size (but not quite a crib), so I went with 40" square quilt, which allowed me to use some remnant fabrics I had and the backing used barely more than a single yard of fabric - perfect for stash busting! For this quilt I decided to select a few soft solids and pair them with solid white, but this layout would work great in so many color ways! From bold primary colors to sweet baby animal prints, you really can't go wrong with this design.
Once you select your fabrics (if you're like me, this can take the longest - so many choices!), you'll have this quilt top cut, sewn and pressed before lunchtime. That leaves you with an afternoon to baste it, then a whole day to quilt and bind it! Realistically you could totally make this start to finish in one day, but let's take two just for the heck of it. Huzzah! (Sorry, not really sure why I 'huzzahed.' I never huzzah - that was weird. I guess I'm just really excited about sharing this quick and easy quilt with you!)
If you've never made HSTs before, don't stress - they're super easy to put together! This quilt uses the two at a time method, meaning that each cut of fabric that you work with will make two (2) half square triangles. As long as you cut your squares accurately and sew with care, you should have no trouble producing squares that are very nearly accurate. If you're experienced with no-waste methods of producing HSTs, you'll notice that my instructions below include an additional 1/8" in the cut instructions - I really like to have just a tiny extra for that stubborn margin of error. I can trim those slightly wonky edges to make happy little squares before I sew them into happy little rows with happy little points.

Make the Quilt
First, a few quick notes:
I'm providing you with instructions to make a 35" square size baby quilt. The fabric requirements for this pattern use scant measurements so there is very little waste - that's the beauty of it! If you're unsure about the accuracy of your yardage or need a bigger margin of error for cutting or longer quilting, please consider adding an additional 1/8 - 1/4 yard to each.
If you'd like to make a 40" baby quilt (as I did), you'll need to add 1/4 yard each for Fabric A, Fabric B & Background Fabric, and cut each square 1 inch larger (9" to start, instead of 8"). Additionally, the backing will have only about 1-2" of overhang on each side, which does not meet the standard 4" requirement of most longarm services, so if you are not quilting this yourself, plan accordingly.
If this is your first quilt, I'm so excited you're here! This is a very easy, beginner-friendly quilt top. If you’re not sure what notions you might need, can check out my list of basic supplies to start quilting first, then pop back over here when you’re stocked up. There are some instructions for basting, quilting and binding on my blog, but in case you can’t find what you need here, the internet is full of tutorials that can help!
Okay, okay, I know! Just get to the FREE quilt pattern already! Ready? Ready!

Weekend Baby Quilt
Finished Quilt Size: 35" x35"
Finished Block Size: 7"
Fabric Requirements:
Assuming standard width of fabric (WOF) is 42".
I used fabrics from my stash, but I’m pretty sure the colors were all Robert Kaufman solids: Kona Ice Frappe, Kona Ash, Kona Fog, and Kona Snow.
Fabric A: 1/4 yard
Fabric B: 1/4 yard
Fabric C: 1/4 yard
Background: 3/4 yard
Backing: 1 yard
Binding: 1/4 yard
Cutting Instructions:
Fabric A: Cut 5 - 8" squares
Fabric B: Cut 5 - 8" squares
Fabric C: Cut 3 - 8" squares
Background: Cut 13 - 8" squares
Binding: Cut 4 - 2.25" x WOF strips
Making Blocks:
Using the two at a time method to create half square triangles (HST)
Pair each 8" square Color Fabric with one Background Fabric, right sides together. You should have 13 pairs of squares.
On the wrong side of the Background Fabric, use a soluble marking tool or Hera marker to draw a diagonal line from the top right corner to the bottom left corner on each pair of squares.
Sew a 1/4" seam on each side of your marked line (sew two seams per square). Fig. 1
Cut on the drawn line, revealing two HST blocks. Open the blocks and press seams towards the Color Fabric.
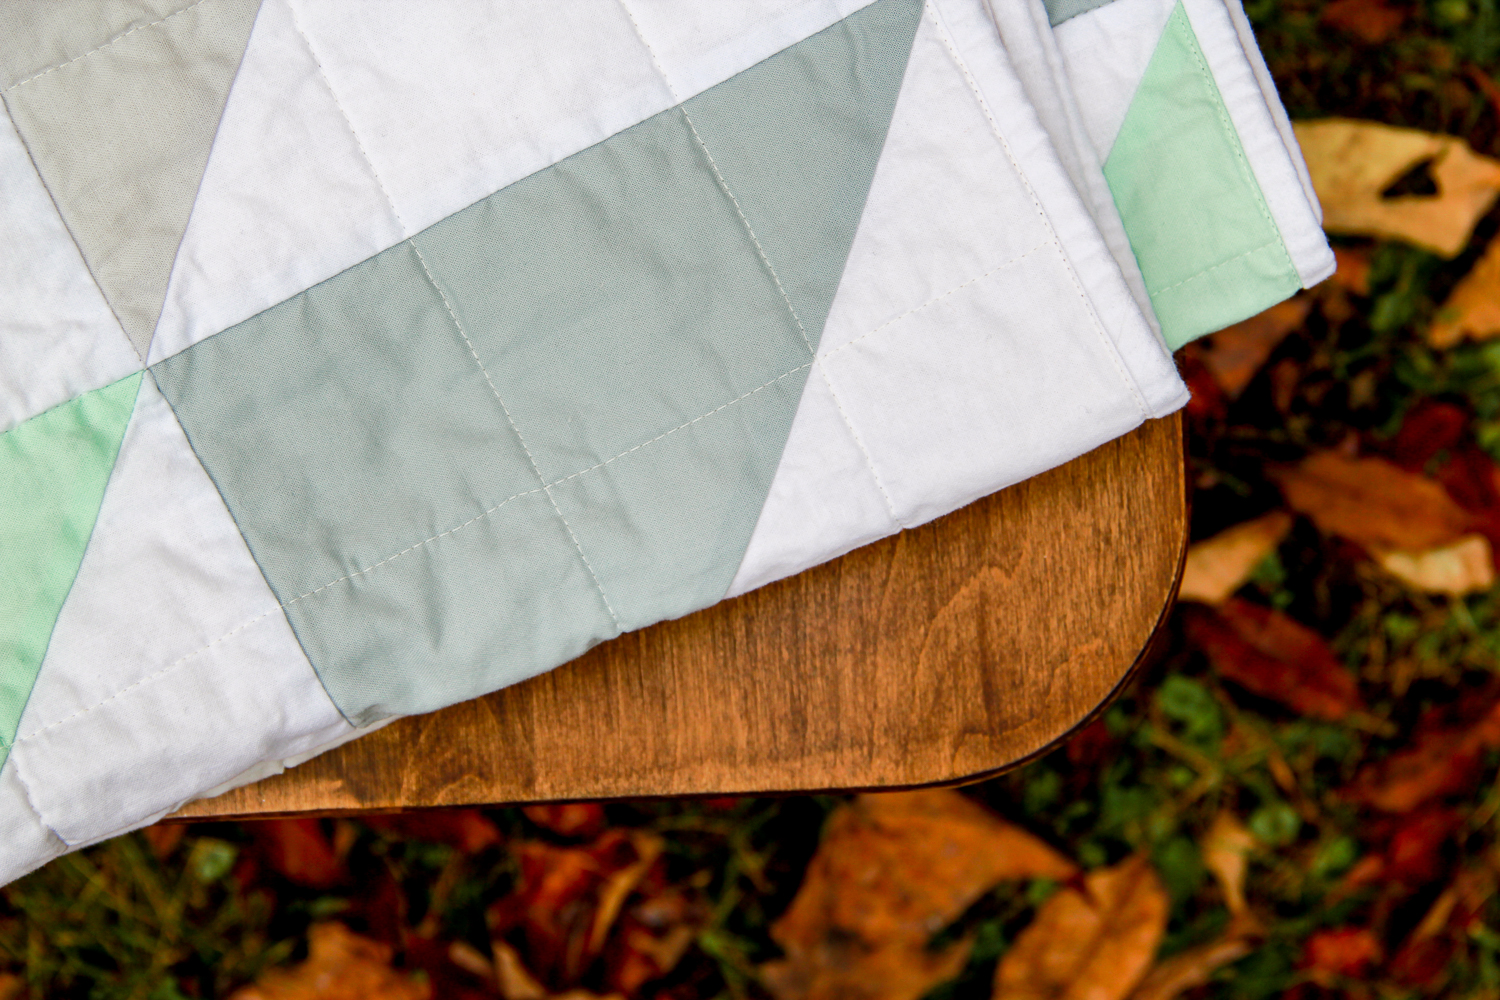
Trim each block to 7.5". You will have 26 blocks total.

Fig. 1
Putting It Together:
Arrange your blocks in the order you would like in a 5x5 grid. You will have one leftover block (Fabric A) that you won't need. Fig. 2
Sew blocks into rows, pressing the seams of each row in alternating directions to help nest seams and reduce bulk at the intersections. (ex. press first row seam all to the left, next row seam to the right, etc).
Sew rows together, pressing the seams in alternating directions.

Fig. 2
Finish It Up:
Lay the backing fabric wrong side up, followed by your batting of choice and your completed quilt top right side up, making a quilt sandwich. Baste & quilt as desired.
Trim the excess fabric to square up your quilt.
Create your binding by joining strips at a 45-degree angle, right sides together, with a 1/4" seam to create one long piece. Press seams open.
Fold the strip in half lengthwise, wrong sides together, to make one long continuous-length, double-fold binding tape. Align the raw edges of binding with the raw edges of the quilt and attach using a 1/4" seam allowance by machine. If you're new to quilt binding (or just want to see how I make and attach mine), you can check out my quilt binding tutorials for help.
Fold the binding to the other side of the quilt and attach by machine or by hand.
You're Done!
Please share them on Instagram using hashtags #weekendbabyquilt #VBQpatterns, and don't forget to tag me @villageboundquilts. I can't wait to see your Weekend Baby Quilts!


And trust that while the cute clothes are adorable and diapers are a necessity, they cannot last as long and will not be as treasured as this simple, beautiful handmade quilt. (On second thought, maybe gift some diapers too) ;)
Please note that even though this is a free pattern/tutorial, all of the instructions are my copyrighted work. This pattern is for personal use only and cannot be reproduced or sold. Duplication of any kind is prohibited. All rights reserved.