Altamont Pillow | Simple Geometric Quilting (Project Tour)
Nearly four years ago I stumbled upon Laura Preston’s gorgeous work via her Instagram @VacilandoQuilting and haven’t stopped double-tapping every post since! Using large-scale designs and solid colors, Laura’s style is unmistakable (and gorgeous!) and is defined perfectly by her book: Simple Geometric Quilting.
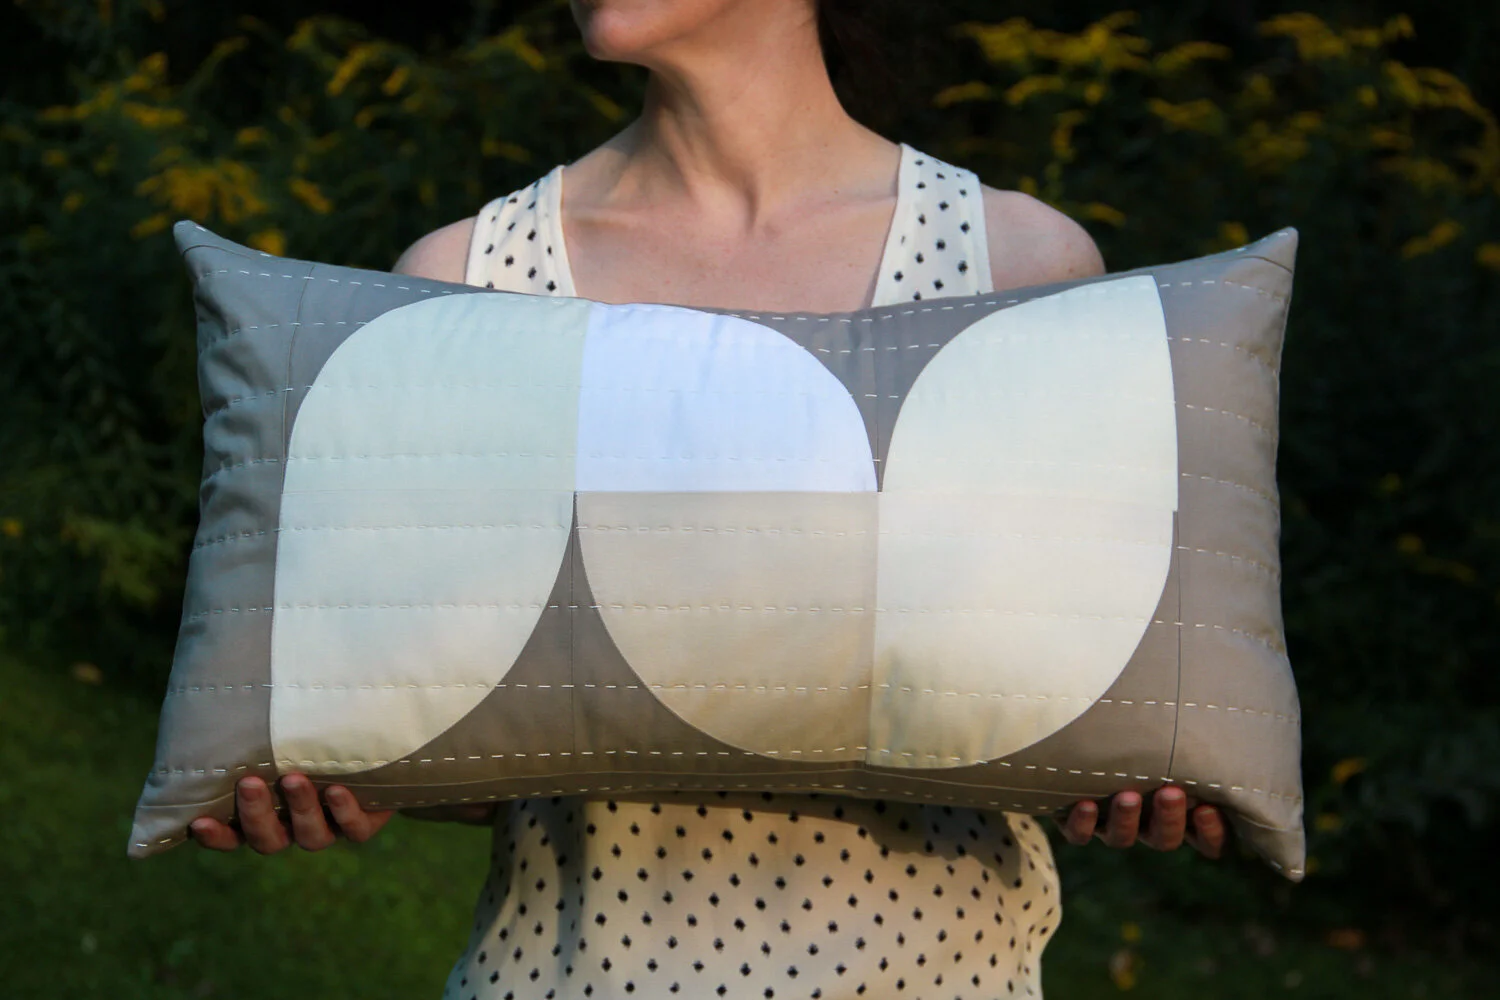
Don’t fear the curves - making the Altamont Pillow was so easy! Laura’s book provides you with all of the detailed instructions you need to sew the curves and piece them together. The pattern does not include any templates to trace or curved rulers to purchase. Instead, Laura provides details on her method for creating your very own curved templates of any size and nary a protractor needed. It was so simple to follow, in fact, that the hardest part of making this pillow was choosing fabrics! Many stacks of fabric piled in my sewing studio later, I finally decided on an all neutral palette and I’m so happy with the results.
I used some of my favorite quilting solids, Kona Cotton, and selected White, Snow, Bone, & Ivory, and a beautiful brownish-gray, Doeskin, as the background. The Ivory and White have the highest contrast in the center of the pillow. On the other hand, Snow and Bone are only subtly distinguishable, but I think that they still play really well together at the edges of this pillow design.
Once the pillow was pieced and basted, I marked a few different designs with my Hera marker before ultimately deciding on my usual: straight lines. I spaced these 1.5” apart and knew that I wanted to hand quilt this project to give it that little bit of extra. I pulled out some DMC perle cotton in bright white and got to work. It didn’t take long before this was all quilted up and ready to be trimmed up and finished.
One step that I added was to place a basting stitch around the perimeter of my quilt sandwich. This is a step that isn’t necessarily necessary, but my machine sometimes struggles with feeding thicker layers of fabric evenly when stitching close to the edge. By adding a longer stitch length around the perimeter (here I used 4.0 and about a 1/8” allowance from the edge), I find it helps make certain all of the layers feed evenly. When it was time to add the backing to this pillow cover, I felt assured there would be no puckers or pinched fabric once I turned my pillow right side out again.
After adding the envelope backing (no zippers to fuss with!) I stuffed it with a pillow form and found the perfect spot for my Altamont Pillow on our guest bed.
For more great projects from Laura, be sure to visit her website, follow her on Instagram, or check out her book Simple Geometric Quilting.


