
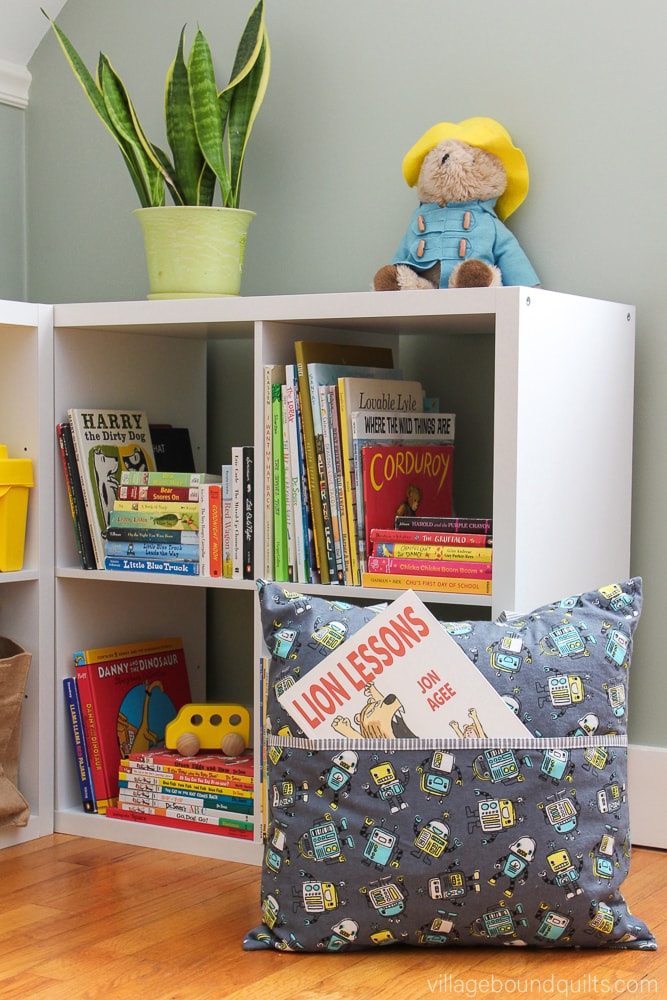
Easy Reading Pillow
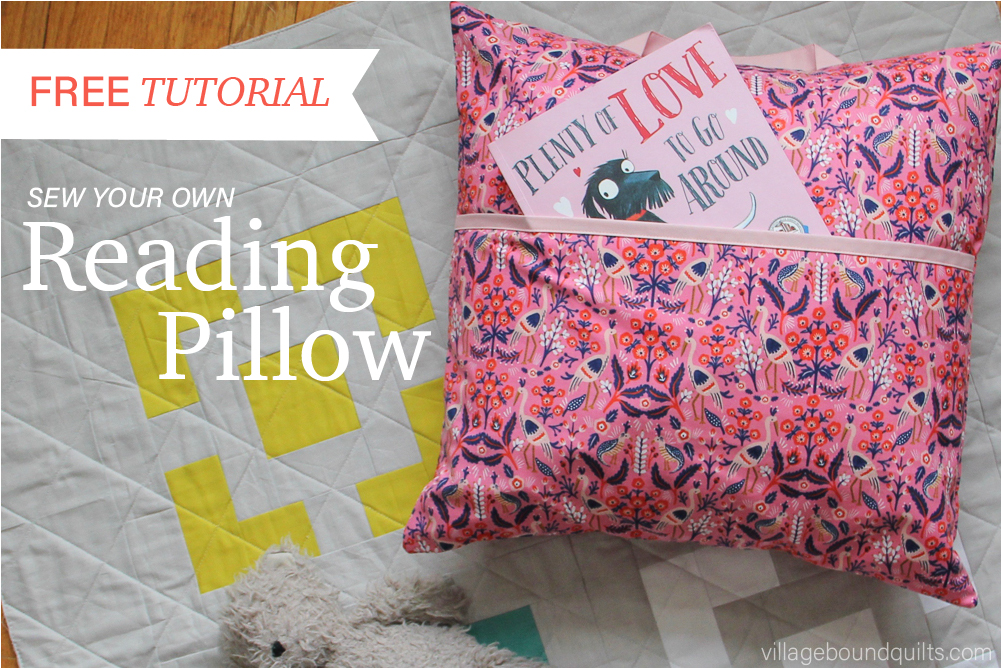
Shown with Haver Square Quilt, a VBQ Pattern.
I'd never heard of a reading pillow until a few months ago when a friend asked if I could make one for her preschooler. After a quick image search on Google (thanks, Internet!), I learned that a Reading Pillow, sometimes called a Book Pillow or a Pocket Pillow, is a large pillow with a pocket sewn into it, intended to be used for - wait for it - snuggling and reading! But as I scoured Pintrest I couldn't quite find exactly what I wanted to make. Too many included piping, fusible fleece, ribbon, zippers, appliqué, or other more complicated supplies and techniques. So I decided to design one myself instead! Only 2 yards of fabric and an hour at your sewing machine and you'll be in Reading Pillow heaven.
Don't let the cute fabric fool you - this pillow makes an excellent gift for kids or adults of all ages! Teens could use a cozy pillow to tuck their history homework (or magazine or laptop) into. By simply switching up the fabrics this goes from Pre-K adorable to college dorm ready. You could even opt-out the handle and this would make an excellent remote-holder pillow for your couch. It's surprisingly versatile ;)
Alright, let's get to it!
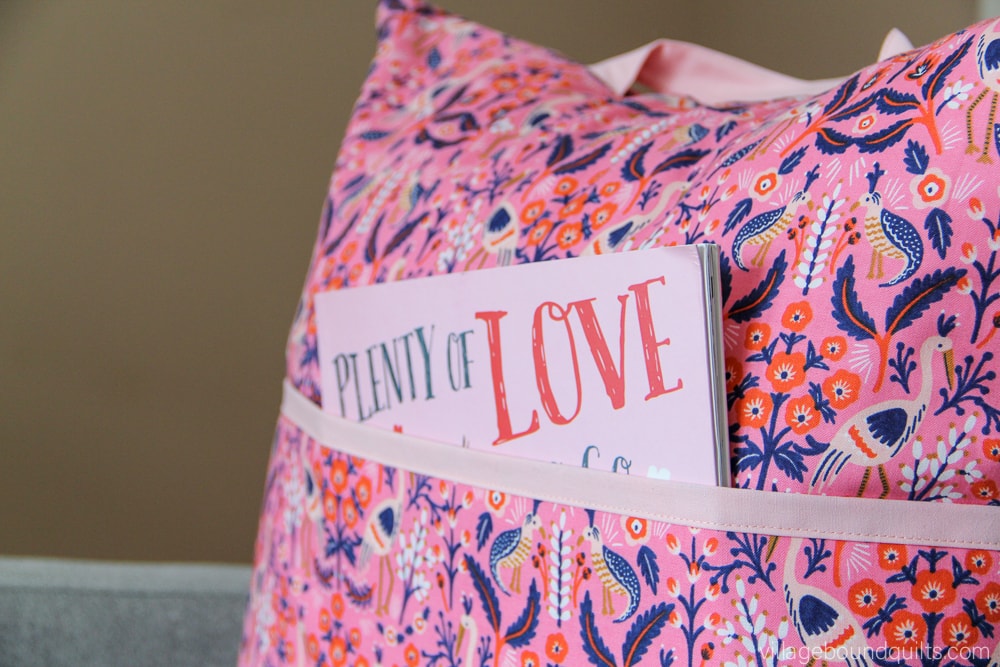

Be sure to read all the way to the end for links to the books shown and some of our favorite book recommendations !
You Will Need:
Sewing machine & needles
Rotary cutter
Acrylic ruler
Self-healing cutting mat
Straight pins
Iron
Fabric (2 yards + 20" square) I used:
Les Fleurs Tapestry Rose (similar here)
Kona Cotton Bellini
Thread in a coordinating color (I like Aurifil)
If you'd like to learn more about notions, check out these Basic Quilting Supplies.
Fabric Requirements & Cutting Instructions:
Color A (Main Color): 1 yd
20" x 20" (main front)
20" x 12" (outer front pocket)
12.5" x 20" (back envelope right)
10" x 20" (back envelope left)
Color B (Accent Color): 1 yd
20" x 13" (inner front pocket)
14" x 20" (back envelope right)
16.5" x 20" (back envelope left)
4" x 13" (handle)
Scrap: 20" x 20" (for main front lining - optional)
Notes:
Backstitch at all starts and stops
Basting stitches use a 5.0 stitch length
Top stitches use a desired stitch length (I used 3.0)
Piecing stitches use a 2.5 stitch length
If you have one, you may find this project easier to sew when using a walking foot (but is not required).
Make The Main Pocket
Optional: If you'd like your pillow front to look quilted and add a bit of heft/shape, use the 20" x 20" Scrap fabric under the 20" x 20" Color A fabric and quilt as desired or attach around all 4 sides with a basting stitch using a 1/8" seam allowance. You can also use interfacing, fusible fleece or low-loft batting for your scrap, if you’d like. If not, skip this step.
Using A - 20" x 12" and B - 20" x 13", align the two fabrics at the bottom, wrong sides together, leaving the 1" B overhang at the top. Sew a basting stitch with 1/8" seam allowance around 3 edges of the Color A piece, avoiding the top and the 1" Color B overhang.
Optional: If you're opting-in to the quilted look, simply quilt as desired, taking care to not quilt in the 1" overhang.
Working on the same piece, fold the B - 1" overhang in half (0.5") wrong sides together. Fold over 0.5" again to overlap A by 0.5", creating a faux binding. Stitch 1/8" from the bottom edge of the binding to secure.
Align the 20" x 12" A-B piece on top of the 20" x 20" A square, wrong side to right side, raw edges touching at the bottom and sides. Pin as needed. Sew a continuous basting stitch 1/4" from the 3 edges, beginning at the binding on one side, across the bottom and ending at the binding on the other side.

Align pieces wrong sides together. Add a basting stitch on 3 sides.

Fold the Fabric B overhang in half, press. Then fold again to overlap Fabric A and press.

Stitch to secure the faux binding.

Pin the pocket to the main piece and add a basting stitch around 3 sides.
Add The Handle:
Using B - 4" x 13", fold the fabric in half 2" lengthwise (hotdog style, not hamburger), wrong sides together, and press to set the crease. Unfold the piece, then fold in each side 1", aligning the raw edge to the center crease and press again to set the creases. fold in half again at the first center crease - you now have a piece 1" x 13". Stitch 1/8" from each edge to secure.
Attach to the main pocket piece at the top of the fabric, measuring 6" from each edge of the 20" square. There will be 6" in between the handle attachments. Be sure that the 'front' of the handle is touching the pillow front and that the handle does not twist. Overhang the handle by 1/2" on each side. sew each edge of the handle 1/4" seam allowance, backstitching to secure. Set aside.

Fold the handle fabric in half lengthwise and press.
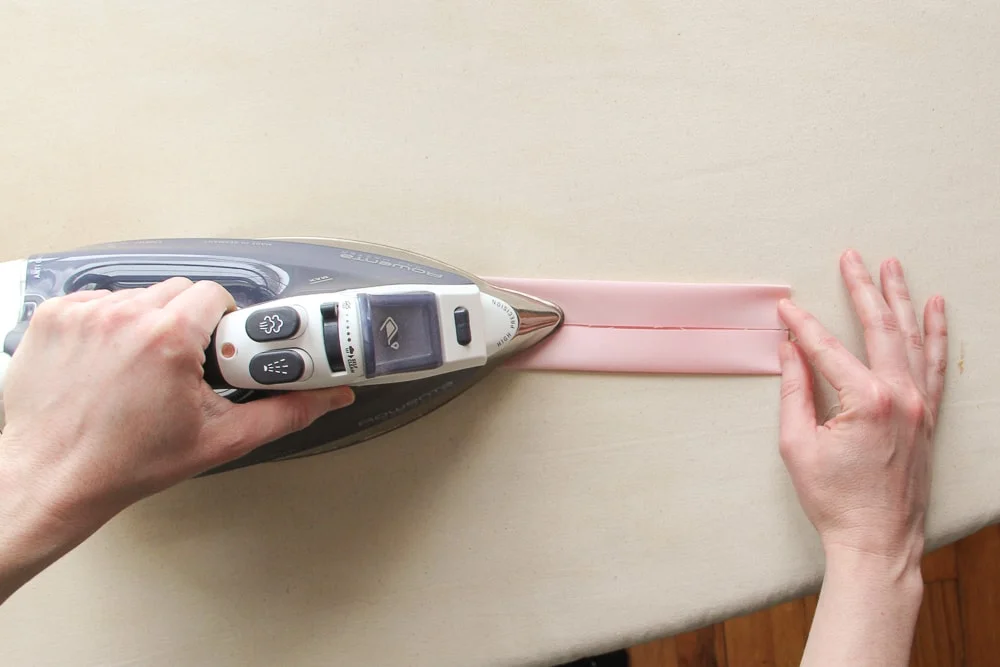
Open that crease, then fold the fabric inwards to the center and press.
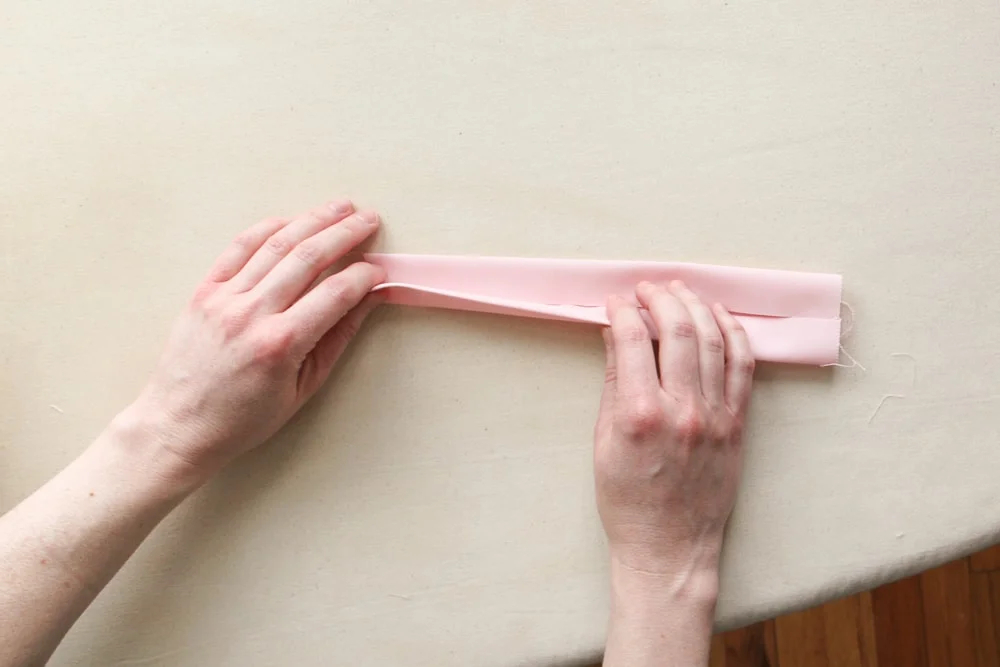
Fold the center crease again (edges together) to create a 1" wide strip (4 layers of fabric).

Stitch 1/8" from each edge and press to set seams.

Place one side of the handle 6" from the edge and pin with 1/2" overhang.

Without twisting the fabric, rpeat on the other side, then sew 1/4" seam allowance on each side.
Create The Envelope Backing:
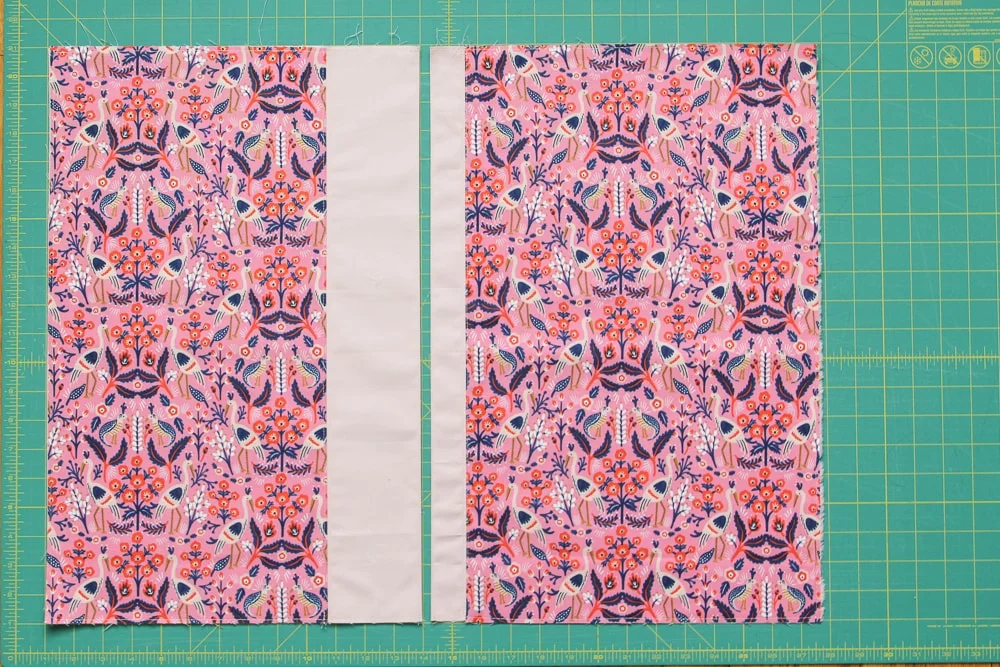
Back Envelope Right: Align A - 12.5" x 20" on top of B - 14" x 20", right sides together aligned on the right side (the 20" length) and sew with a 1/4" seam allowance. If using a directional print, make sure it's correctly oriented. When done, Color B should be on the left and A on the right, and will now measure 26" x 20".
Fold in half, wrong sides together, to measure 13" x 20" and press to crease. The accent stripe will measure ~1". Stitch 1/8" from the creased edge and along either side of the seam where A & B joined, a total of 3 rows of stitching. This will be the outermost piece of the envelope backing and will overlap the second piece by ~6".
Optional: add a basting stitch 1/8" seam allowance around the 3 unfinished sides of this backing piece to secure them together.Back Envelope Left: Align B - 16.5" x 20" on top of A - 10" x 20", right sides together aligned on the right side (the 20" length) and sew with a 1/4" seam allowance. If using a directional print, make sure it's correctly oriented. When done, Color A should be on the left and B on the right, and will now measure 26" x 20".
Fold in half, wrong sides together, to measure 13" x 20" and press to crease. Sew 1/8" from the creased edge and along either side of the seam where A & B joined, a total of 3 rows of stitching. This is the other half of your envelope backing which will be covered ~6" by the other backing piece.
Optional: add a basting stitch 1/8" seam allowance around the 3 unfinished sides of this backing piece to secure them together.

Back Envelope Right: align Fabric A over Fabric B, right sides together and sew.

Back Envelope Right: Fabric A will be on the right. Flip fabrics wrong-sides together and press.

Sew 1/8" from crease and along either side of the joining seam. Add a basting stitch around the 3 raw edges.

Back Envelope Left: align Fabric B over Fabric A, right sides together and sew.

Back Envelope Left: Fabric A will be on the left. Press your seam (I side press my seams toward the darker fabric.)

Back Envelope Left: Flip fabrics wrong-sides together and press. Then follow the instructions for top stitching and basting.
Back Envelope pieces ready to be attached to the main pocket piece. These will overlap (right over left) by 6" when sewn up.
Putting It Together:
Lay the 20" x 20" pocket piece right side up. With the creased edge running perpendicular to the handle, lay the Back Envelope Right backing wrong side up, aligning the 3 raw edges to the left edges of the pocket piece (the backing opening will be vertical on the pillow). Then lay the other backing piece wrong side up in the same manner along the right edge, making sure your directional prints are correctly oriented. The crease of each backing piece will align just to the inside edge of the handle strap. The backing pieces should overlap by ~6" and the main pocket piece will not be visible.
Pin around the edges to secure, taking care to note where fabrics overlap and create bulky intersections (at the faux binding, the 2 handle attachments, the 2 points at the top where the backing overlap, and the 2 points at the bottom where the backing overlap). Place a pin at the top of the pillow too, to make sure the center of the handle strap is tucked inside well (so it doesn't get sewn into the seam allowance).
Using 1/2" seam allowance, stitch continuously around the full perimeter of the 20" x 20" square, pivoting at the corners. Backstitch at the start and stop as well as backstitching at the bulky intersections and 4 corner pivots for added strength and durability.
Trim the 4 corners at a 45-degree angle.
Optional: If you think this item may get frequent washing, you may choose to add a zigzag stitch around the raw edges at this point for added security and to prevent fraying, or you can skip this suggestion.Flip the pillow inside out making sure to poke out the corners as much as possible. A chopstick, knitting needle or dull pencil may help with this process. Just be sure the item isn't sharp - don't poke a hole in your newly finished project!

Lay your backing pieces right sides facing the main pocket.

Pin to secure and sew a 1/2" seam allowance around the perimeter.

Trim the corners (do not cut through your seam) and add a zigzag stitch to prevent fraying.

A metal chopstick is my corner-turning tool of choice.

Finished back.

Finished front.
Final Steps:
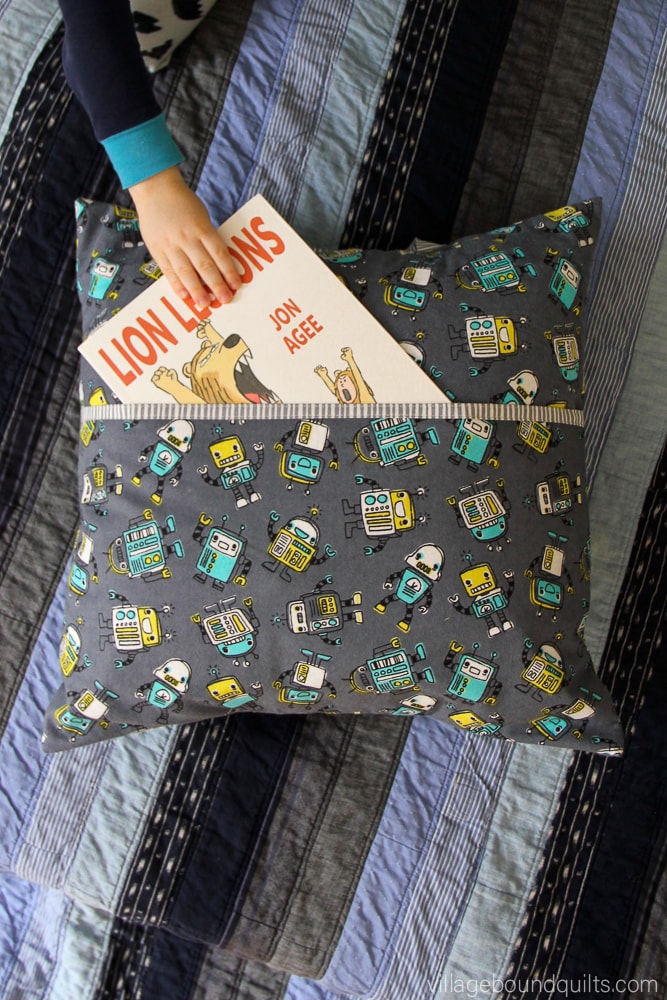
Stuff with a 20" pillow form and a good book. Enjoy!
And don't forget to post your finished pillow to Instagram! Tag me @villageboudnquilts and use the hashtag #ReadingPillowVBQ.

Book Recommendations: None of the links in this post are sponsored. They are just books we enjoy!
We LOVE to read at our house and over the years, we've had quite a few favorites! Here are some sugguestions on books to add to your pillow, ages 1-4:
Other favorites that we've enjoyed in the past few years have come from the Dolly Parton Imagination Library, and include:
Imagination Library:
Plenty of Love to Go Around (pictured)
Lion Lessons (pictured)
The Little Engine That Could
Peanut Butter & Cupcake
Excellent Ed
Oh No Gotta Go!
Hooray, a Piñata!
Last Stop on Market Street
And some early chapter books that we have been enjoying for Age 4-9 (to read-to your child, or your child to read alone):
My Father’s Dragon
The Princess in Black
Mercy Watson to the Rescue
Toys Go Out
Nate the Great
Wallace & Grace
Magic Tree House
Fortunately The Milk
Kenny and the Dragon
Looking for adult recommendations? Check out my favorite books here - I’m always adding new titles.
I can't wait to see your versions! Post your pictures to Instagram, and remember to tag me @villageboudnquilts and use the hashtag #ReadingPillowVBQ.

Please note that even though this is a free pattern/tutorial, all of the instructions are my copyrighted work. This pattern is for personal use only and cannot be reproduced or sold. Duplication of any kind is prohibited. All rights reserved.