
How to FPP: A Beginner's Guide to Foundation Paper Piecing
Have you seen a quilt with a load of paper on the back and wondered why in the world it was there? Or seen an incredibly complex block that was ‘made using FPP’ and had no clue what kind of quilty-magic was involved? If you’re relatively new to quilting, you may have heard the term FPP and thought, “WTF is FPP?!” FPP is Foundation Paper Piecing (sometimes just called paper piecing), a way of creating quilt blocks by sewing fabric to template-like paper (a foundation) using your sewing machine. It yields incredibly accurate quilt blocks and is often used to create precise shapes or pictures, or to sew very small pieces or odd angles. However, FPP can also be used for simple blocks too, to help make crisp lines and points.
Sewing FPP for the first time may seem a little confusing, but stick with the instructions through to the end and work slowly - you’re going to essentially be sewing a mirror image to the printed design on the paper, and the end result is SO worth it! First, let’s talk supplies and some important tips that will make FPP a breeze. (If you’re just here for a quick refresher on how to FPP, you can jump ahead to the how-to instructions).
Supplies
You can absolutely tackle FPP if you already have your basic quilting notions, but there are a few optional notions that you might consider acquiring that will make it easier to FPP. Full disclosure: I use only the basics! I quilt using traditional piecing most of the time, so I haven’t found the necessity to purchase any of the extras yet. I’ve split the list below into basics and extras:
BASICS
Sewing machine: I love my Juki TL-2010Q (purchased in 2019) - it’s super accurate and powerful and is not computerized.
Thread: 50wt cotton thread - I most often use either Gutermann or Aurifil for all of my quilt projects.
Needles: an 80/12 Universal is just fine. Sewing through paper will dull your needle, so be sure to change it after an FPP project.
Cutting mat: a good self-healing cutting mat can literally last you years! Mine is at least 6 years old and going strong.
Rotary cutter or scissors: I use this rotary cutter with these blades for both fabric and paper. Cutting through paper will dull your blades so be sure to change it after an FPP project. For fabric I use these scissors and for paper I use whatever scissors I find in my kids craft supplies, which is usually something cheap from Target. Whichever cutting tool you choose, please, for the love of (insert whatever noun you prefer here), do NOT use your fabric scissors to cut FPP paper templates!
Quilt ruler: Any size larger than 5” should work, but 12” is preferable. Or if you have one 6” x 24” acrylic ruler that will work too!
Seam ripper: my favorites are mini Seam-Fix, but any seam ripper will do. Just like your other blades, a seam ripper will eventually dull, so replace it when you find that you really have to tug on threads to rip through them.
Fine pins: not fine as in good (though that’s important too), but fine as in thin - bulky pins will bend the paper and can cause puckers and shifting - not so helpful. Fine pins, 0.60mm or smaller, and at least 1.5” in length are easiest to use. Glass headed pins will resist iron damage. (And remember to replace these when they are showing signs of wear, like when they are snagging or pulling fabric or are bent.)
Iron: hot, dry iron when sewing with paper - don’t want to wet the paper or ink with steam! I’ve owned the same Rowenta iron for over 10 years and love it. Its taken quite a beating, including being dropped a handful of times, and still heats like a dream.
Clear tape: basic tape is all you might need. Seems like an odd notion for sewing, but this is in case of paper pieces ripping, needing to be sewn more than once, or if perforations are causing paper templates to fall apart while sewing. Just tape it up and sew again! (But be careful to avoid ironing over any pieces with tape - opt for finger-pressing or seam-rolling instead on those pieces).
EXTRAS
Add-A-Quarter ruler: add-a-quarter ruler is a super handy tool that I would consider a basic notion if you find you will be sewing FPP often. It removes the risk of cutting away seam allowances as you’re working, saving loads of trouble (if that sounds confusing, it will make sense once we get into the How-To FPP).
Seam roller: If ironing paper freaks you out and your worried finger pressing might not be enough, consider a seam roller to ‘press’ seams as you work through your FPP project. It can be super handy for traditional piecing or English paper piecing too!
Washable glue: I stick with the classics: I’ve never had an issue with Elmer’s Glue Sticks or Elmer’s School Glue washing out, so that’s what I use.
Foundation paper: papers for foundation piecing are slightly thinner than standard printer paper and are supposed to be easier to tear out at the end of your project. I’ve only every used cheap, white printer paper - whatever’s cheapest at the shop!
Cardstock or postcard: A stiff but relatively thin piece of cardstock can aid in folding back papers as you sew. You can usually scavenge a post card from your junk-mail pile or a magazine subscription insert to help here (And again, if that sounds confusing now, don’t worry about it - all will be explained in the How-To).
Tweezers: fine-pointed crafting tweezers (or whatever you have) can be helpful when removing papers from tight corners or under seam allowances.
Light box: A light box is the biggest FPP luxury item, in my opinion. I find a daytime window or my phone flashlight to work just fine for me if I’m working to align fabric to FPP templates.
SEVERAL IMPORTANT FPP TIPS
Aside from gathering supplies, there are also several tips to consider before you begin sewing any FPP project:
Measure the 1" test block on each printed page. If the Template pages are printed at 100%, they should be correct, BUT... Check every page! Most FPP Templates will have a test square to measure (all VBQ FPP Templates do, for sure!) so be sure to print one page and measure for accuracy before you go crazy printing multiple copies. Make sure it is correct, because if your test block measures inaccurately, your block will be inaccurate. And remember, you can use standard printer paper for printing FPP templates.
Notate or color-code your templates. In each paper template section, write or color-in the fabric that will be used. Think of this process as a sort of color-by-number swatch guide. This will help avoid using the incorrect fabric and having to unpick seams.
Expect to make mistakes. That's what the seam ripper is for! But it's easier to pull out large stitches than small ones, so...
When in doubt, baste first. If you're not sure if you've lined up your fabric to your FPP template correctly, try increasing your stitch length to 5.0 and sew a basting stitch first. Fold fabric open to check if it fits and adjust as needed. Remove the basting stitches before sewing with a smaller stitch length. Apply clear tape over any ripped papers, as needed, then simply re-sew.
Use a sewing needle just for FPP. Sewing through paper will dull your needle substantially. Use a needle that's nearing its end-of-use or expect to change your needle at the end of the project
Use a smaller stitch length. Drop your stitch length below 2.0, preferably to 1.5 or even 1.2 to help make substantial perforations in the paper while you sew. This perforates the paper more, making it easier to remove papers at the end. Be aware that if your stitches are too small, you might find your FPP templates falling apart along perforations on their own (just tape those back together), so find a sweet-spot that works best for you and your machine.
Lock every seam. Locking seams is simple - at the start of sewing, stitch forward a few stitches, then backstitch to the start of the line. At the end, sew all the way to the end of the line, then backstitch a few stitches, and finish sewing to the end again. This keeps your stitches extra secure as you work.
Use a cutting tool just for FPP. Just like sewing through paper will dull your needles, cutting through paper will dull your blades. Use a rotary cutting blade that's nearing its end-of-use or expect to change your blade at the end of the project. You may also choose to use paper scissors instead but might find it difficult to cut cleanly through the fabric this way.
Pay attention to seam allowances when trimming. As you work through each template, be careful not to cut away your seam allowances. An add-a-quarter ruler can be helpful here, but isn't required.
There will be fabric wasted. As much as I dislike fabric waste and try to limit it, FPP does generate a lot of odd scraps so have a bin nearby to collect your trimmings. For ideas on how to reuse or re-purpose those really tiny bits, check out this blog post: 10 Ways to Use Fabric Trimmings.
How to FPP
Phew, that was a lot of information! Okay, let’s dive in - one of the most important (and potentially confusing) parts of Foundation Paper Piecing is that the printed templates you see are actually going to end up being the back of the quilted block. Another way to think of this is that the finished FPP is going to be a mirror image of the template. Let’s get started.
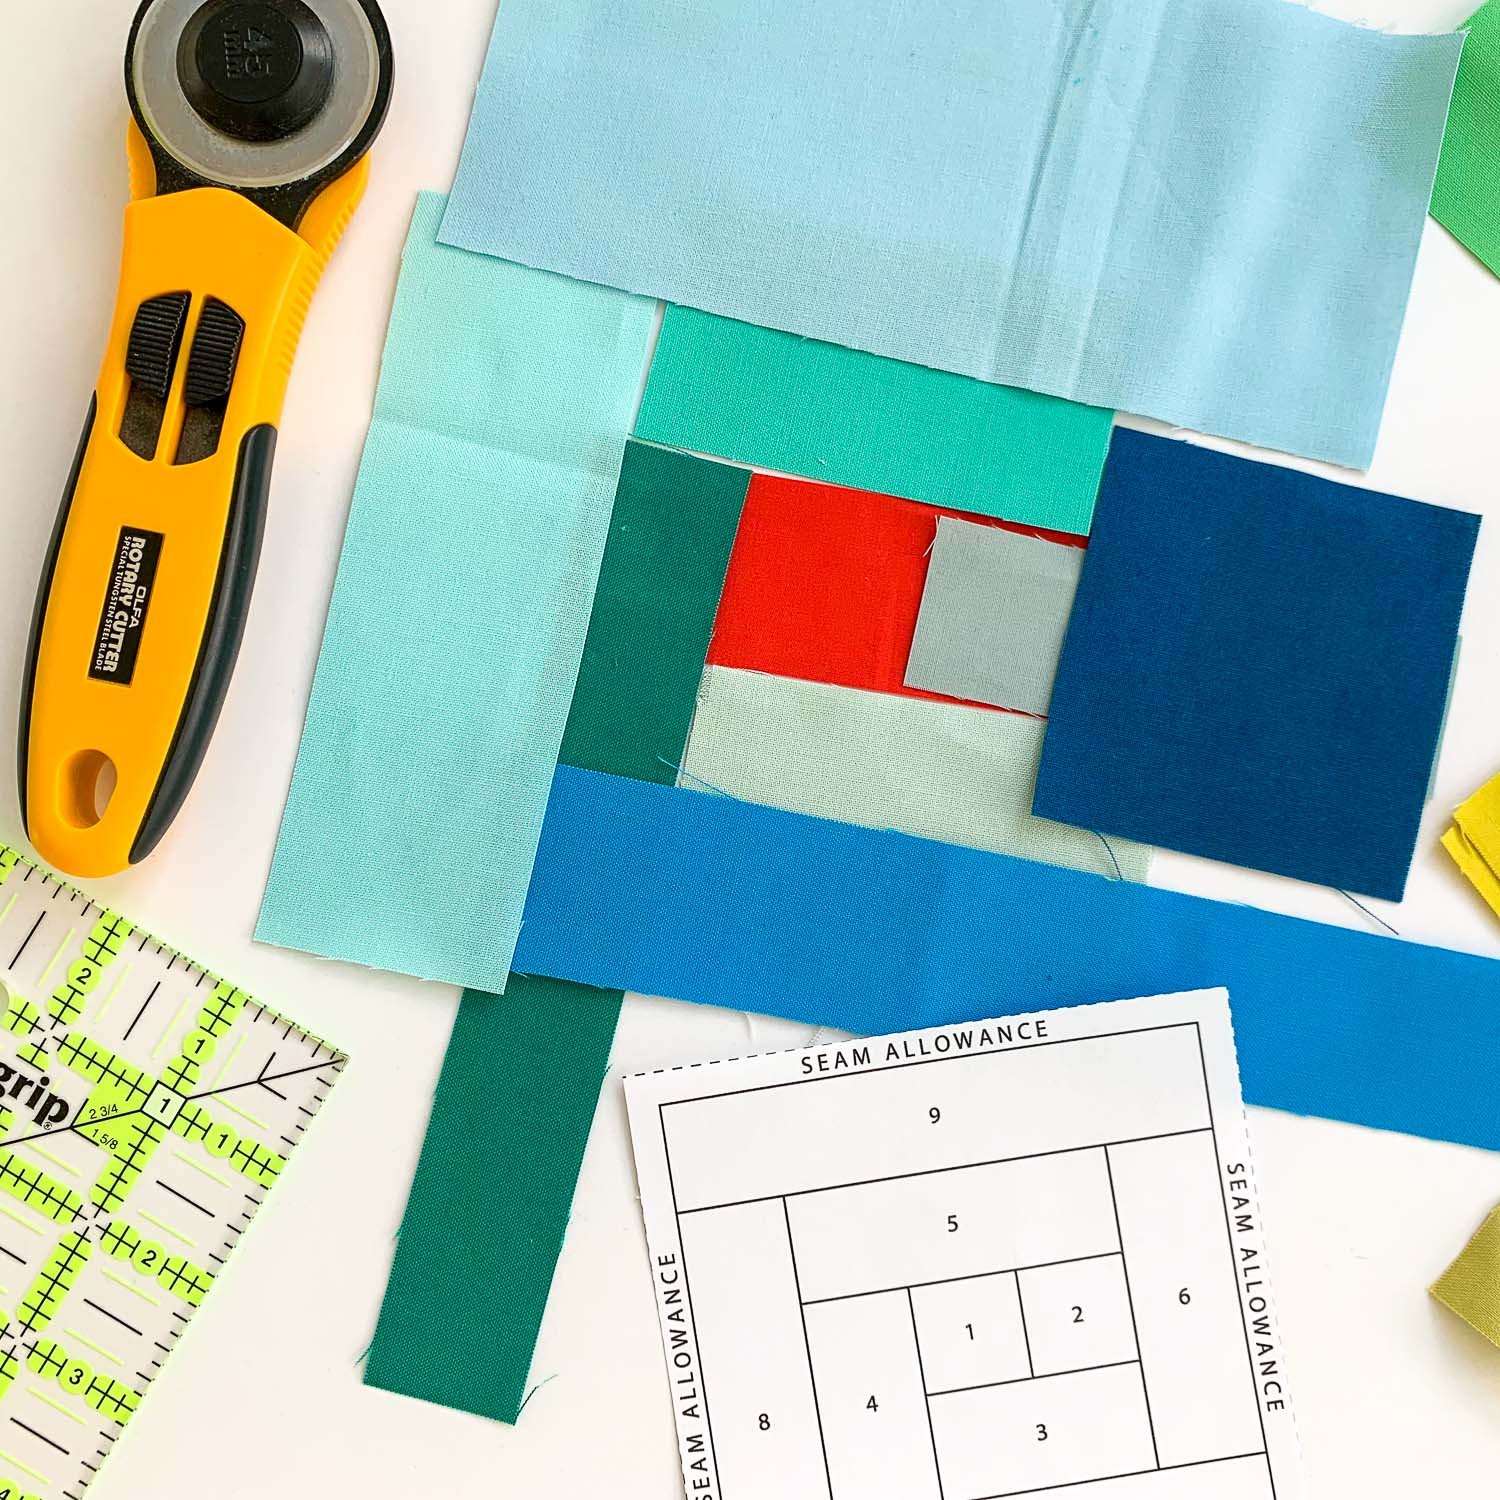
Choosing fabric from scraps
print templates & gather fabric
If the pattern you are following has specific fabric measurements designated for each template piece, be sure to cut out all your fabric and label the pieces carefully to stay organized. If there are no template-specific fabric cutting instructions specified, gather your fabric scraps or yardage that you plan to use for the project and prepare to cut fabric pieces to fit your template(s) as you sew.
If you haven’t already done so, print one copy of the template(s) you will be using and measure the test square for sizing accuracy (all VBQ FPP templates have a 1” test square to measure). Once you have verified your sizing, print the remaining template(s) in as many copies as the pattern specifies, and cut them out. If desired, take time now to label or color-code each template space with fabric choices.
Village Bound Quilts FPP patterns available:
LOG CABIN BLOCK: 4” TEMPLATE (FREE!)
COURTHOUSE STEPS BLOCK: 4” TEMPLATE (FREE!)
SNOWFLAKE STAR PATTERN: 12” BLOCK (AVAILABLE HERE)
If this is your first time working with an FPP project, be sure to work slowly and complete one template piece at a time. Until you get in a good groove, avoid chain piecing or batch piecing, as that can easily get confusing when sewing FPP.
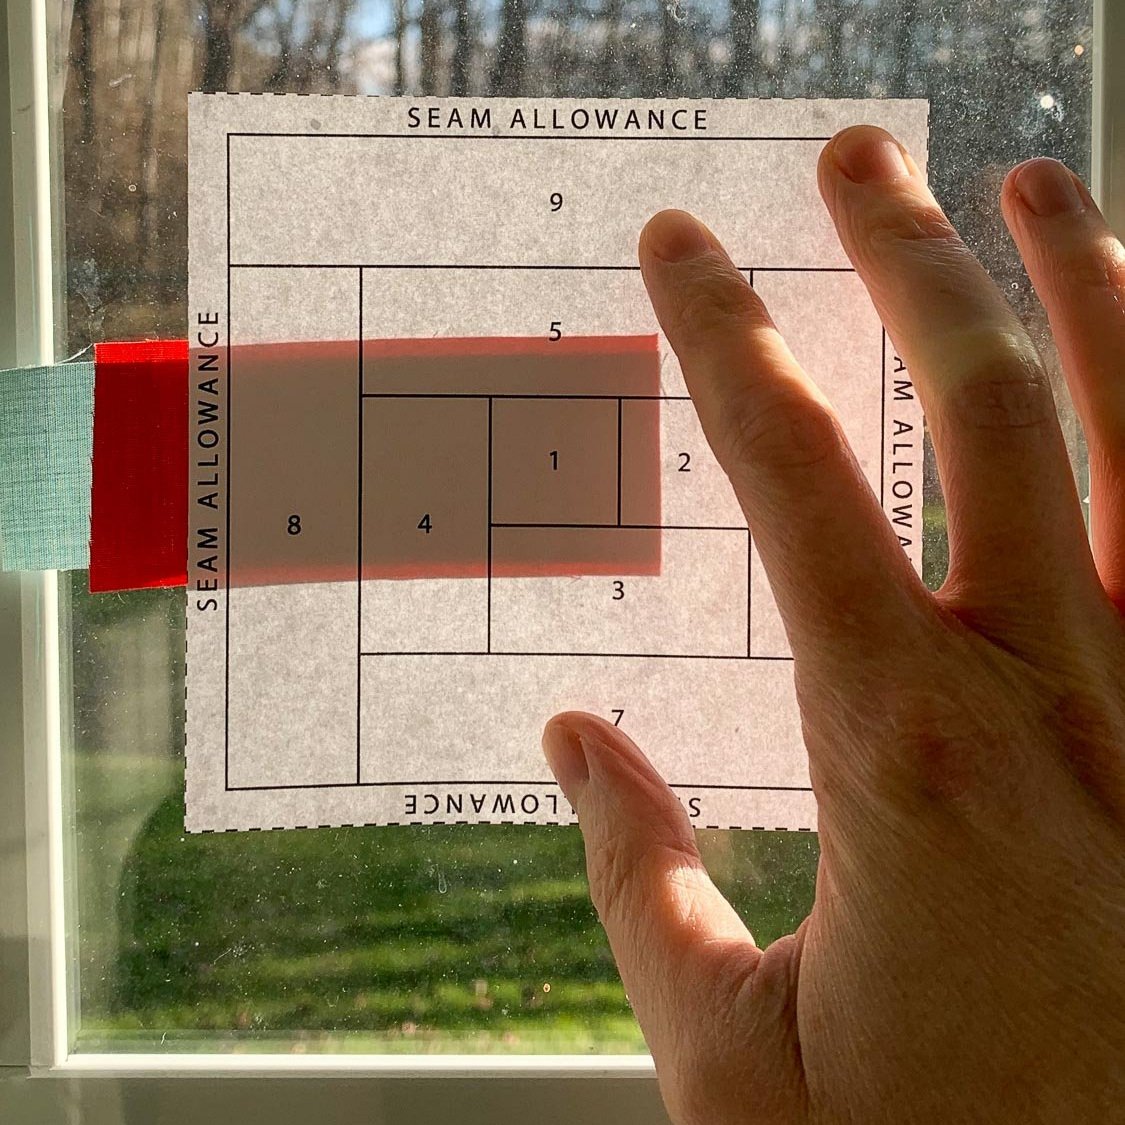
ALIGN THE FIRST FABRIC
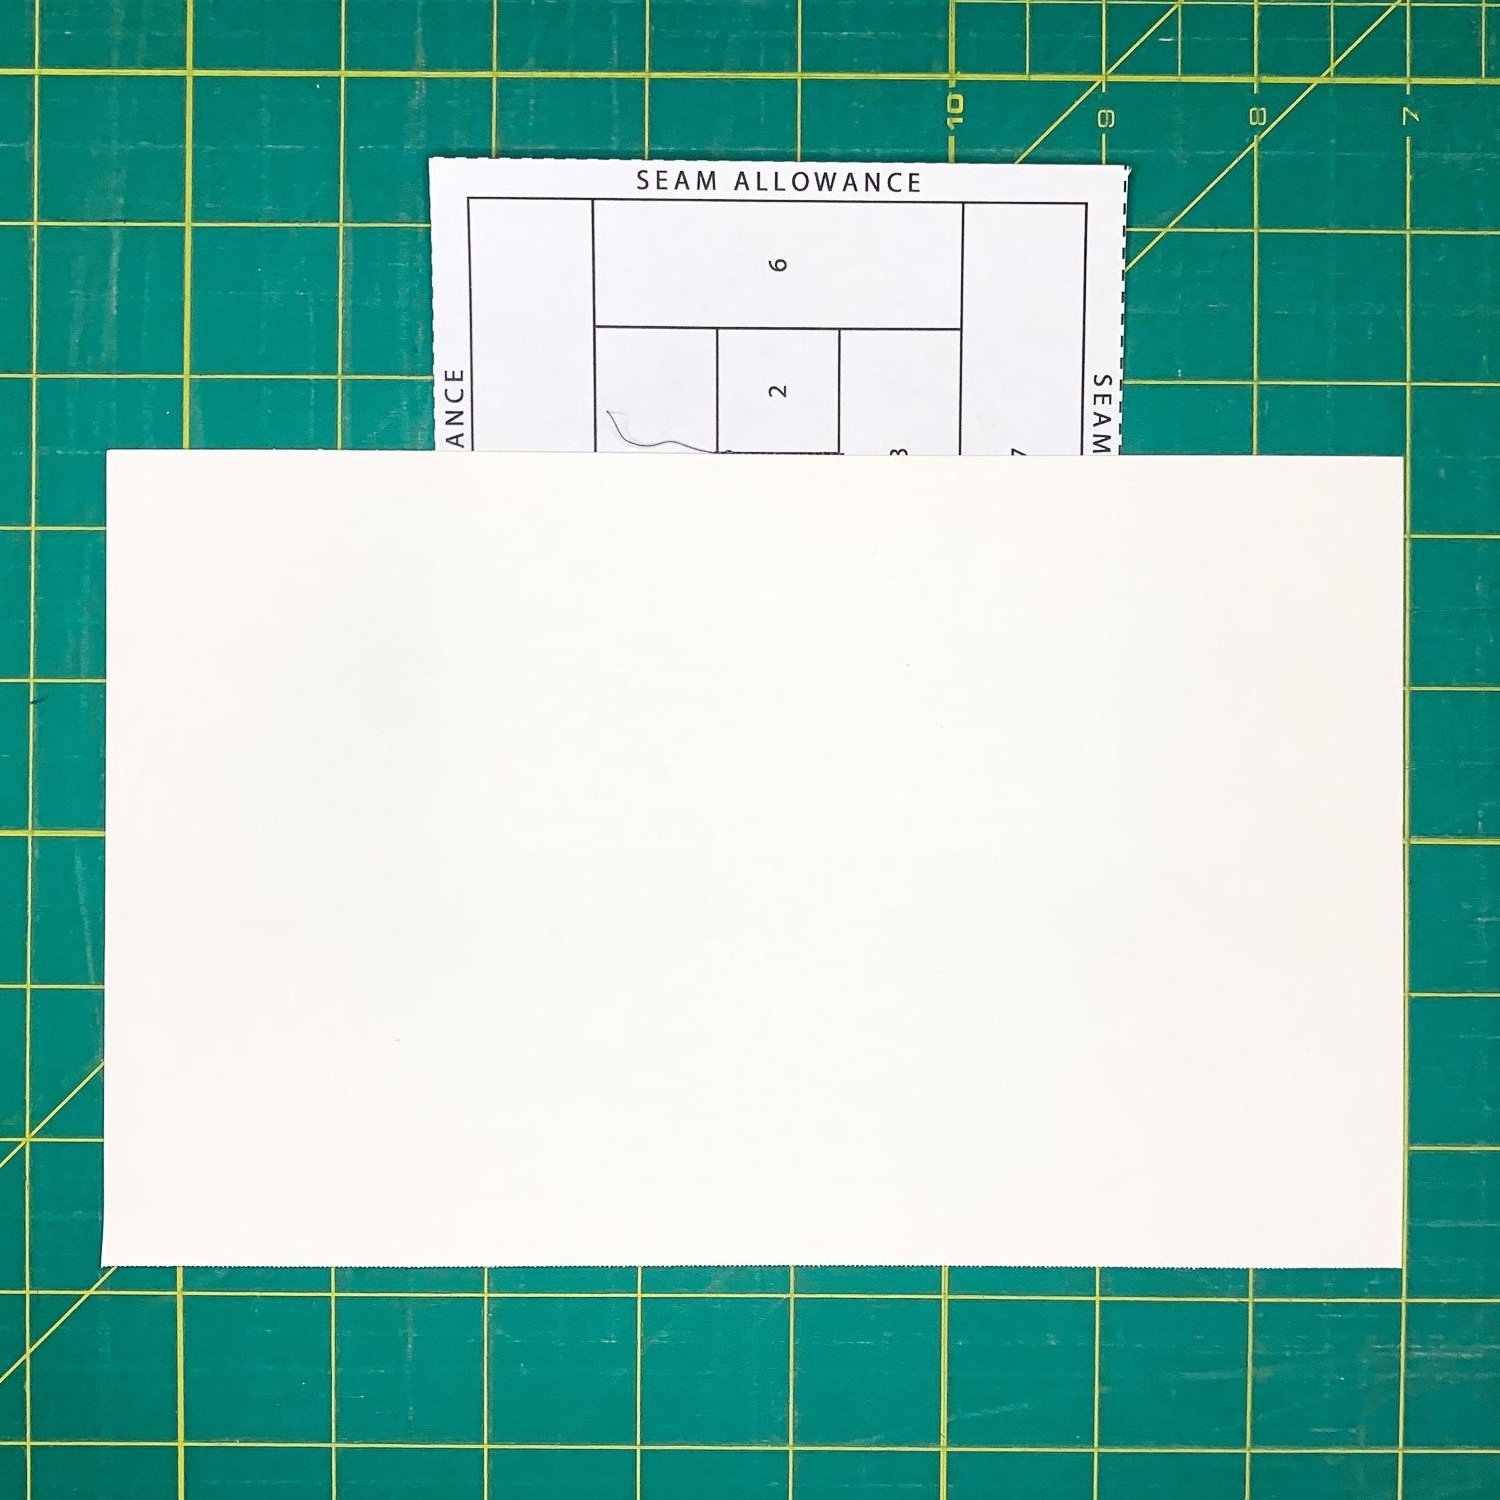
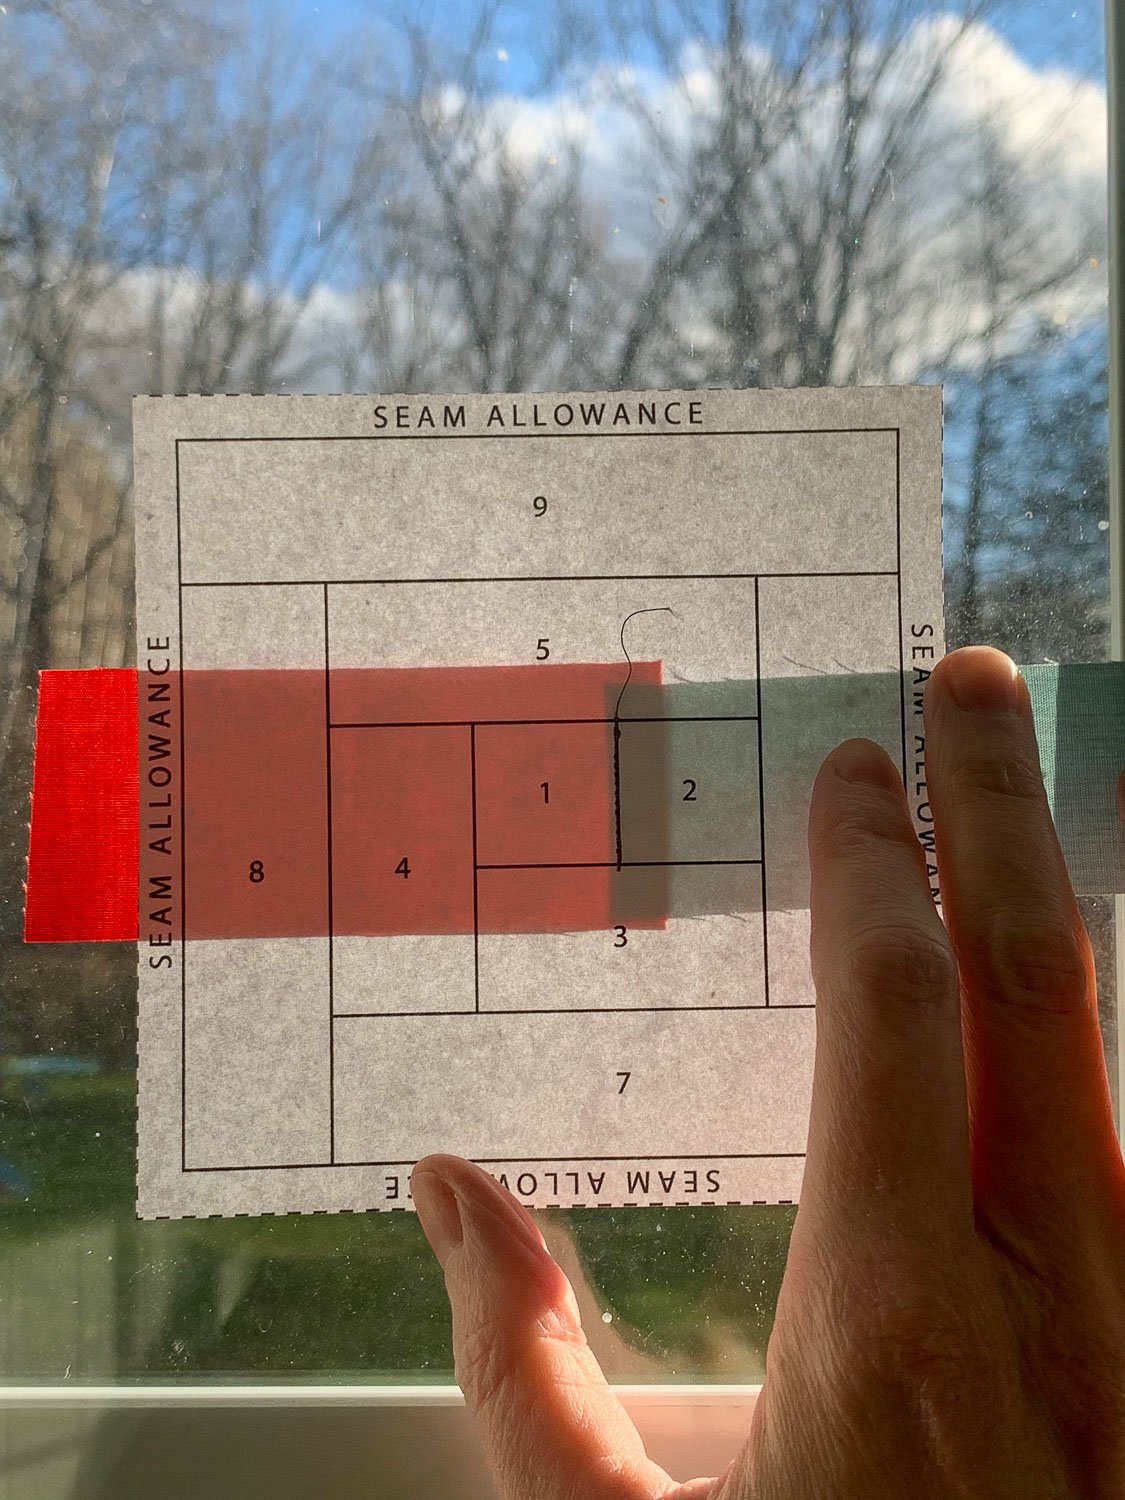
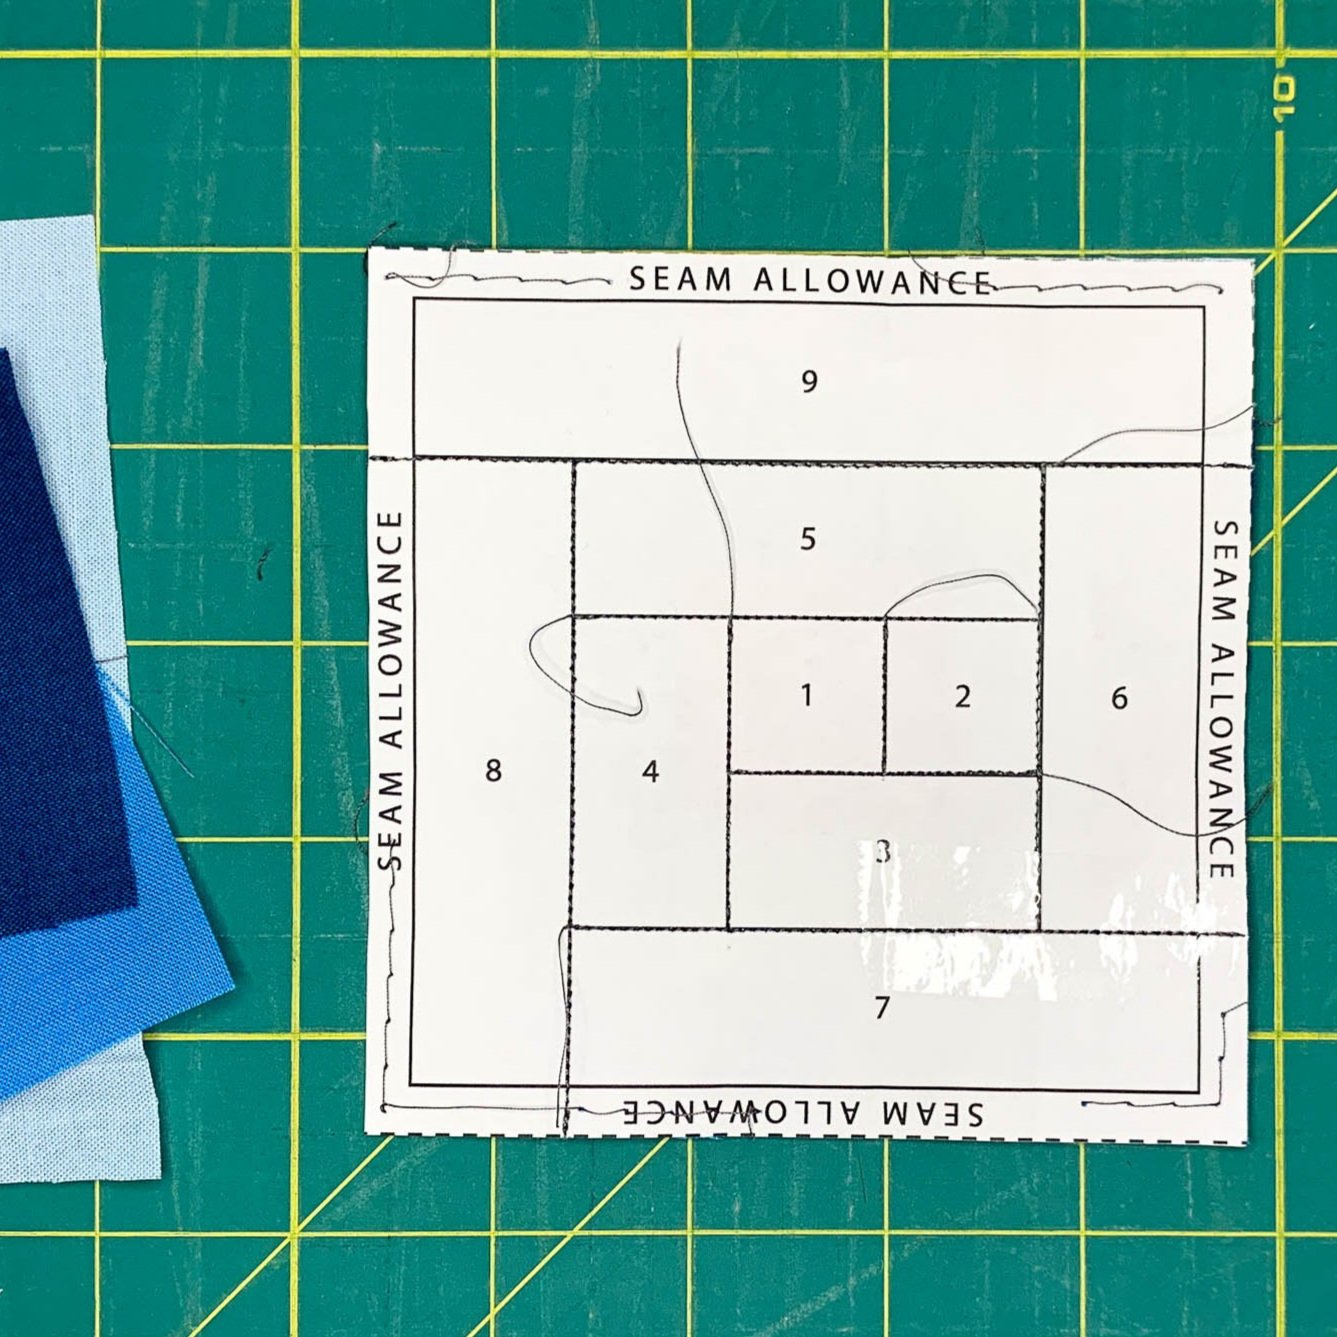
Find the space labeled 1 or A1 on your template and cut a piece of fabric or use a scrap measuring at least 1/4” larger than the space on all sides. With the printed side of the template facing you, place the fabric under the template, wrong sides together. The right side of the fabric will be facing out, away from you. Hold the fabric and template up to a bright window or light to make sure there is at least 1/4” of fabric surrounding the template lines. You may choose to use a small dab of glue in the center of the template space or a pin on the paper side to hold the fabric in place.

Make sure the 1 space on the template is surrounded on all sides by at least 1/4” of fabric.

This shows the fabric aligned incorrectly - there is not enough fabric surrounding space 1.
The first piece of fabric in any template is the only one that you will align this way - the remaining fabrics will always be placed right sides together with fabric 1 (which is now secured to your template) while sewing.
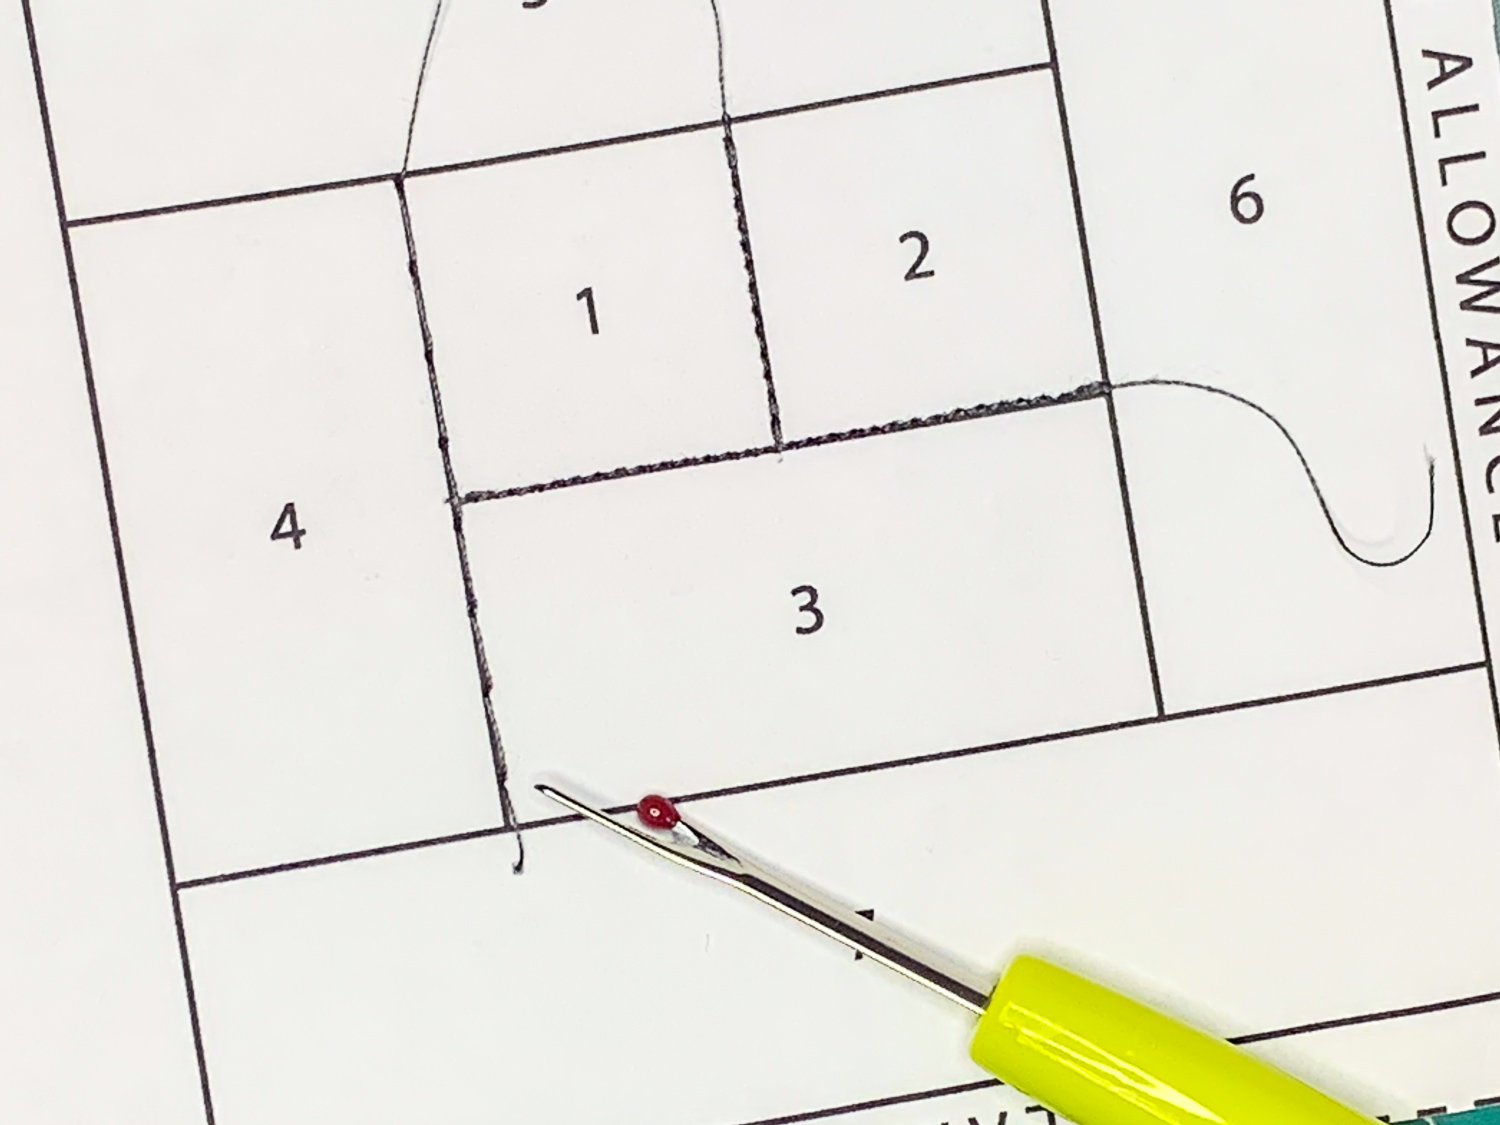
SEW THE FIRST SEAM
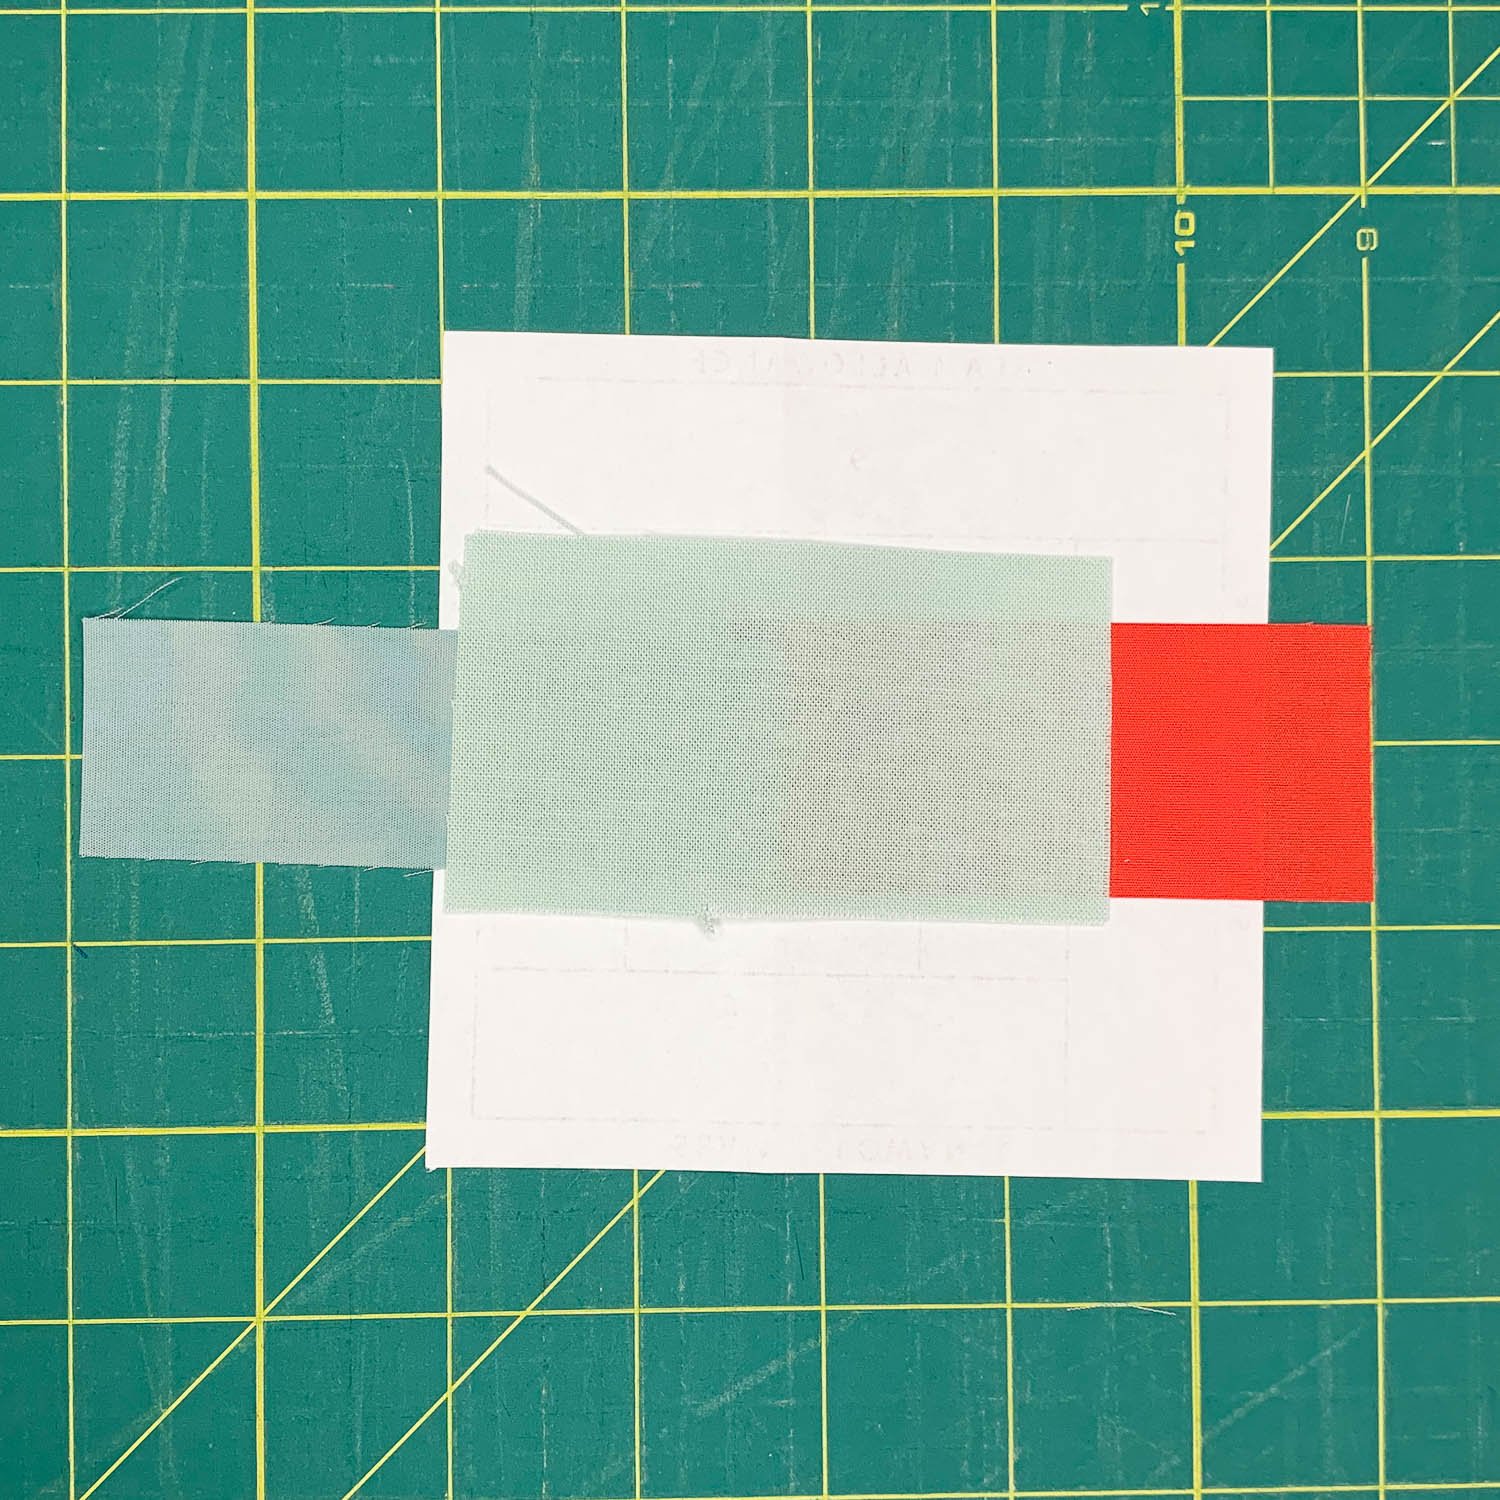
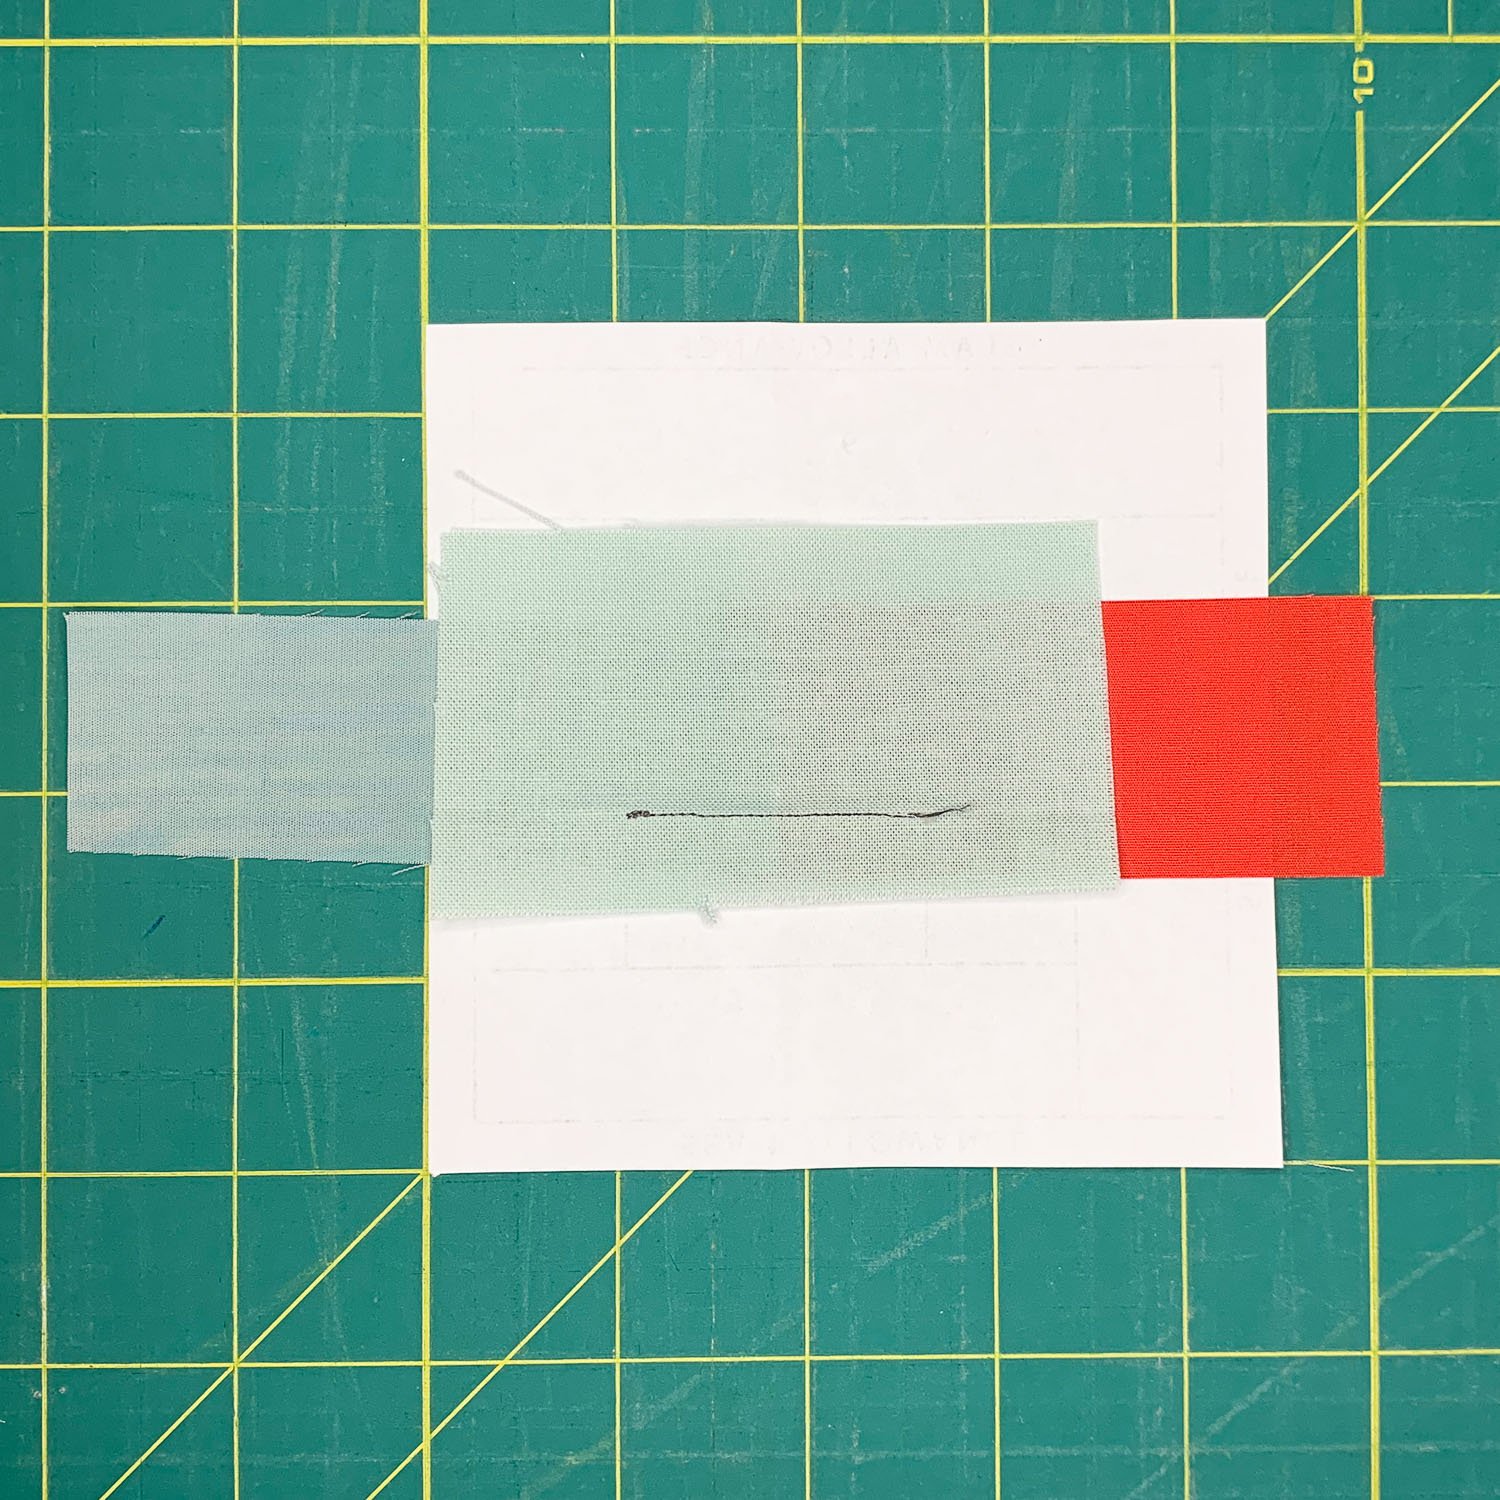
Prepare your fabric for space 2 (or A2) using fabric measuring a minimum of 1/4” larger than the space on all sides. If space 2 is an odd shape or angle, use a piece of fabric that is substantially larger than the space to ensure it will cover the space once sewn and folded open. Align fabric 2 right sides together over fabric 1, making sure there is at least 1/4” overlapping the template line between space 1 and 2. This small overlap will become the seam allowance between 1 and 2. Fabric 2 will mostly be overlapping Fabric 1 at this point, but when opened up it should cover the entire space 2 with at least 1/4” of fabric around the edges outlining space 2. Use a pin on the paper side to hold the fabric in place, or hold fabric 1, fabric 2 and the template tightly together as you move to your sewing machine.
With the printed side of the paper facing up, lower the needle into one end of the line that divides space 1 and 2, then lower the presser foot. Lock the seam at the start, sew directly on the line, and lock the seam again at the other end of the line.
Align fabric 2 right sides together with fabric 1, leaving at least 1/4” overlapping the template line that joins space 2 with 1.

Hold the fabrics tightly (or us a pin) and insert the needle at the start of the line that joins space 2 to 1.

Locking the seam at the start and stop, sew along the line joining space 2 to 1 using a stitch length <2.
Remember: if you’re not sure if a cut of fabric is going to correctly cover the space after sewing, use a basting stitch first to test the coverage area. When you’re happy with the alignment, remove basting stitches and sew with a smaller stitch length, locking the ends as usual.
An example of a basting stitch along the line joining space 4 to the template, in order to test if the fabric is aligned correctly when folded open.

Once it is determined the fabric coverage is sufficient, remove the basting stitch and sew using a stitch length <2, locking stitches at the start and stop of the line.
TRIM THE SEAM ALLOWANCE
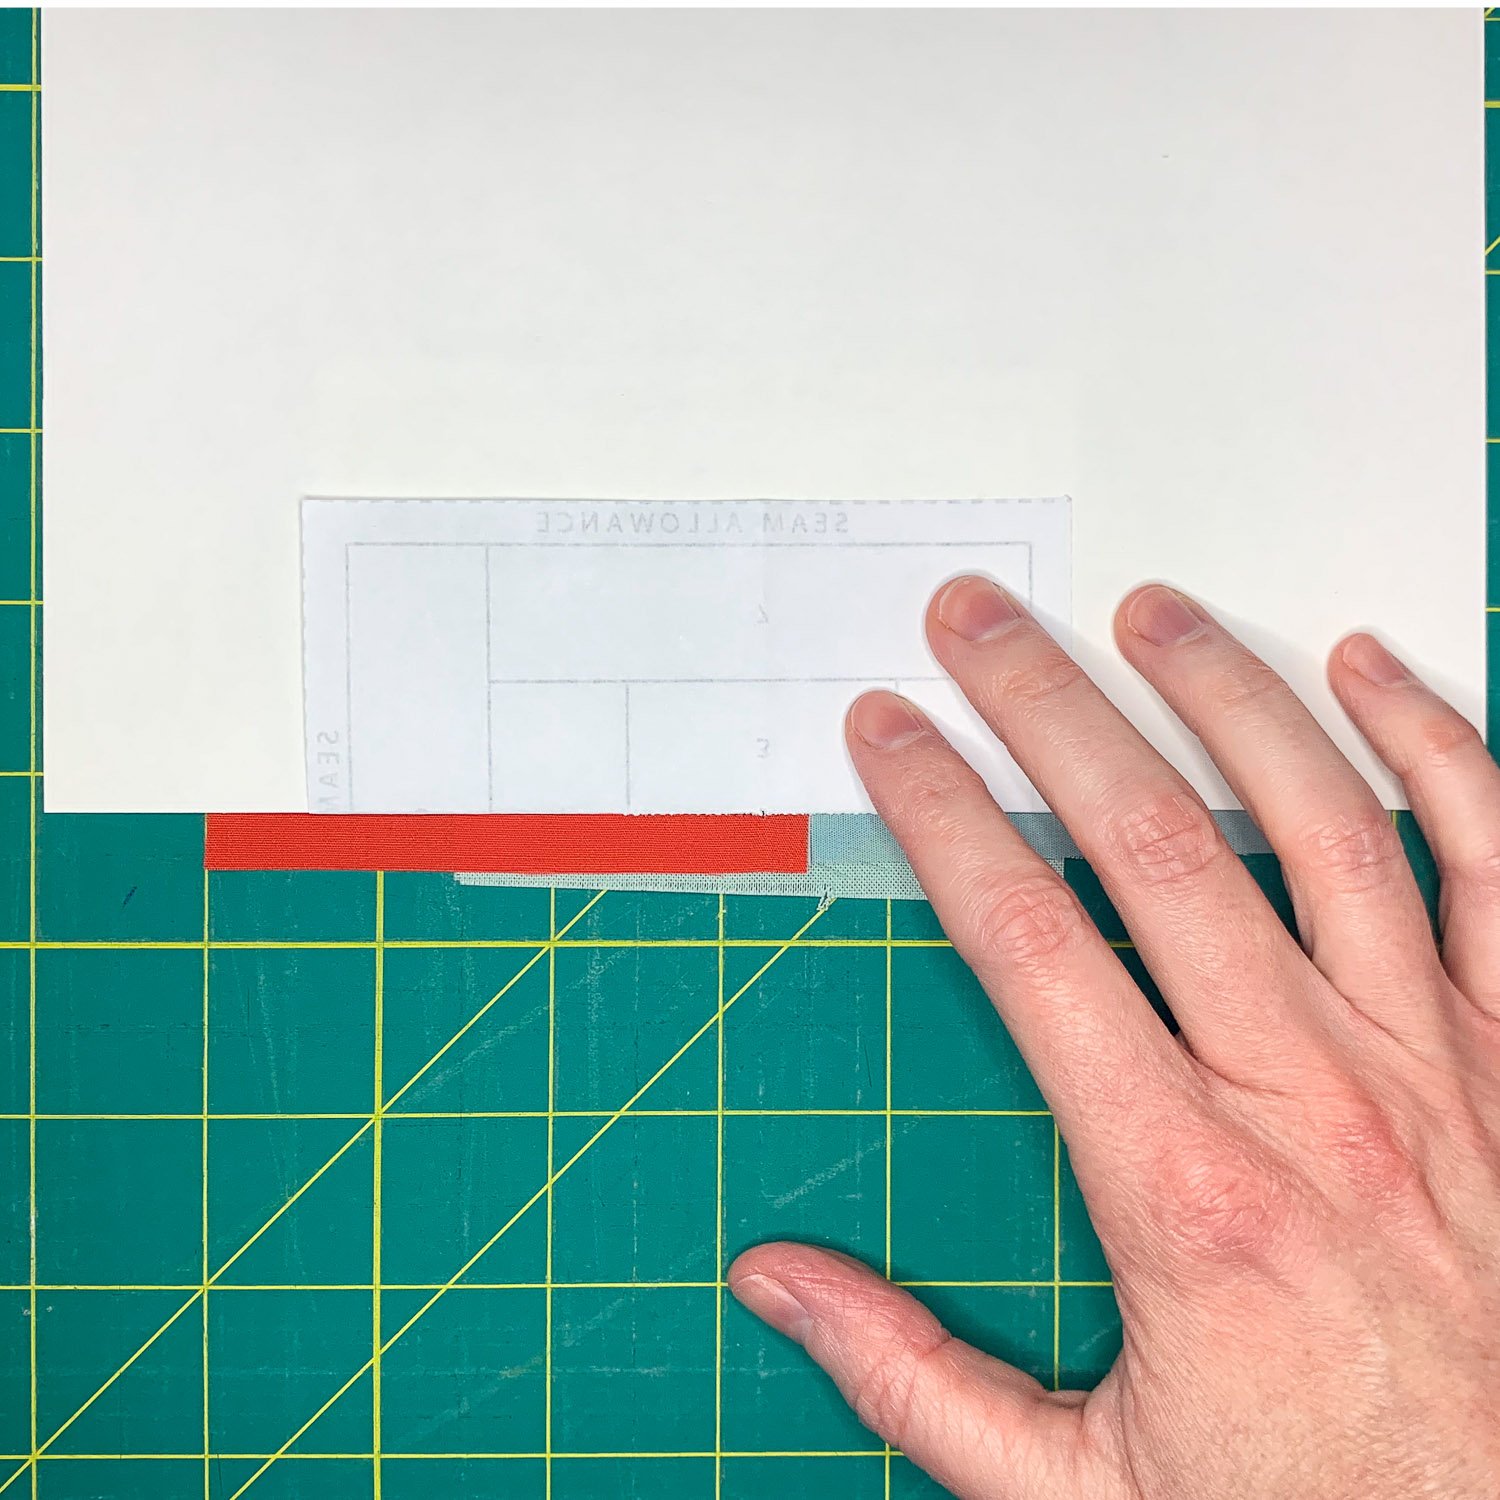
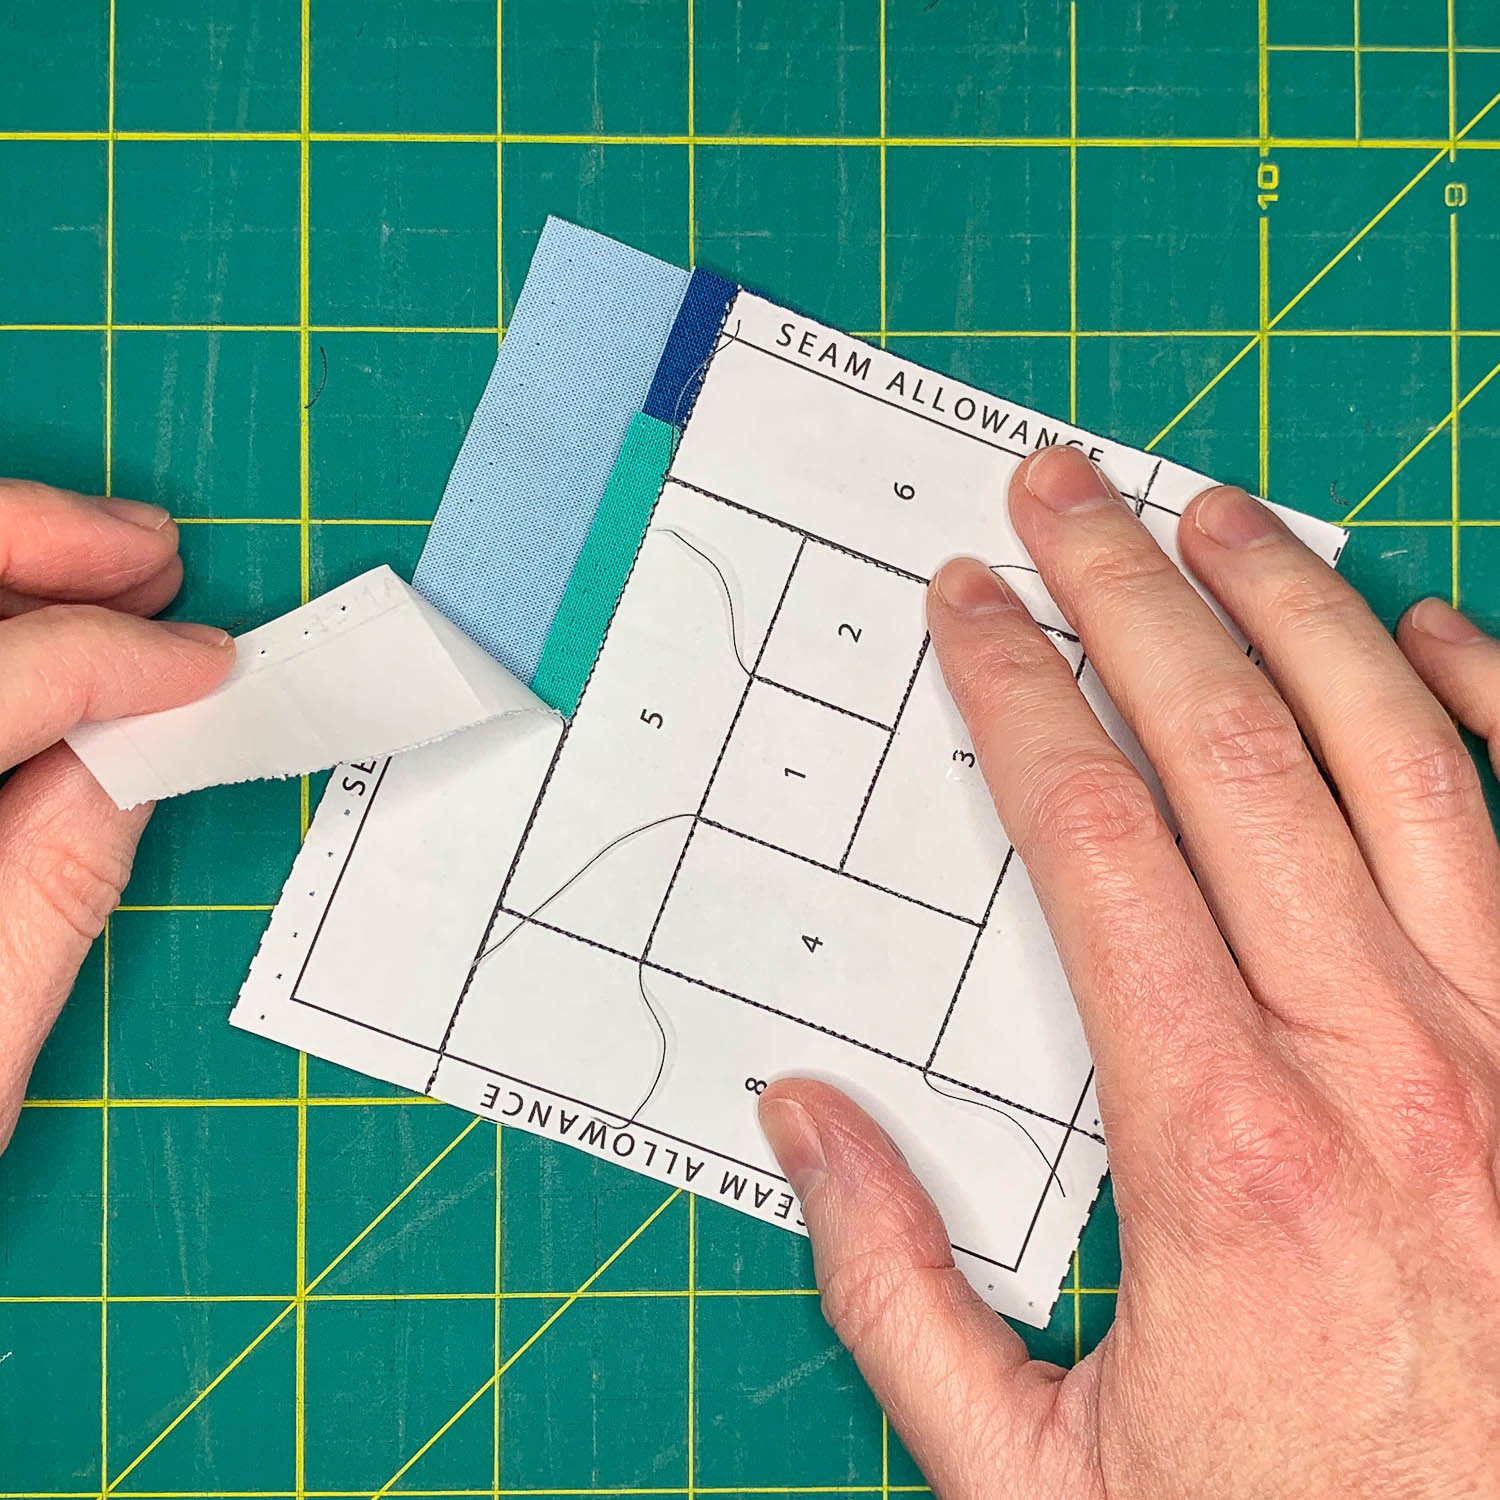
Remove the Template from your machine and check that fabric 2 is still fully covering space 2 with at least 1/4” fabric around the edges. Leaving fabric 1 and fabric 2 right sides together, place the template printed paper side up on your cutting mat. Fold back the paper along the sewn seam, exposing the seam allowance. If the sewn seam does not extend to the edges of the template, use cardstock as needed to hold along the sewn line to help make a straight fold across the template.
Use cardstock as needed to hold along the sewn line to make a straight fold across the template.

Fold back the paper along the sewn line.

Folded template shown without the cardstock. The exposed seam allowance is along the folded edge, ready for trimming.
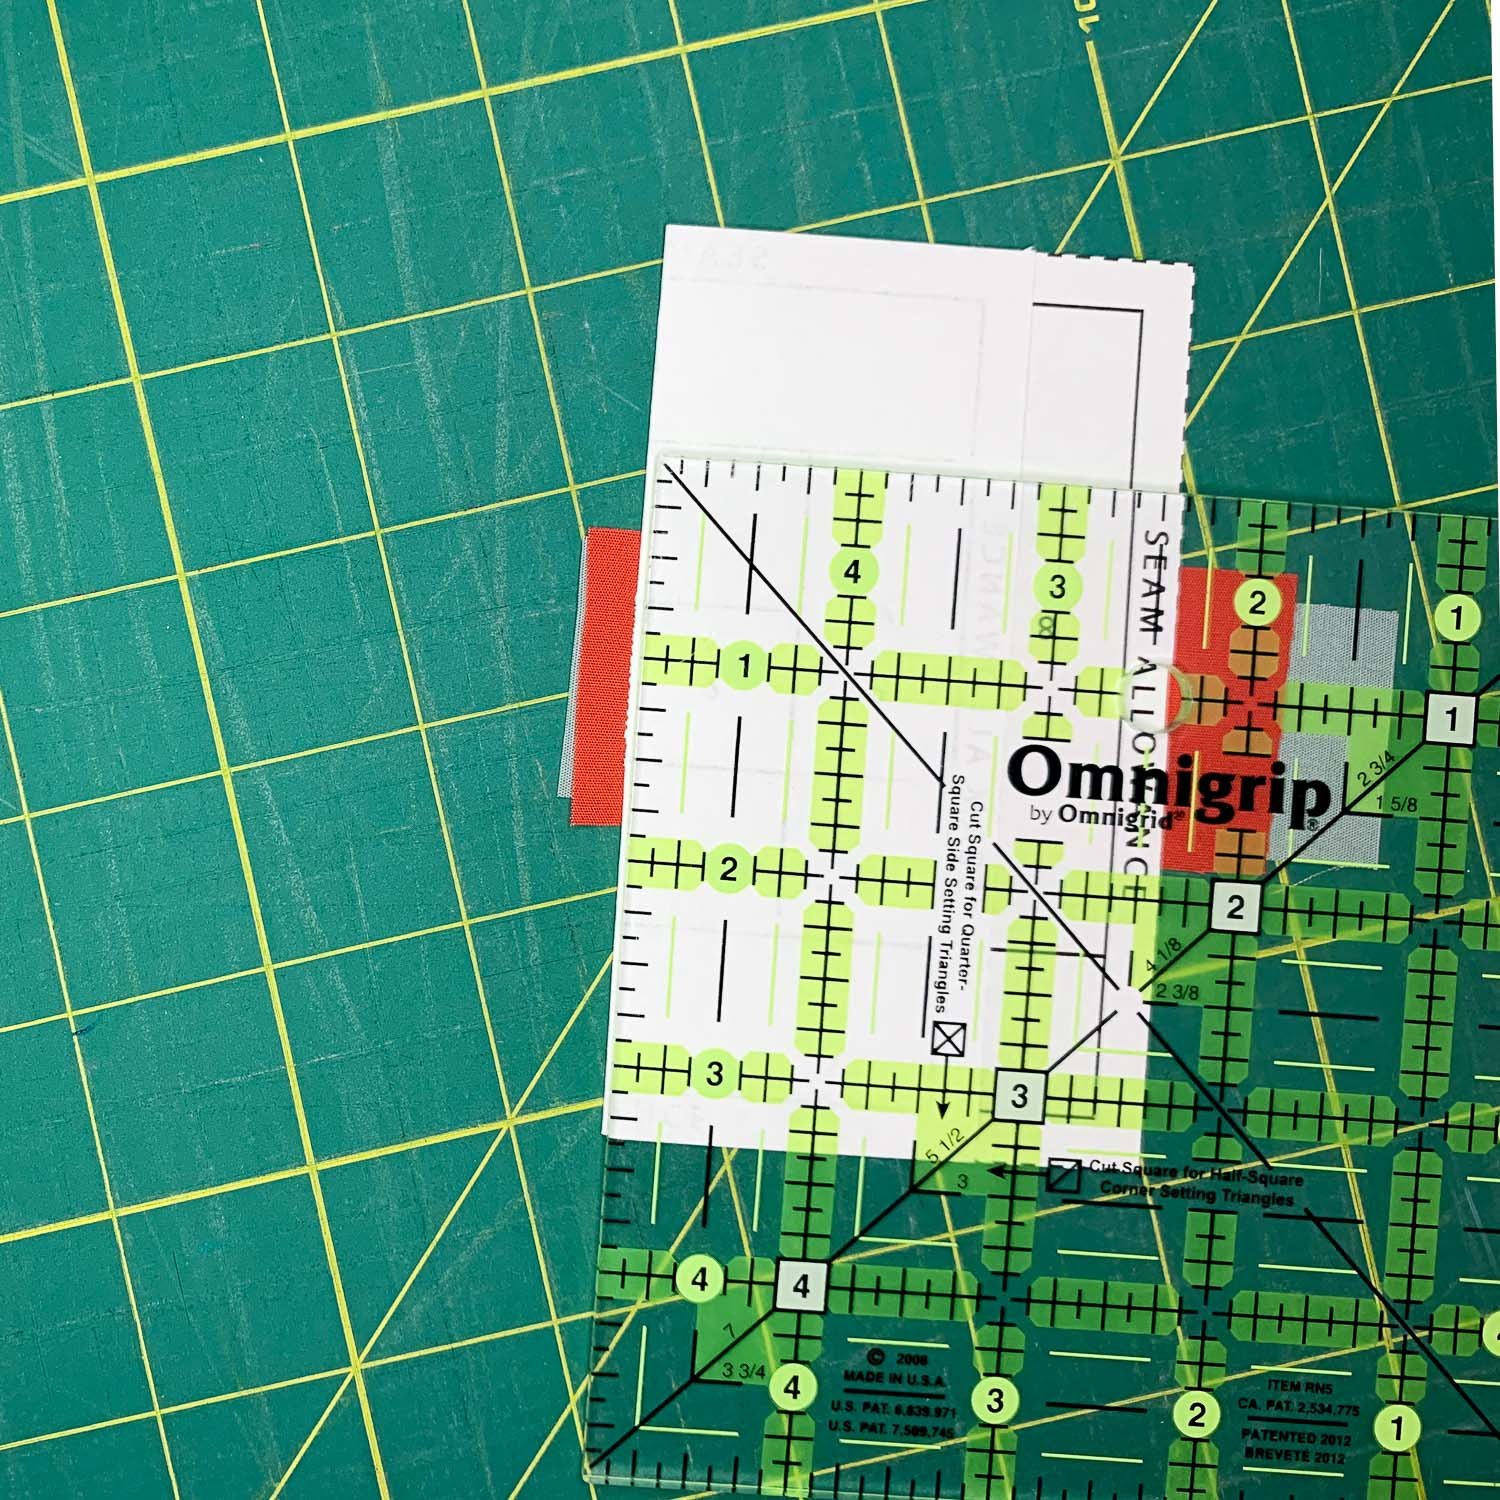
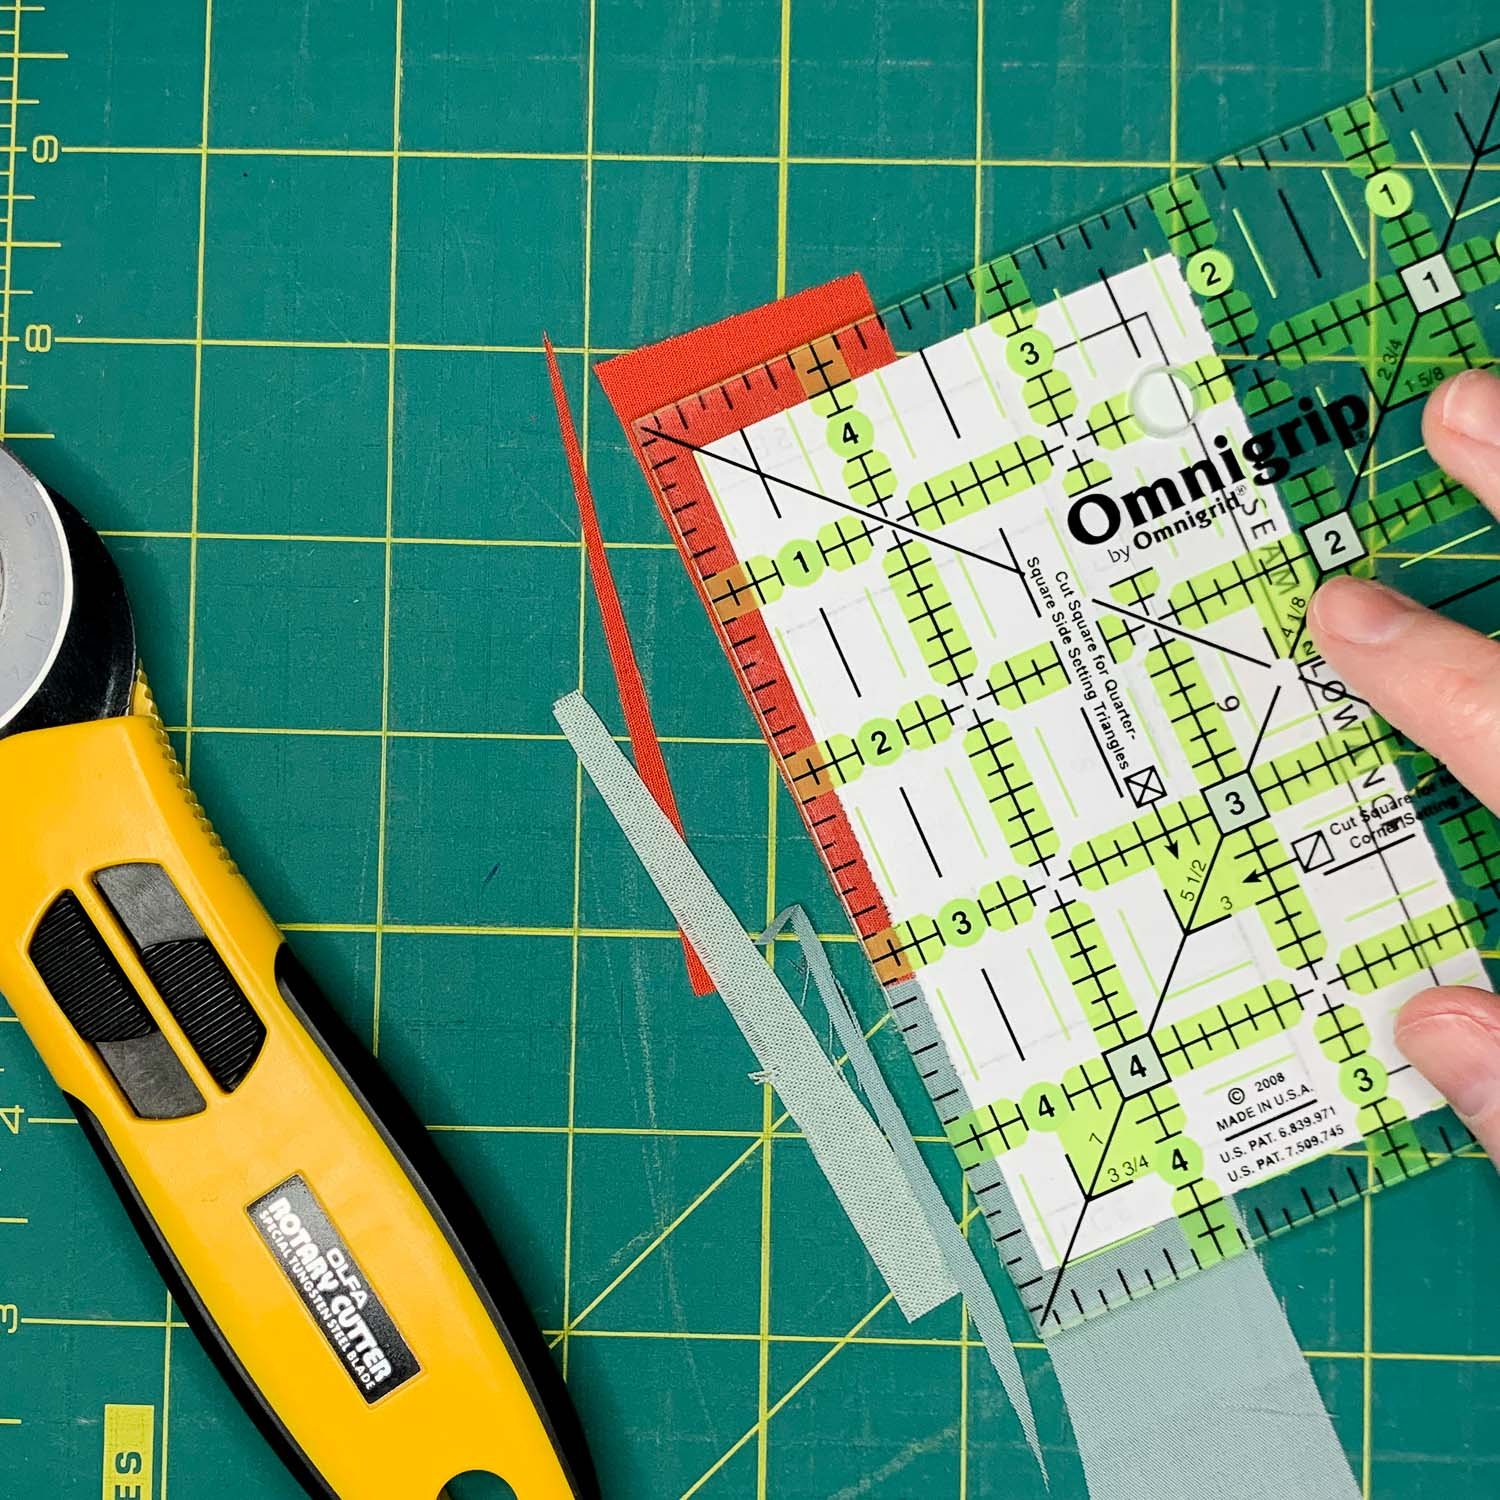
Using a quilting ruler and rotary cutter, DO NOT align the ruler with the folded paper edge, or the seam allowance will be lost. Instead, align the 1/4” mark of the ruler along the folded paper edge, then trim away any excess.
I’ve accidentally cut away the seam allowance many times when sewing FPP projects, and had to cut new fabric to sew again. This is why the add-a-quarter ruler can be helpful! It has a lip that automatically adds 1/4” to the straight edge it’s aligned with, so the risk of cutting away your seam allowance is basically eliminated.

Align the 1/4” mark of the ruler along the folded paper edge, then trim away any excess beyond the seam allowance.
This shows the ruler aligned incorrectly - the 1/4” seam allowance will be cut off.
PRESS
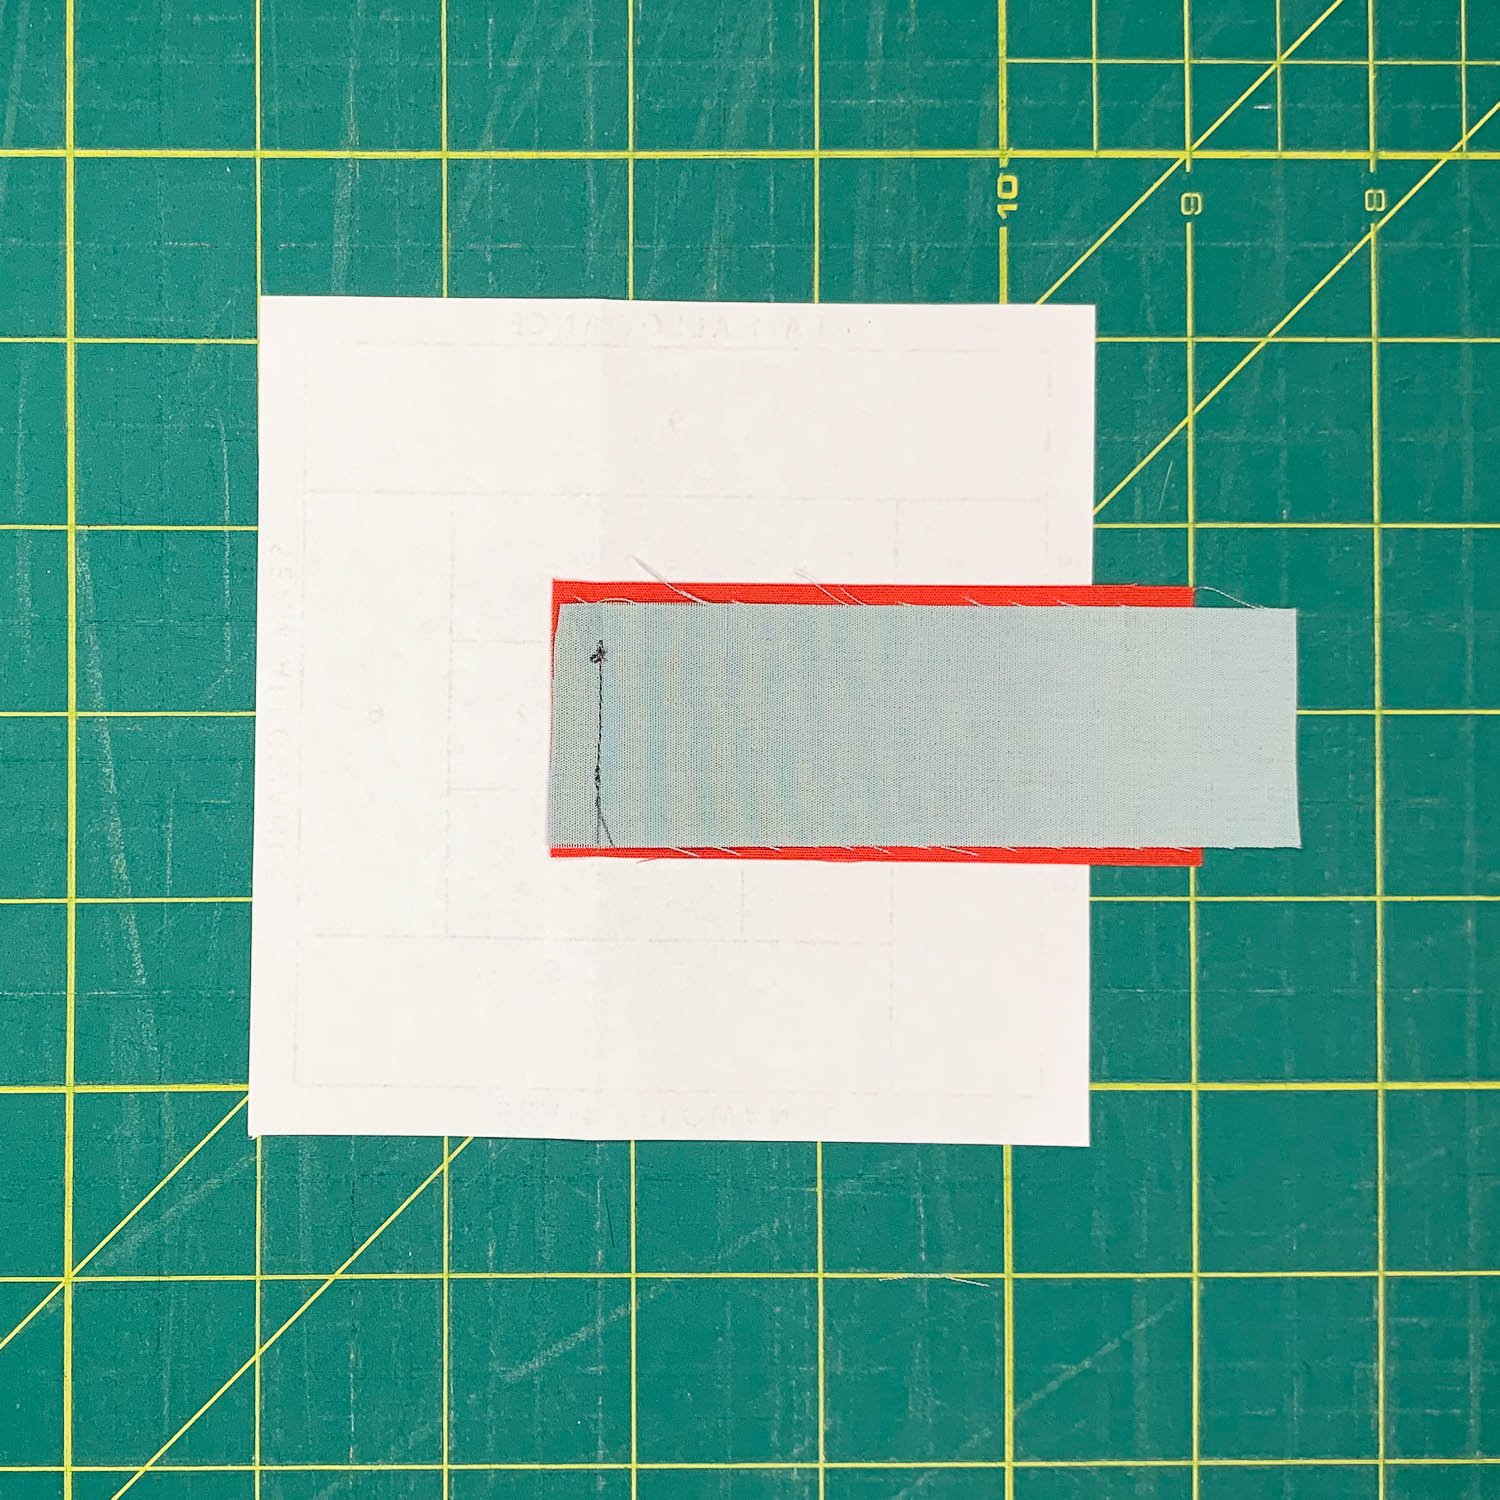
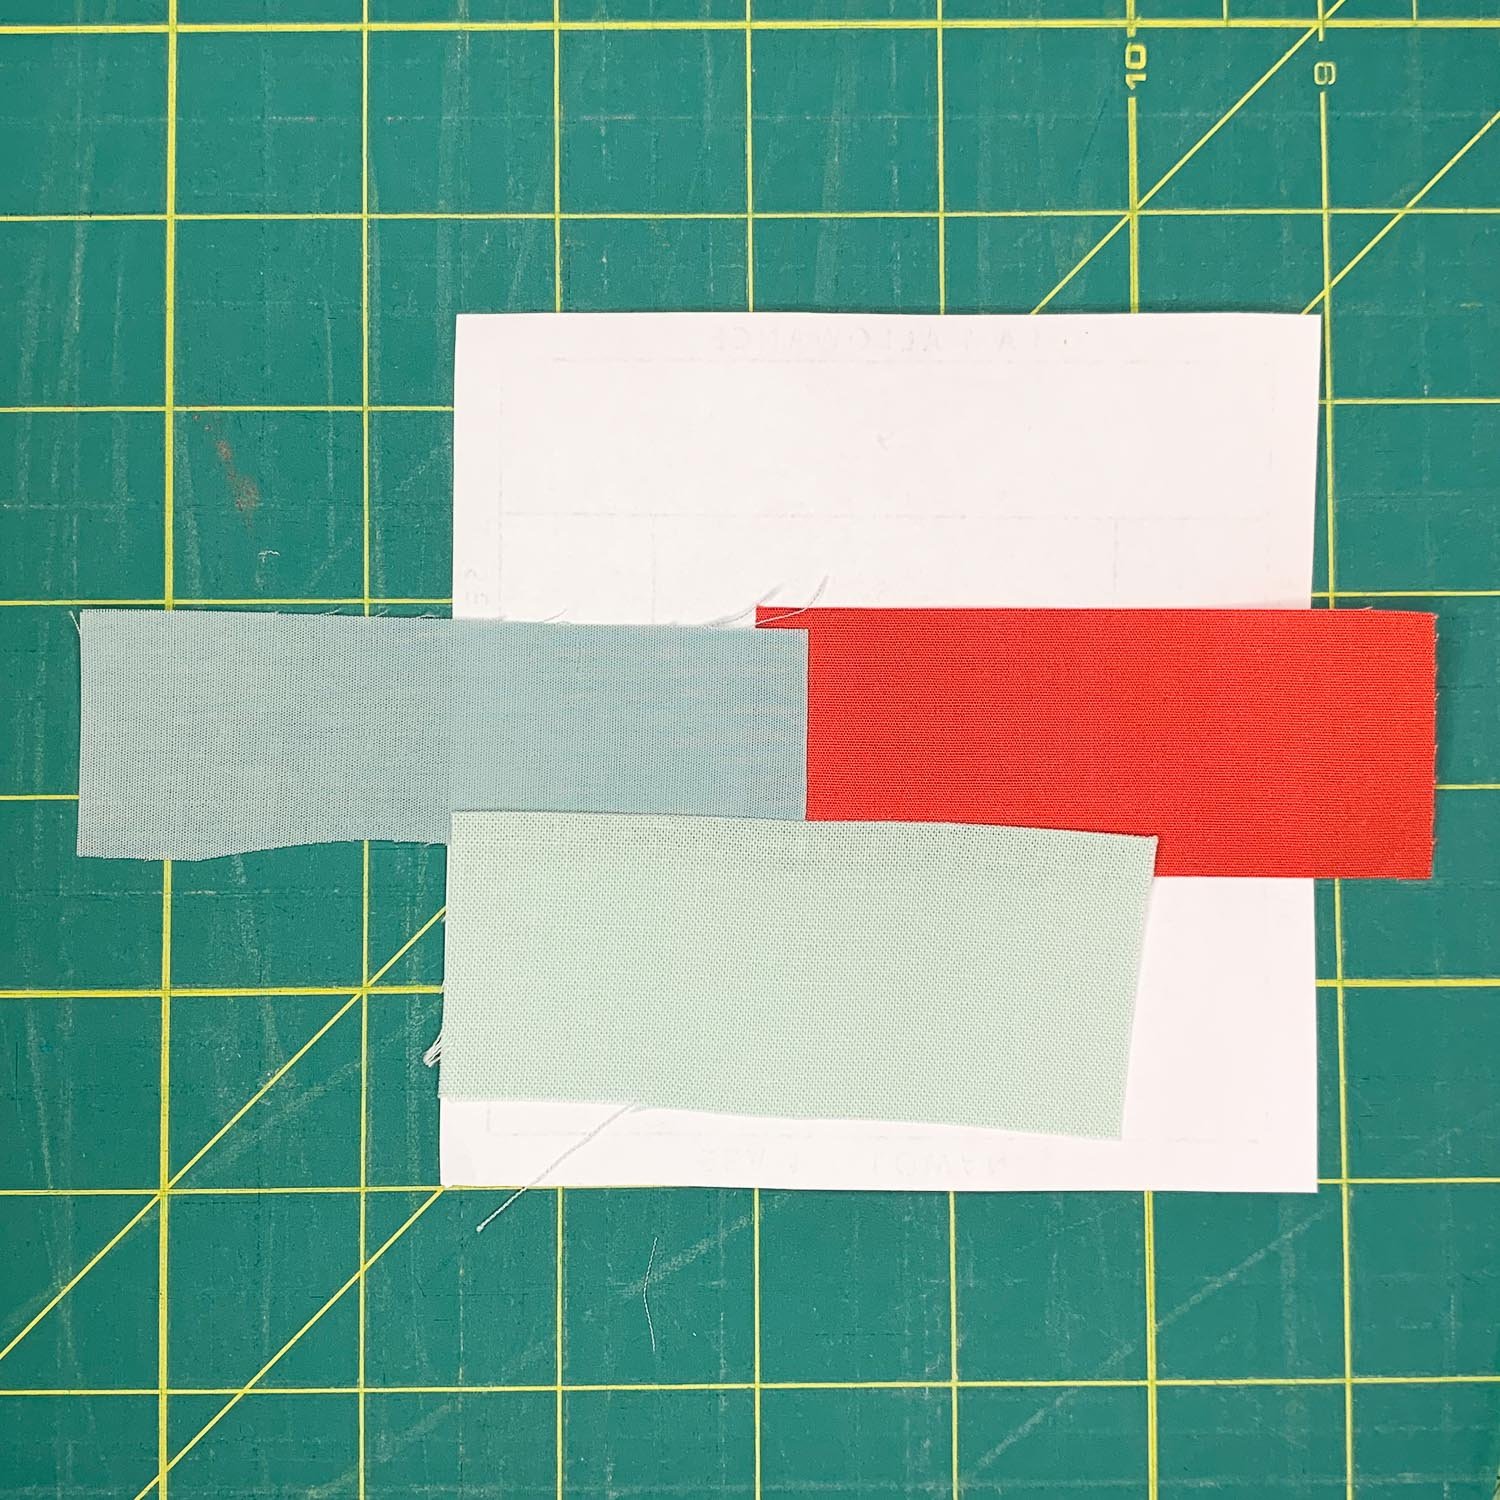
After trimming, unfold the template and place it flat, fabric side up, and open fabric 2. Press using a hot, dry iron (or seam roller or finger press). Your seam allowance will automatically press to the side.
After trimming the seam allowance, unfold the template and place it flat, fabric side up.
Press fabric 2 open.
When fabric 2 is opened, you can see the seam allowance pressed towards space 2, and there is at least 1/4” fabric surrounding all sides of space 2.
ALIGN, SEW, CHECK, FOLD, TRIM, PRESS, REPEAT
Now we just repeat until the template is complete!
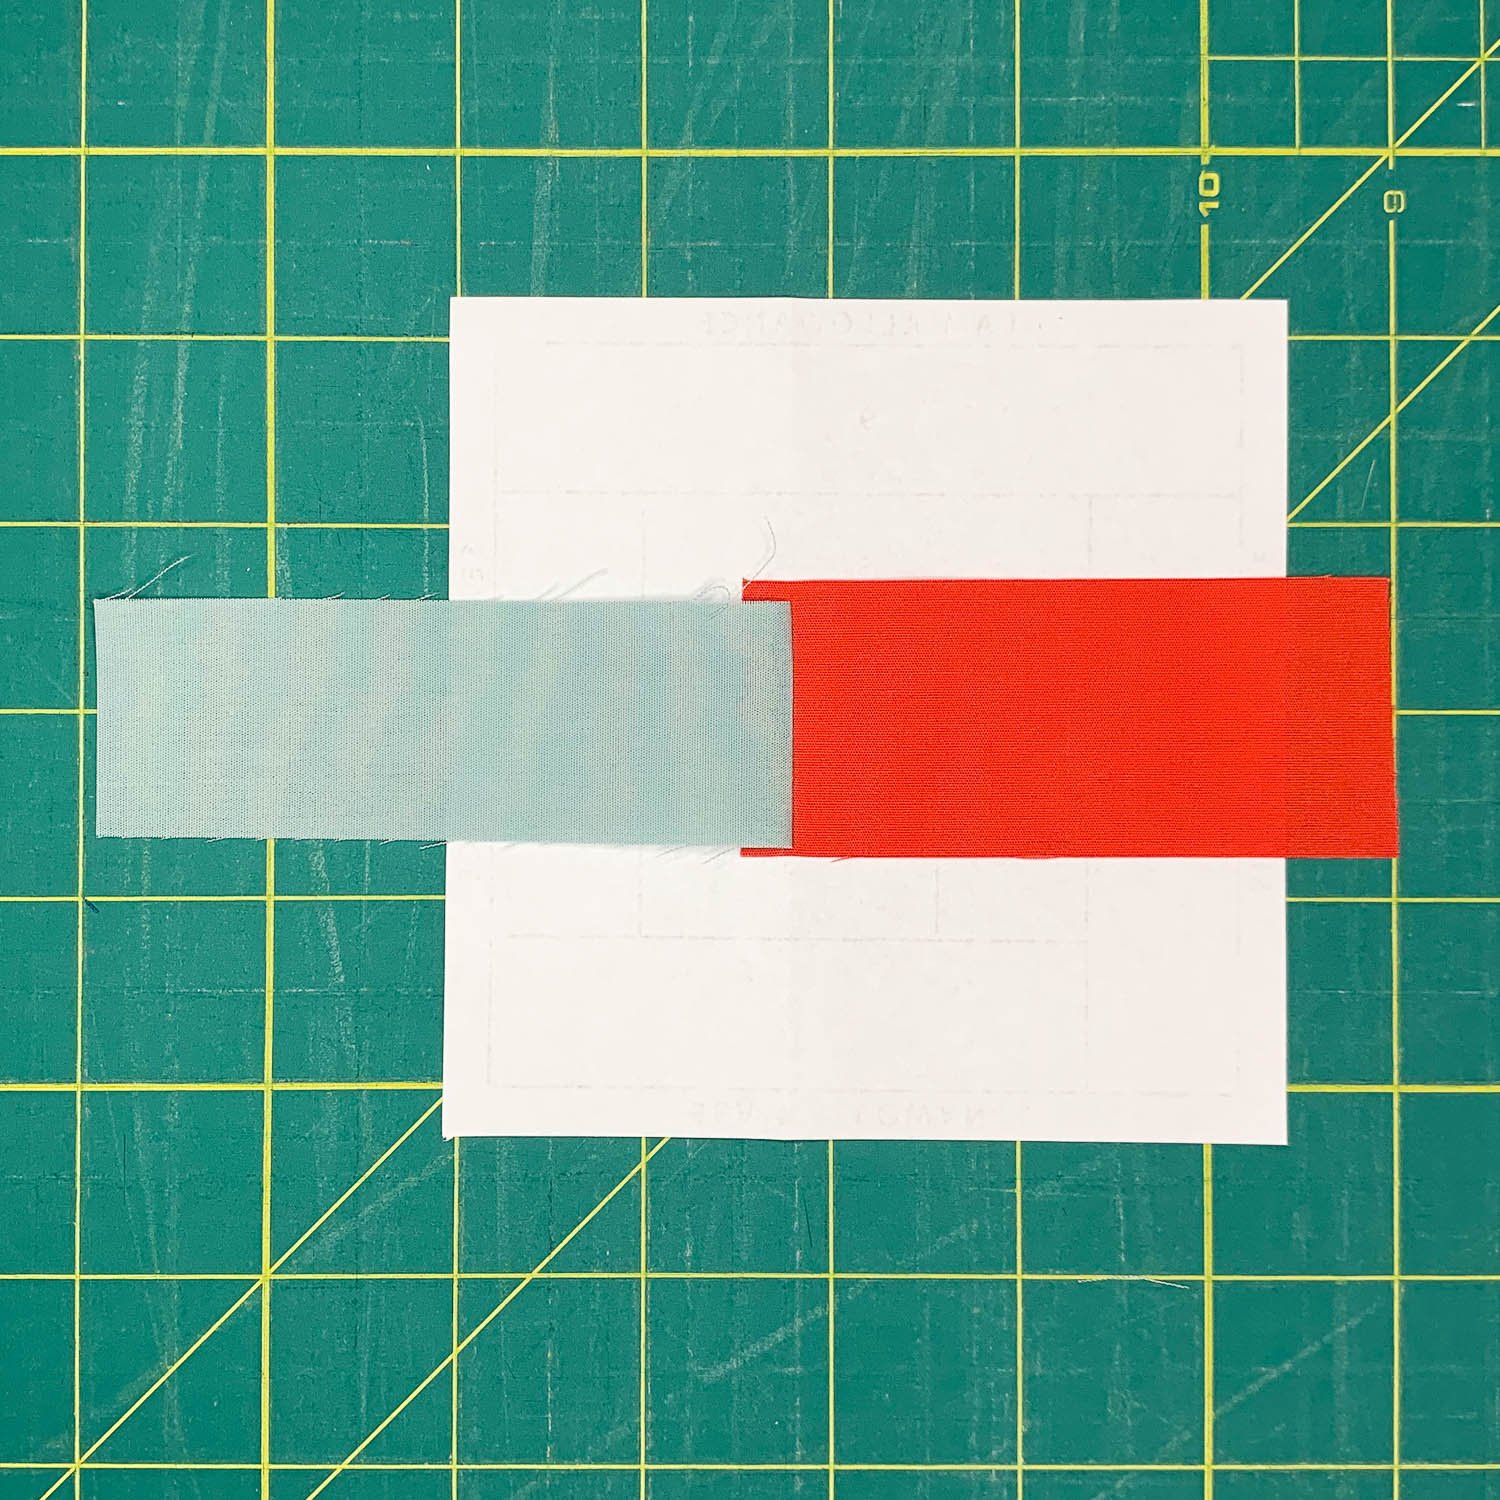
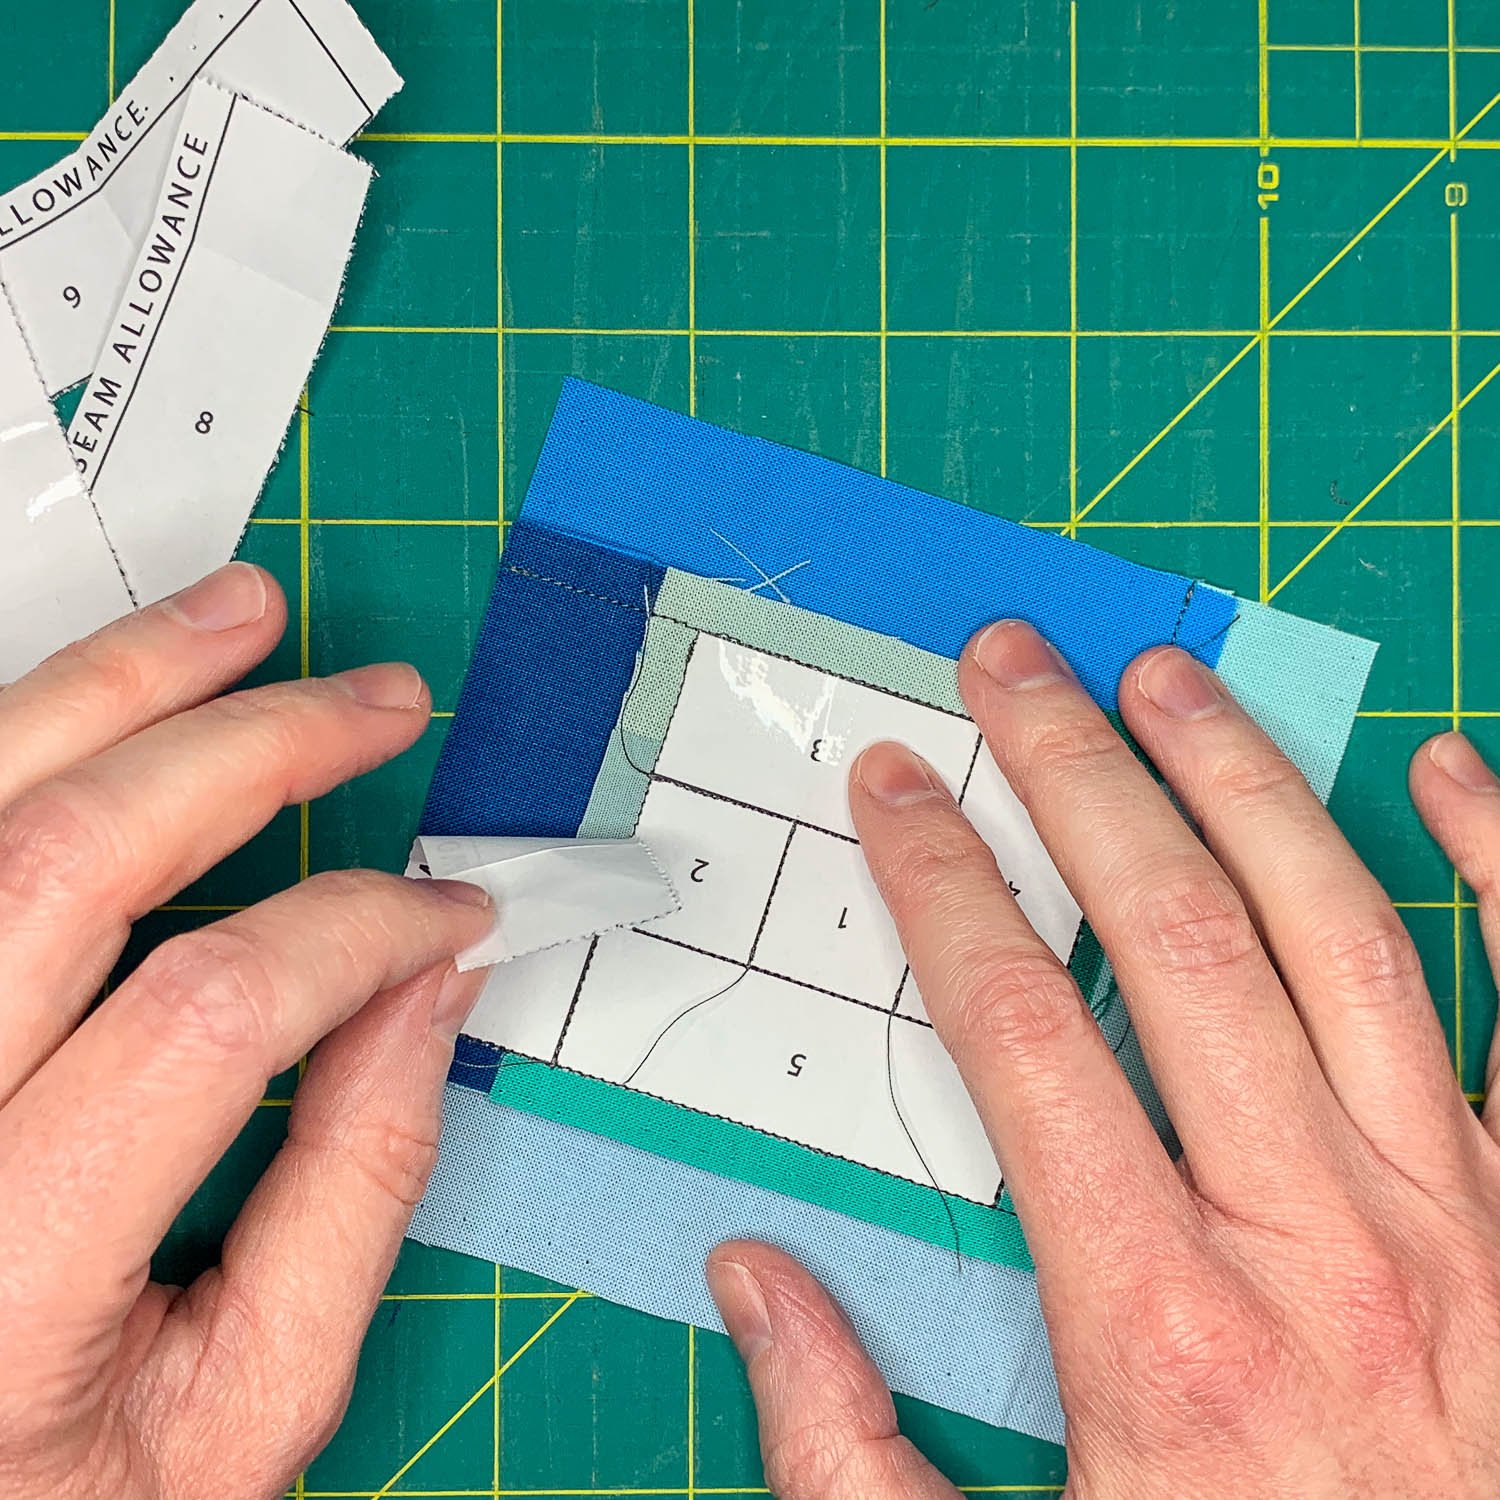
Align the fabric for template space 3 (or A3) and place it right sides together with fabrics already sewn to the template. Make sure there is at least 1/4” fabric 3 overlapping the template line that joins space 3, and that when the fabric 3 is opened it will cover all of space 3 with at least 1/4” of fabric around the edges outlining space 3. Remember you can do this by holding the template up to a bright window or light to ‘see through’ the pattern to the fabric on the back. Pin or hold the fabric in place and move to your sewing machine, printed template side up.
Sew along the line that joins space 3 to the template, locking stitches at the start and stop. Use a basting stitch first if you want to check your fabric alignment.
Check that the fabric still fully covers the space with an additional 1/4” fabric around the edges.
Fold back the template paper along the line that joins space 3, making a straight fold across the template.
Trim away any excess fabric by aligning your ruler 1/4” from the fold of the fabric to create the seam allowance.
Press the fabric open by laying the template fabric side up on a flat surface. Use a hot, dry iron, or seam roller, or finger press.
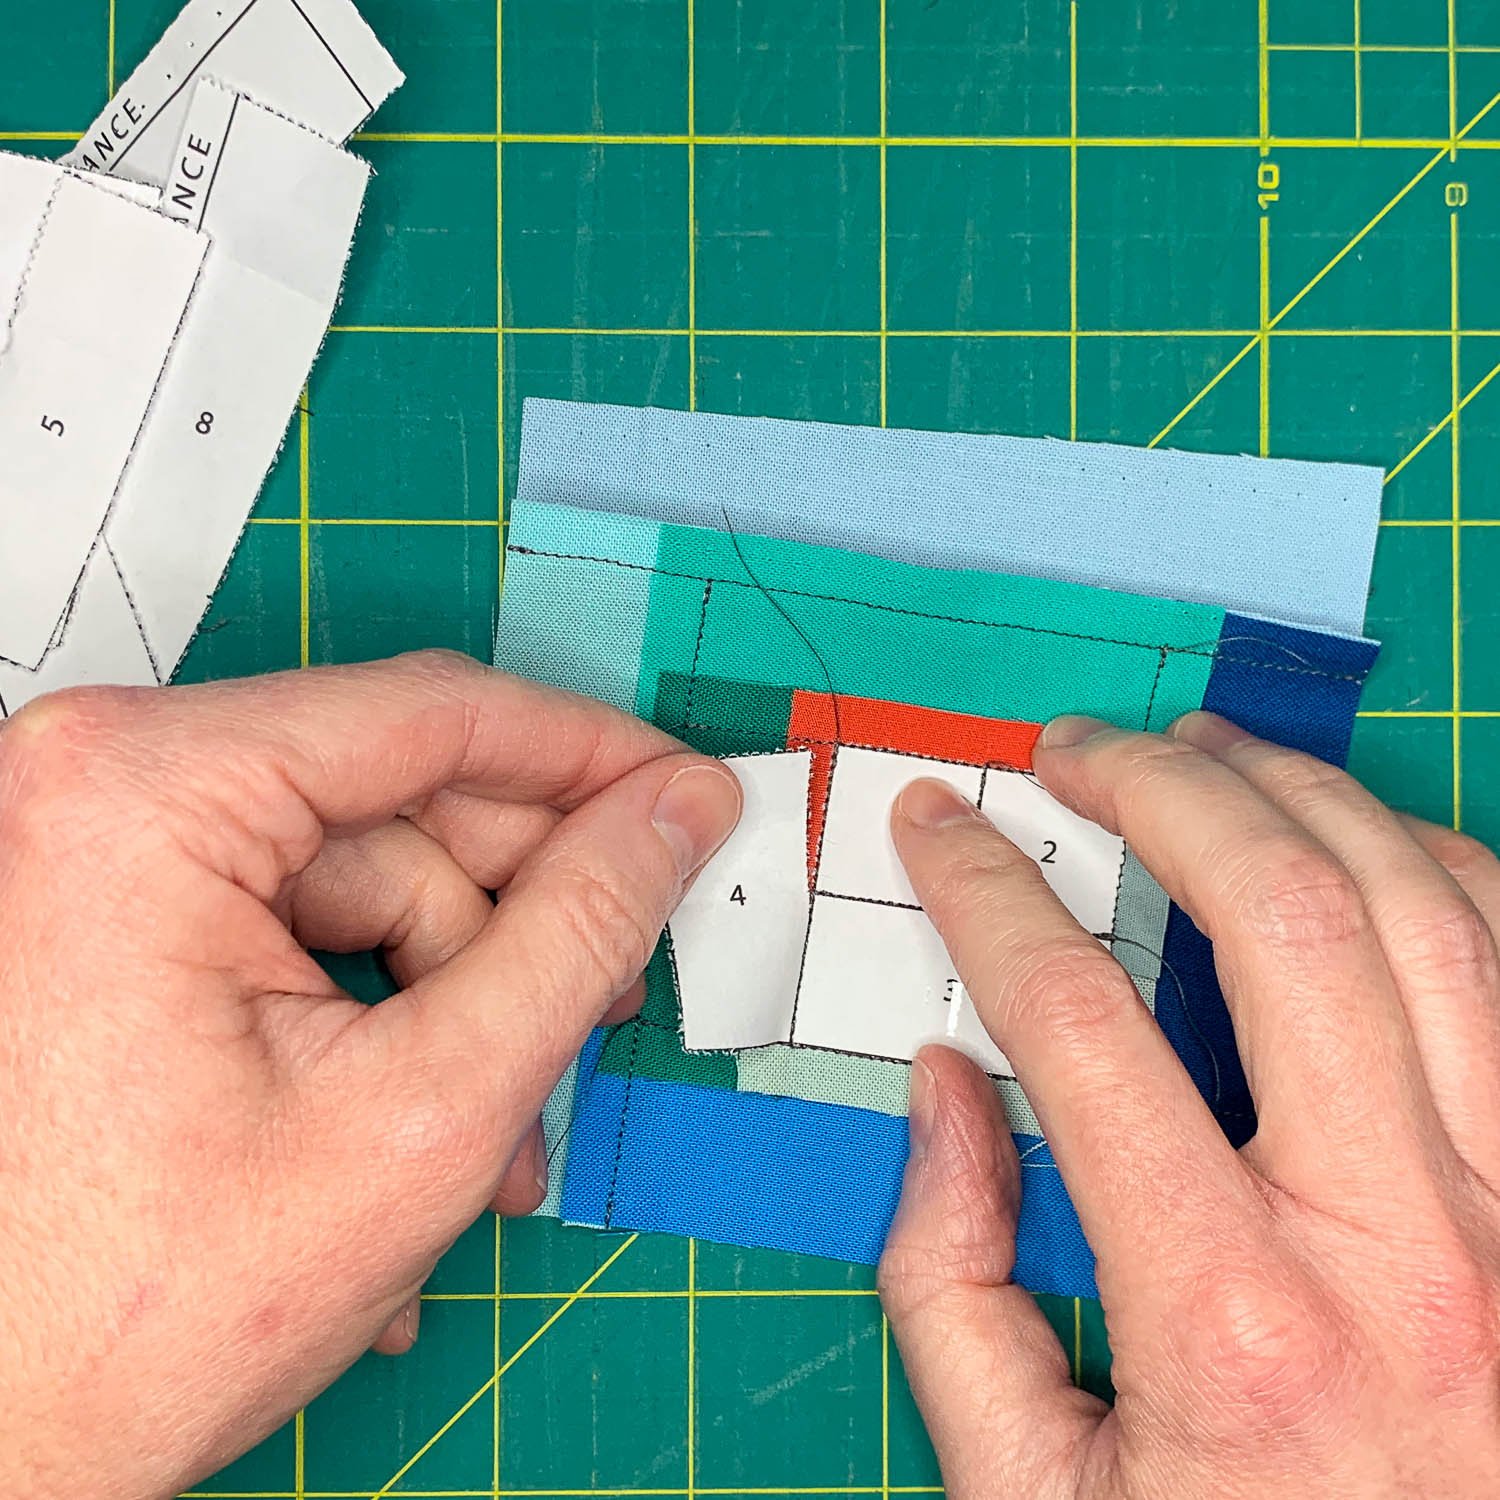
Repeat these steps until your template is complete!
Align
Fold
Sew
Trim
Check
Press
Then, repeat again for each template in your pattern: align the fabric, sew the line, fold the paper, trim the seam allowance, press the fabric, and repeat. If there are multiple templates, begin with A, then move on to B, C, etc., always working in numeric order.
BASTE EDGES & TRIM TO SIZE
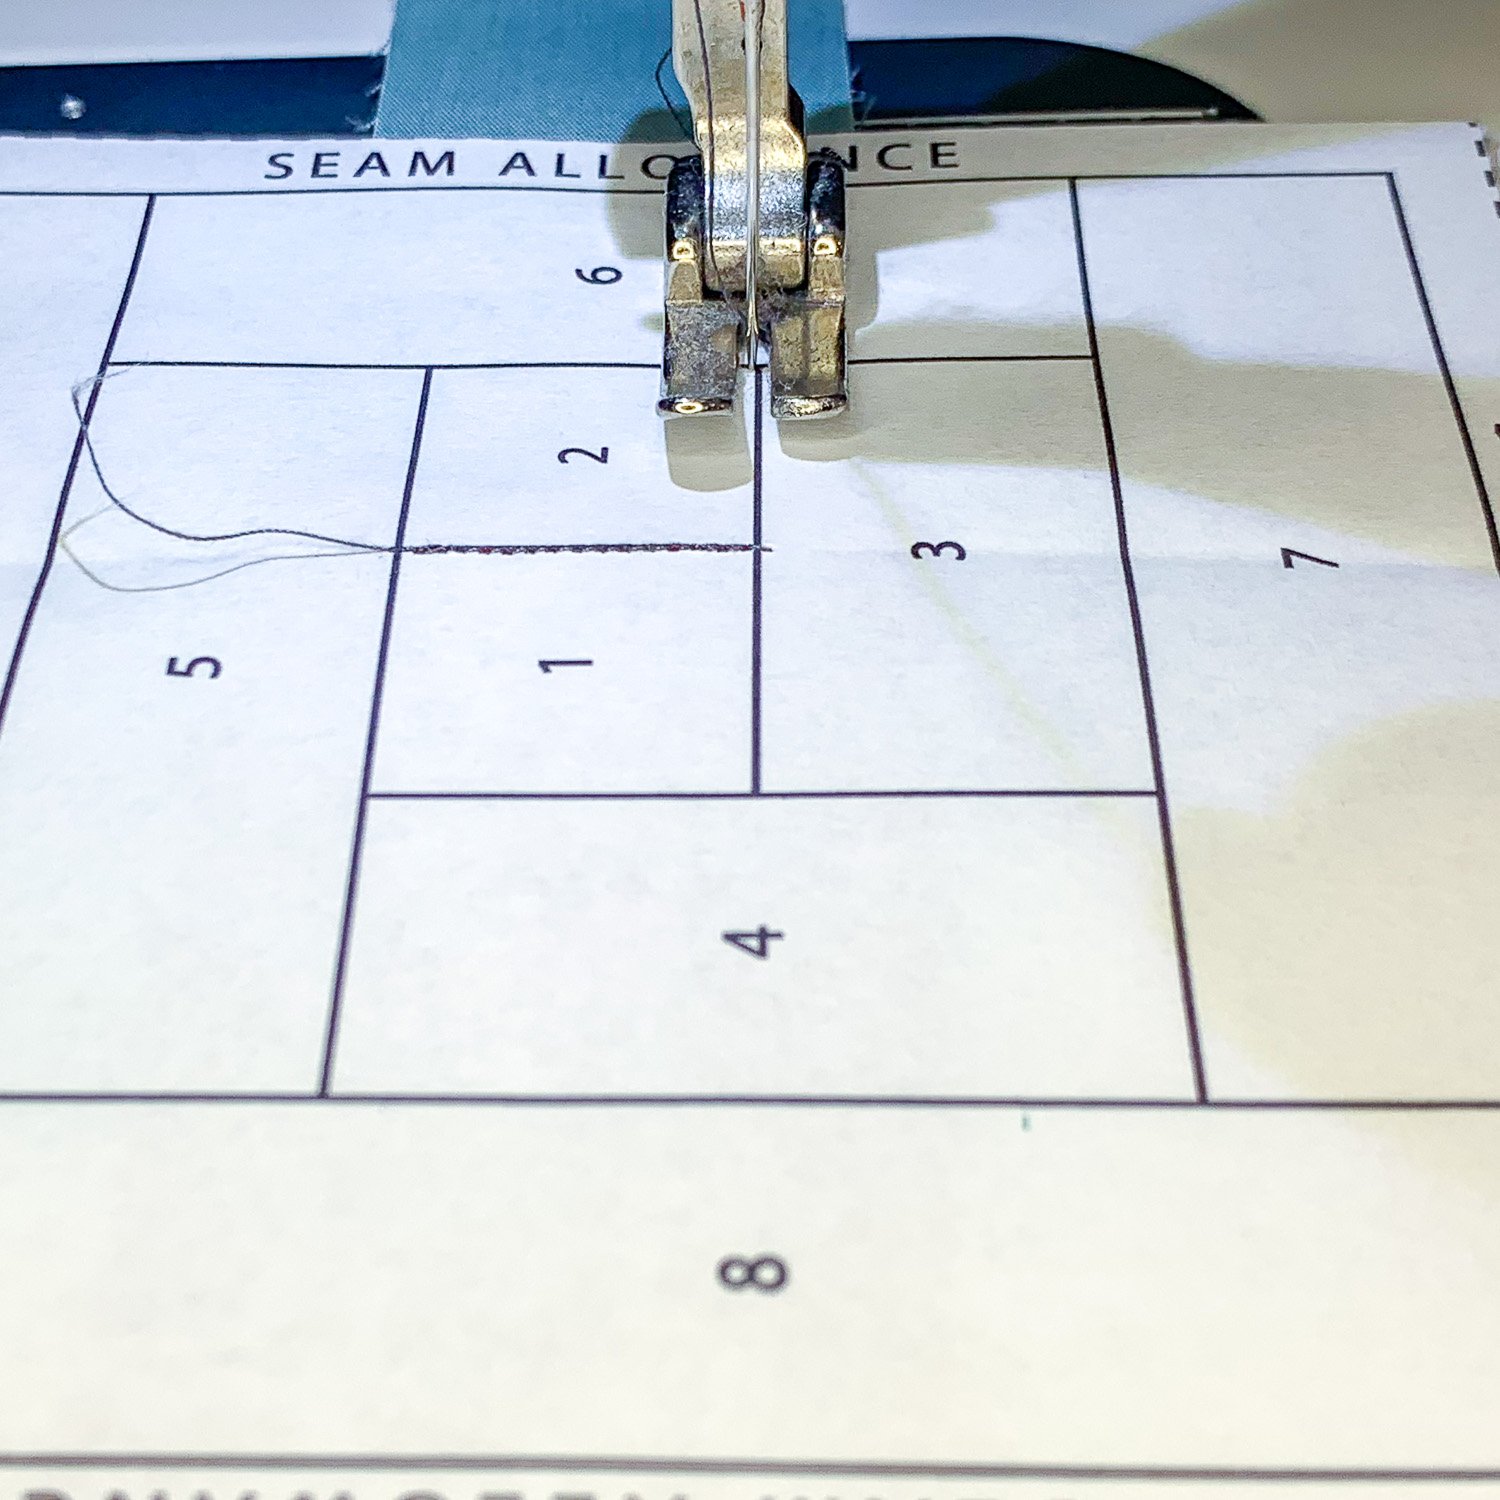
Basting your template edges is completely optional, but it’s a step that I like to do because it keeps the fabric edges of the template(s) from folding or becoming misaligned when sewing them together. When you’ve completed a template piece and made your final press, take your template to your sewing machine, set your stitch length to ~5, and add a handful of stitches around the edge of the template, within the seam allowance, along the edges of the piece that are least secure. Usually this is at corners and long pieces of fabric. While it may take a few extra minutes and extra thread, these stitches will provide stability for your block while trimming to size, and will be easy to remove by hand later on. You could also use a very small amount of glue to do the same job, if you prefer.
After basting (or if you chose to skip that step), lay your template flat on your cutting surface, printed paper side up, and trim any excess fabric hanging over all the edges of the paper template. Pay attention to cutting along the paper edge this time, as most FPP templates will include the outer seam allowance in the template.
Template complete, basted and trimmed. (You can see where I needed to use tape to fix a seam during sewing).

Prior to basting in the seam allowance and trimming the outer edges of the template.
JOINING TEMPLATES TOGETHER
Many FPP patterns will have multiple templates that need to be joined together for the finished quilt block. Some will have instructions within the seam allowance so you know which piece(s) to sew together, and others will not. Pay attention to your specific pattern instructions on placement of your template(s), but these steps should guide you through joining those together. This part is pretty easy, as you’ll simply be joining blocks together as you would in traditional piecing, with the only difference being the paper attached to the fabric.
Place the first two templates fabric sides together, printed sides of the paper facing out. You can use a very thin bead of glue or just a few tiny drops within the seam allowance of the fabric, or you can use pins as desired, to secure the two templates together for sewing. Note that you will NOT be gluing fabric to paper - you will be gluing the seam allowance of one template (on the right side of the fabric) to the seam allowance of the second template (also the right side of the fabric). You can use a hot, dry iron to quickly adhere and dry the glue. Do NOT use an iron if there is any tape on your templates.
Sew along the 1/4” seam allowance line using a small stitch length and locking seams at the start and stop. Flip the two templates open and press on the fabric side of the joined templates. Follow your pattern instructions on which direction to press your seams. You may choose at this point to remove the only the seam allowance papers from the joined templates or you can leave them until the end - it’s really your preference.
Continue joining template pieces, using glue or pins as desired to secure them together for sewing, pressing seams and removing seam allowance papers until your block is complete.
REMOVE THE PAPERS & PRESS TO FINISH
The last step to complete your FPP block is to remove all of the papers. If you have not already removed seam allowance papers, start with those pieces, then move on to removing all remaining papers one section at a time. They should remove quite easily because of the perforations from the sewing needle, but still pull gently so you don’t tug on the thread too hard.
When all of the papers have been removed, give the block(s) a final press on the back along all the seams, and press the front.

Fabric layout, before sewing
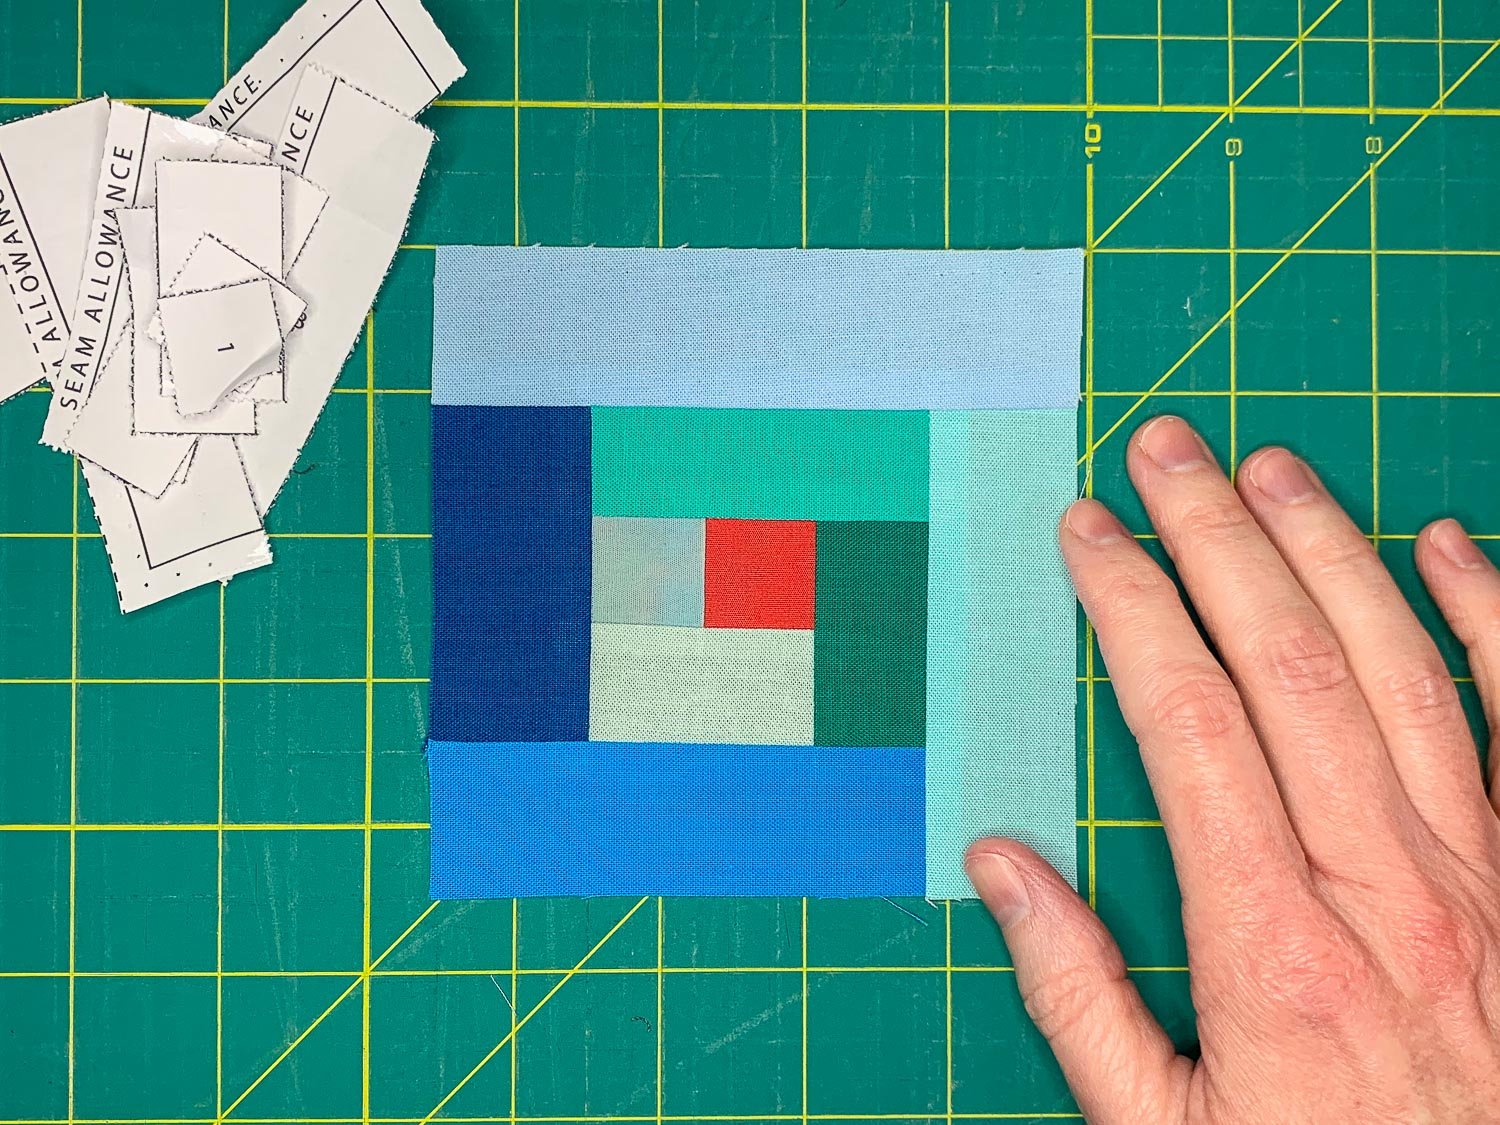
Completed block
Finish YOUR PROJECT
When your FPP block is done, finish your block(s) in a variety of ways: add a border to the block to make it larger, quilt and bind it to make a mini quilt or add corner tabs to make it a wall hanging. You can also make many blocks and sew them all together to make a larger quilt.
Be sure to share your finished VBQ patterns on Instagram: tag #VBQFPP #VBQpatterns and @villageboundquilts
